



There is something deeply satisfying about greeting your Thanksgiving guests with decor you made with your own two hands, which is exactly why thanksgiving decorations diy projects have become the heart of so many holiday homes across America. Handmade pieces bring a warmth that store-bought decorations simply cannot match, from the imperfect brushstrokes on a painted pumpkin to the scent of dried orange slices hanging by your fireplace. When you craft your own holiday accents, every wreath, garland, and centerpiece carries a little story that guests will ask about. In our experience, these are the details guests photograph and ask about long after the last slice of pie is gone.
The best thanksgiving decorations diy ideas prove that a stunning holiday home does not require a designer budget or advanced crafting skills. Most of the projects in this roundup cost under fifteen dollars in supplies, use materials you can grab at Michaels, Joann, or Target in a single trip, and come together in an afternoon or a cozy weekend. Many also give beautiful second lives to natural materials like pinecones, twigs, and fallen leaves that cost absolutely nothing at all. Weekend crafters can knock out three or four of these in a single Saturday, and most supplies overlap so one shopping list covers several projects at once.
We have organized twenty-four thanksgiving decorations diy projects by where they shine brightest, from the front door to the dining table to the mantel. Each idea includes exact dimensions, realistic prices, and step-by-step guidance that works for beginners, plus a pro tip for making it look polished instead of crafty. Pour a cup of cider, gather your supplies, and let us turn your home into the warm, grateful gathering place you have always pictured. We also included a few kid-friendly projects so the whole family can craft together while the turkey roasts in the oven.
1. Rustic Fall Wreath With Faux Berries

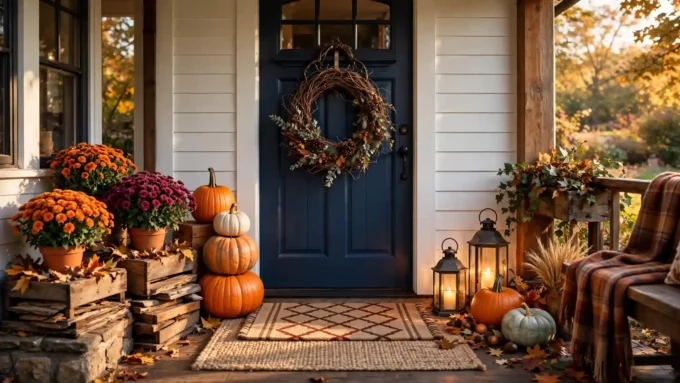
A handmade wreath sets the tone for your entire holiday, and this rustic version starts with a standard eighteen-inch grapevine wreath base that costs about nine dollars at Michaels or Hobby Lobby. Gather bunches of faux berries in deep red and amber, dried wheat stalks, mini faux pumpkins, and a few burlap ribbon loops, then hot-glue everything in clusters of three for a professional, layered look. Tuck longer pieces toward the outside edge so the wreath measures a full twenty-four inches across when finished. Choose berries with wired stems so you can bend each cluster into place without extra glue, which keeps the finished wreath looking full and dimensional.
The beauty of this wreath is that it survives the whole season, from early November right through your Christmas swap, since every element is weather-safe faux or dried. Hang it with a wide two-inch burlap ribbon looped over the top of your front door, secured with a small command hook rated for outdoor use. If your door is glass or metal, a wreath hanger that slips over the top avoids adhesives entirely and still holds up to twenty pounds. Pro tip: spritz the dried wheat lightly with hairspray before assembling to keep the grains from shedding on your porch all month long.
2. Layered Pumpkin Centerpieces: A Thanksgiving Decorations DIY Classic
A showstopping dining table centerpiece is the signature of every great thanksgiving decorations diy display, and layering pumpkins in graduated sizes is the easiest way to nail it. Start with a long wooden tray or a twelve-by-thirty-six-inch runner board as your base, then cluster five to seven faux or real pumpkins in three sizes, mixing heirloom blue, cream, and classic orange for depth. Fill the gaps with eucalyptus sprigs, small gourds, and taper candles in brass holders. Add height variation by setting one large pumpkin on a stack of two linen-wrapped books, an easy stylist trick for instant dimension.
Keep the tallest pumpkin under fourteen inches so guests can still see each other across the table during dinner, a classic entertaining rule worth respecting. Real pumpkins last about ten days indoors, so build this centerpiece the week of Thanksgiving; faux pumpkins from Target run six to twelve dollars each and work year after year. For the table runner underneath, a simple kraft paper runner lets guests jot notes of gratitude between courses, doubling as decor and an activity. Pro tip: dot tiny LED fairy lights through the greenery for a glow that photographs beautifully without the fire risk of real candles near dried florals.
3. Hand-Painted Pumpkin Accents
If you love the look of designer pumpkins but not their price tags, painted pumpkins are your answer, and acrylic craft paint gives flawless coverage on both real and faux pumpkins. White, chalky-finish paint in matte or linen creates that coveted farmhouse look, while metallic gold and copper paint transforms a four-dollar craft-store pumpkin into something worthy of a boutique. Use a soft foam brush for smooth coats and let each layer dry twenty minutes before adding the next. Chalky-finish paint adheres especially well to the waxy skin of real pumpkins, so skip the primer and go straight to your color coats.
Two thin coats beat one thick coat every time, and a final layer of clear matte sealer keeps the finish from chipping when guests inevitably pick them up. Try painting simple leaf silhouettes with a stencil, or wrap rubber bands around the pumpkin before painting to create crisp striped sections when you peel them off. A small stencil brush works better than a foam pouncer for fine leaf details, giving you crisper edges on smaller three-to-four-inch pumpkins. Pro tip: paint your pumpkins the same color as your candlesticks or dinnerware for an instantly coordinated table that looks like it was planned by a stylist.
4. Preserved Fall Leaf Garlands
Fallen maple and oak leaves become instant holiday magic when you preserve them with a simple glycerin soak, a trick that keeps them supple and colorful for weeks instead of curling and browning. Mix one part vegetable glycerin with two parts warm water in a shallow tray, submerge your flattest, most colorful leaves, and leave them for three to five days. A Michaels leaf punch can also cut perfect paper leaves from fall-toned scrapbook paper if real leaves are scarce. Press the leaves flat under heavy books for two days before the glycerin soak, since flat leaves string more neatly and curl less on the twine.
String your preserved leaves onto natural jute twine using a small hole punch and clothespins, spacing them every two to three inches for a garland that drapes about six feet long. Hang it across a mirror, along a stair railing, or as a backdrop behind your dessert table. For stair railings, cut the twine six inches longer than the span and secure it with clear zip ties hidden behind the newel posts. Pro tip: layer two garlands together, one slightly longer than the other, and twist them gently so the doubled strands read fuller and more expensive than either would alone.
5. Mason Jar Candle Holders With Twine
Mason jar candle holders deliver that warm, flickering glow every Thanksgiving table needs, and a case of twelve quart-size jars costs under fifteen dollars at Walmart or Target. Wrap the neck of each jar with three loops of natural twine, tie a small dried wheat bunch or a cinnamon stick bundle into the knot, and drop in a battery-operated tea light for worry-free ambiance. The ribbed glass of a classic mason jar diffuses light into the prettiest golden pattern. Wide-mouth pint jars work better than quart jars for tables with limited space, keeping each candle holder about five inches tall and unobtrusive.
Line five of these down the center of your table, alternating jar heights by placing two on small wooden blocks for dimension, or cluster them on the mantel beside framed family photos. Real tea lights work too, but keep them two inches from the rim and never leave the table unattended. Group the jars in clusters of three on a round wooden tray for the coffee table, where they can be moved aside easily when guests arrive. Pro tip: frost the inside of the jar with a thin coat of white acrylic mixed with a little water, swirled and dried upside down, for a soft milk-glass glow.
6. Handmade Burlap Table Runner
A burlap runner is the fastest way to give your dining table instant farmhouse charm, and a fourteen-inch-wide by six-foot roll of natural burlap costs about eight dollars at Joann or Hobby Lobby. Cut it two inches longer than your table on each side so the ends hang gracefully, then fray the edges by pulling out three horizontal threads for that deliberately rustic fringe. Layer it over a cream or ivory tablecloth for contrast that keeps the burlap from looking rough. Pre-washed burlap from the fabric aisle frays less during cutting than the raw garden-center variety, so it is worth the extra two dollars.
Stenciling a simple leaf border or the word ‘grateful’ down the center in white acrylic paint elevates the whole runner from crafty to custom. Use a foam pouncer and go light on the paint so the texture of the burlap still shows through, and let it dry flat for at least two hours before folding. After the holiday, roll the runner around a cardboard tube instead of folding it, which prevents creases and keeps it ready for next year. Pro tip: iron the runner on low with a pressing cloth before your gathering to flatten the roll memory so it lies perfectly smooth under your centerpiece.
7. Rustic Chalkboard Sign Welcome Boards

A chalkboard welcome sign lets you greet guests with a personal message, and an eighteen-by-twenty-four-inch framed chalkboard runs about fourteen dollars at Michaels or can be made by painting an old picture frame with chalkboard paint. Write your greeting with chalk markers, which give crisp white lettering that wipes clean with a damp cloth after the holiday. Practice your layout on paper first so words like ‘Gather Together’ sit centered and balanced. A light sanding with 220-grit paper before the chalkboard paint goes on gives the frame a smooth surface that erases cleanly every time.
Lean the finished sign against your entryway wall, prop it on the porch beside the wreath, or hang it on a plate stand as part of your buffet setup. Dress the frame with a small wired ribbon bow in fall plaid to tie it into the rest of your decor. Chalk markers come in metallic gold and copper too, which photograph beautifully and match the warm tones of your fall decor. Pro tip: trace your letters lightly in pencil first using a free printable script alphabet as a guide, then go over them with the chalk marker for hand-lettering that looks professionally done.
8. Gilded Pinecone Bowl Fillers
Pinecones are free for the gathering and become surprisingly elegant decor with nothing more than metallic spray paint, making them one of the smartest thanksgiving decorations diy projects for a tight budget. Collect two dozen clean pinecones, bake them at two hundred degrees for forty-five minutes to kill any hitchhikers and open the scales, then spray them in gold, copper, or bronze from six inches away in thin, even coats. Let them dry overnight on newspaper. Wear a simple dust mask while baking and spraying, since warm pinecones release a strong pine scent and spray paint needs good ventilation.
Pile the gilded pinecones into a wide wooden dough bowl or a low glass hurricane vase and set it on the coffee table, the entryway console, or beside the fireplace. Mixing painted and natural pinecones keeps the look from feeling too precious, roughly one gilded cone for every two natural ones. A shallow galvanized tray from Dollar Tree makes a charming base for the bowl, and the whole arrangement fits perfectly on a twelve-inch coffee table. Pro tip: dab a few pinecone tips with cinnamon-scented essential oil before displaying so your bowl filler doubles as a subtle holiday fragrance.
9. Corn Husk Harvest Wreath
Corn husks bring gorgeous golden texture to your front door, and a bag of dried husks costs under five dollars in the tamale aisle of most grocery stores or at a local farm stand. Soak the husks in warm water for twenty minutes to make them pliable, then layer them around a fourteen-inch straw wreath form, securing each with floral pins and overlapping like shingles so no base shows through. The finished wreath measures about nineteen inches across. Keep a bowl of water nearby while you work, because the husks stiffen quickly once they start drying and need a quick re-soak.
Add a dried mini corn or a burlap bow at the top and a few wheat stalks tucked into the side for a true harvest feel that is unmistakably Thanksgiving. Because the husks are natural, mist the finished wreath with a light coat of clear sealer if it will hang on a covered porch exposed to morning dew. A matching pair of smaller eight-inch husk wreaths on the windows flanking your door creates a coordinated entryway for under fifteen dollars total. Pro tip: alternate husk direction in a sunburst pattern rather than a uniform swirl for a designer wreath look that stands out from every other door on the block.
10. Thankful Gratitude Tree Centerpiece
A gratitude tree turns your holiday table into a conversation starter, and all you need is a sturdy branch pruned to about twenty-four inches tall, a mason jar or small crock for the base, and kraft paper tags. Secure the branch in floral foam inside the jar, cover the foam with moss or dried beans, and hang the tags with twine so each guest can write what they are thankful for during cocktails. It becomes a keepsake you will treasure for years. Cut thirty tags from kraft cardstock in a leaf shape with a two-inch punch for a detail that elevates the whole centerpiece.
Place the gratitude tree on the sideboard or the dining table where guests gather before dinner, and set a small basket of extra tags and a fine-tip marker beside it. Reading the tags aloud after dessert has become a beloved tradition in many families, often drawing a few happy tears. After the holiday, punch a hole in each tag and thread them onto a ribbon to create a keepsake garland you can hang next year. Pro tip: save each year’s tags in a labeled envelope tucked inside your holiday storage bin, then add them to a memory scrapbook or frame the favorites together.
11. Twine-Wrapped Napkin Rings
Handmade napkin rings make every place setting feel intentional, and this twine version starts with empty toilet paper rolls cut into one-and-a-half-inch rings, which are then wrapped tightly in natural jute twine. A dab of hot glue at the start and finish holds everything secure, and the whole project takes about five minutes per ring, perfect for a set of eight or ten. Slide a linen napkin through and add a sprig of dried lavender or a faux berry pick. A thin line of hot glue down the seam, covered by the final twine wrap, keeps the rings perfectly round even with daily handling.
For a slightly dressier version, wrap the rings in velvet ribbon instead of twine, or glue a small acorn or dried orange slice to the front of each ring as a natural medallion. These cost pennies to make yet look far more expensive once they are on the table with your best dinnerware. Store the finished rings nested together in a zip bag with a dryer sheet to keep the twine smelling fresh until next Thanksgiving. Pro tip: make two extra rings beyond your guest count, because there is always one setting that gets added at the last minute and handmade details should never feel improvised.
12. Kraft Paper Place Cards With Calligraphy

Elegant place cards solve the seating puzzle and double as table decor, and a pack of one hundred tent-style kraft cards costs about six dollars at Target or on Amazon. Fold each card, write the guest’s name in your best handwriting or with a brush pen, and add a tiny leaf or berry sprig glued to the corner for a finished look. Metallic gold ink on kraft paper reads beautifully against warm wood or white tablecloths alike. Number the back of each card lightly in pencil in seating order, so setting the table on the big day takes five minutes flat.
Prop each card against a small pumpkin, a pinecone, or a folded napkin so it stands upright and readable at eye level from across the table. If handwriting is not your strength, print names in a script font on the cards using your home printer for an equally polished result. For a buffet-style meal, skip the table placement and stand the cards in a row on the sideboard next to each dish with the menu written out. Pro tip: write names on both sides of the tent so the guest approaching from either side of the table can find their seat without flipping the card around.
13. Abundant Cornucopia Horn of Plenty
The cornucopia is the most traditional symbol of Thanksgiving abundance, and a twelve-inch woven wicker horn costs about ten dollars at craft stores each fall. Lay it on its side on your sideboard or mantel with the wide opening facing outward, then overflow it with faux apples, pears, grapes, mini pumpkins, and dried corn in rich autumn tones. Pack floral foam deep inside the narrow end so your fruit stays exactly where you arrange it. Line the inside of the horn with a plastic bag before adding the foam, which protects the wicker if you decide to use real fruit.
This is one thanksgiving decorations diy staple that rewards generous stuffing, so do not be shy about piling fruit well past the rim in a natural cascade. Real fruit works for a one-day display, but faux fruit keeps the horn looking perfect from November through the whole holiday season. Place the cornucopia on a folded linen napkin or small tray to catch any loose berries and to give the arrangement a finished base. Pro tip: tuck in a few LED fairy lights among the fruit so your horn of plenty glows softly in the evening, a trick that makes it look magical in family photos.
14. Painted Acorn Garland Strands

Acorns are nature’s tiniest ornaments, and a garland of painted acorns strung on twine is delicate, charming, and almost free to make. Gather thirty to forty clean acorns, remove the caps, paint the nut bodies in white, gold, and copper acrylic, then hot-glue the caps back on once dry. Drill a tiny hole through each cap with a pin vise, or simply hot-glue each acorn directly to a six-foot strand of twine spaced two inches apart. A small hand drill or pin vise makes quick work of the caps, but a heated needle pushed through with a thimble works in a pinch.
Drape the finished garland over a mirror frame, along a window sill, or across the front of a bookshelf for a subtle woodland accent that works everywhere. Because acorns are small, this project shines in close-up spots where guests will actually notice the detail, like a powder room mirror or a bar cart. This garland also looks lovely wound around a tabletop topiary or a small potted rosemary tree for a living-plant accent. Pro tip: seal the painted acorns with a quick spray of clear matte finish so the paint does not chip when the garland is stored with your other holiday bins.
15. Birch Twig Candle Holders
Birch bark and twigs wrap plain glass cylinders into woodland candle holders that look straight out of a cabin lodge, and a bundle of craft birch branches costs about twelve dollars at Joann. Cut straight twigs to the exact height of your glass holders, then hot-glue them vertically around the outside, packing them tight so no glass shows between sticks. Three holders in five, seven, and nine-inch heights make a perfect staggered grouping. Sort your twigs by thickness before gluing so each holder has a uniform look, since mixing thick and thin sticks reads messy.
Set the trio on your mantel, the entryway table, or as part of your dining centerpiece, always with battery-operated candles inside for safety around natural materials. The rough bark texture contrasts beautifully with smooth glass hurricanes and polished brass accents nearby. These holders transition beautifully to winter when you swap the fall accents for evergreen sprigs, giving you two holidays from one afternoon of crafting. Pro tip: buy one extra bundle of branches, because twigs split and snap during cutting, and having spares keeps you from making a frustrating mid-project run back to the store.
16. Cozy Fabric Pumpkin Pillows

Fabric pumpkins are the softest way to bring fall into your living room, and each one needs just a ten-inch square of flannel or velvet, a handful of polyfill, and a cinnamon stick for the stem. Gather the fabric edges with a running stitch, stuff firmly, pull the thread tight, and glue the cinnamon stick into the center crease for a stem that smells as good as it looks. A set of five takes about an hour of easy evening crafting. Use a chopstick to push the stuffing into the corners so each pumpkin keeps a plump, round shape without lumps.
Mix plaid, solid rust, and cream velvet fabrics in sizes from six to ten inches for a pumpkin patch that styles beautifully on the sofa, an armchair, or the hearth. These wash gently by hand if needed and store flat in an off-season bin. Toss the finished pumpkins in the dryer on no heat with a damp washcloth for ten minutes to fluff them before displaying. Pro tip: tie a thin strip of burlap ribbon around each pumpkin like a real vine for a finishing detail that makes the whole set look store-bought in the very best way.
17. 'Give Thanks' Harvest Banner: A Thanksgiving Decorations DIY Mantel Must
A burlap banner spelling out ‘give thanks’ is the classic Thanksgiving mantel topper, and making your own lets you size it perfectly for your space. Cut nine five-by-seven-inch pennants from burlap or kraft cardstock, stencil one letter per pennant in cream paint, and string them on jute twine with small clothespins so the letters hang straight. A nine-letter banner stretches about forty inches wide, ideal for a standard fireplace mantel. Lay the pennants face-down in order on the table before stringing, which keeps the letters in the right sequence and the spacing even.
Drape the banner with a gentle swag across the mantel front, securing the ends with small adhesive hooks so it does not pull paint when removed after the holiday. This thanksgiving decorations diy favorite pairs perfectly with garland, candle trios, and framed fall prints layered behind it. If your mantel is wider than forty inches, add a small pumpkin or leaf cluster to each end of the twine to fill the extra space. Pro tip: cut a small V-notch in the bottom of each pennant for that polished swallowtail finish, a ten-second step that makes homemade banners look professionally cut.
18. Wooden Entryway Fall Sign

A tall wooden sign on the porch is the first thing guests see, and a six-foot cedar plank sign reading ‘hello fall’ or ‘grateful’ costs a fraction of boutique prices when you make it. Sand a one-by-eight-inch board smooth, stain it in weathered gray or classic walnut, and stencil your word vertically in white or cream chalk paint using three-inch letters. A small wooden stake on the back keeps it standing on the porch. Clamp a straight board alongside your plank as a saw guide if you need to trim it, since a wavy cut is the one thing that reads amateur.
Flank the sign with two real pumpkins and a mum in a galvanized bucket for a porch vignette that looks welcoming from the street. Because the sign is painted on both sides, you can flip the message after Thanksgiving to a winter greeting and use the same board all season. Add small L-brackets to the back bottom of the sign so it stands steady on uneven porch floors without wobbling in the wind. Pro tip: seal outdoor signs with two coats of clear spar urethane so rain and morning frost do not lift the paint before the holiday arrives.
19. Layered Thanksgiving Mantel Styling

A beautifully styled mantel anchors your whole holiday living room, and the secret is layering in three depths: tall pieces in back, medium pieces in the middle, and low pieces in front. Start with a faux fall garland draped across the mantel shelf, add three candlesticks of graduated heights and a framed ‘grateful’ print in the middle, then finish with small pumpkins and pinecones along the front edge. The full arrangement spans the mantel width with about two inches of breathing room at each end. Start with the largest items first and work forward, since it is much easier to fill small gaps than to squeeze a tall piece into a finished arrangement.
Odd numbers are your friend here, so group decor in threes and fives and step back often to check the balance from across the room. Battery-operated candles with timers save you from nightly fiddling and keep the glow consistent every evening of the holiday week. A thin LED light strip hidden behind the front row of decor washes the whole mantel in warm light and costs about twelve dollars. Pro tip: lean a large round mirror or wreath in the center back of the mantel to reflect the candlelight and double the visual impact of everything in front of it.
20. Pumpkin Vase Floral Arrangements

Hollowing a real pumpkin into a flower vase creates a centerpiece no one will forget, and a medium six-to-eight-inch pumpkin is the perfect vessel size. Cut a wide opening around the stem, scoop out the seeds and pulp, and tuck a plastic cup or floral foam block inside to hold water for your flowers. Fill it with grocery-store mums, eucalyptus, and wheat stalks in warm orange, cream, and burgundy for about twenty dollars total. Choose pumpkins with flat bottoms so they sit steady, and test the wobble before you start arranging since a tipping vase ruins the flowers.
These pumpkin vases last about seven days with fresh water changes every two days, so make them the week of Thanksgiving for peak freshness on the big day. Use them as dining table centerpieces, on the entryway console, or flanking the fireplace for a cohesive look throughout the house. For a longer-lasting version, use a faux craft pumpkin and cut the opening with a serrated knife, which never rots or softens. Pro tip: rub petroleum jelly on the cut edges of the pumpkin to slow browning and keep your floral vessel looking fresh several days longer.
21. Wood Slice Drink Coasters

Sliced branch coasters bring rustic charm to your coffee table and protect it from cider mugs and wine glasses during the holiday gathering. Cut a three-to-four-inch diameter branch into half-inch thick slices with a miter saw, or buy a bag of twelve pre-cut wood slices for about nine dollars at Michaels. Sand each slice smooth with 120-grit paper, stencil a small leaf or monogram in the center, and seal with two coats of polyurethane. Cut a few extra slices since some will crack during drying, and the extras make handy plant pot risers or gift tags.
The sealant is what makes these coasters actually functional, since it blocks moisture rings and lets you wipe them clean between uses. Tie a set of six with twine and a dried orange slice for a hostess gift that costs under five dollars to assemble. Lightly toast the edges of each coaster with a kitchen torch for a rustic finish, keeping the flame moving so the wood never chars. Pro tip: glue a small cork circle to the bottom of each coaster so they never scratch your table and stay put on smooth surfaces.
22. Dried Orange Slice Garland

Dried orange slices are the prettiest natural garland you can make, glowing like little stained-glass windows when they catch the light. Slice three navel oranges into quarter-inch rounds, lay them on a parchment-lined baking sheet, and dry them at two hundred degrees for three to four hours, flipping every hour until they are firm and translucent. String them on twine with cinnamon sticks and star anise between slices for a fragrant finish. Blood oranges create a stunning deep-red variation, so dry a mix of navel and blood orange slices for a two-tone garland.
Hang the garland across a window where sunlight shines through the slices, along the mantel, or even on your Christmas tree later since it keeps beautifully in a dry box. A ten-slice garland stretches about three feet, so make two or three strands for a full window display. Store leftover dried slices in a paper bag rather than plastic, since any trapped moisture will soften them over time. Pro tip: pat the orange slices very dry with paper towels before baking and start checking at the three-hour mark, because thin slices brown fast once the moisture is gone.
23. Cozy Throw Blanket Styling
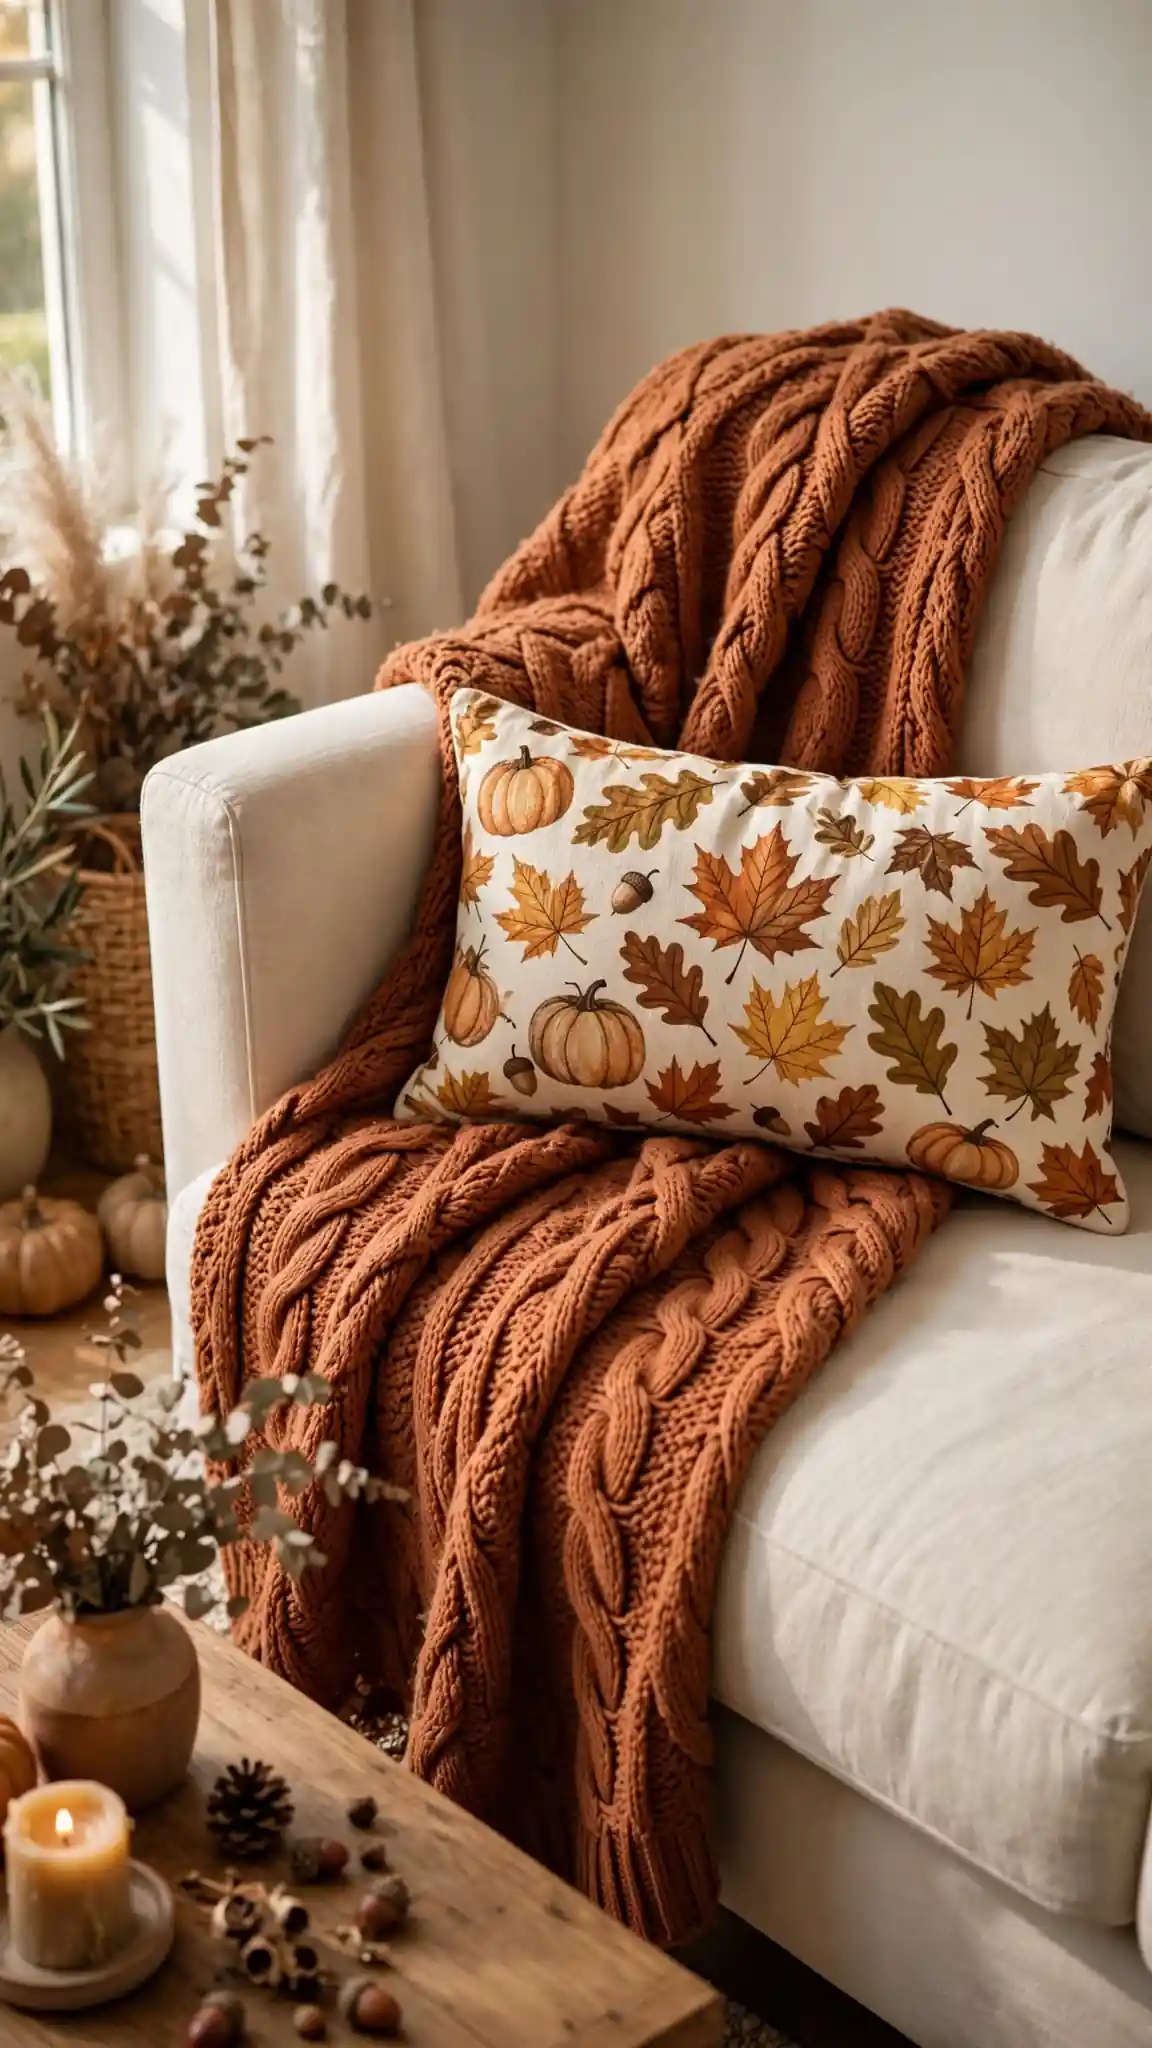
A well-draped throw blanket is the easiest thanksgiving decorations diy-adjacent trick for making the living room feel instantly holiday-ready, no crafting required. Choose a chunky knit or plaid throw in rust, mustard, or cream, and drape it diagonally across the corner of your sofa with one folded edge showing the texture. Target and HomeGoods carry beautiful forty-dollar throws that look far more expensive than they are. Fold the throw lengthwise into thirds before draping so the fringe hangs in a neat band, a trick stylists use for that effortless catalog look.
Layer the throw over a coordinating lumbar pillow in a fall pattern and your sofa suddenly reads ‘Thanksgiving ready’ to every guest who walks in. For photos, loosely fold the throw in thirds and lay it across an armchair or the foot of the guest bed, letting the fringe hang naturally. Wash the throw before first use to soften the knit, and choose machine-washable fabrics since holiday throws see heavy use and the occasional gravy spill. Pro tip: keep one throw basket by the sofa stocked with two folded blankets so guests can grab one during football-watching marathons without disturbing your styled drape.
24. Kids' Thanksgiving Craft Table
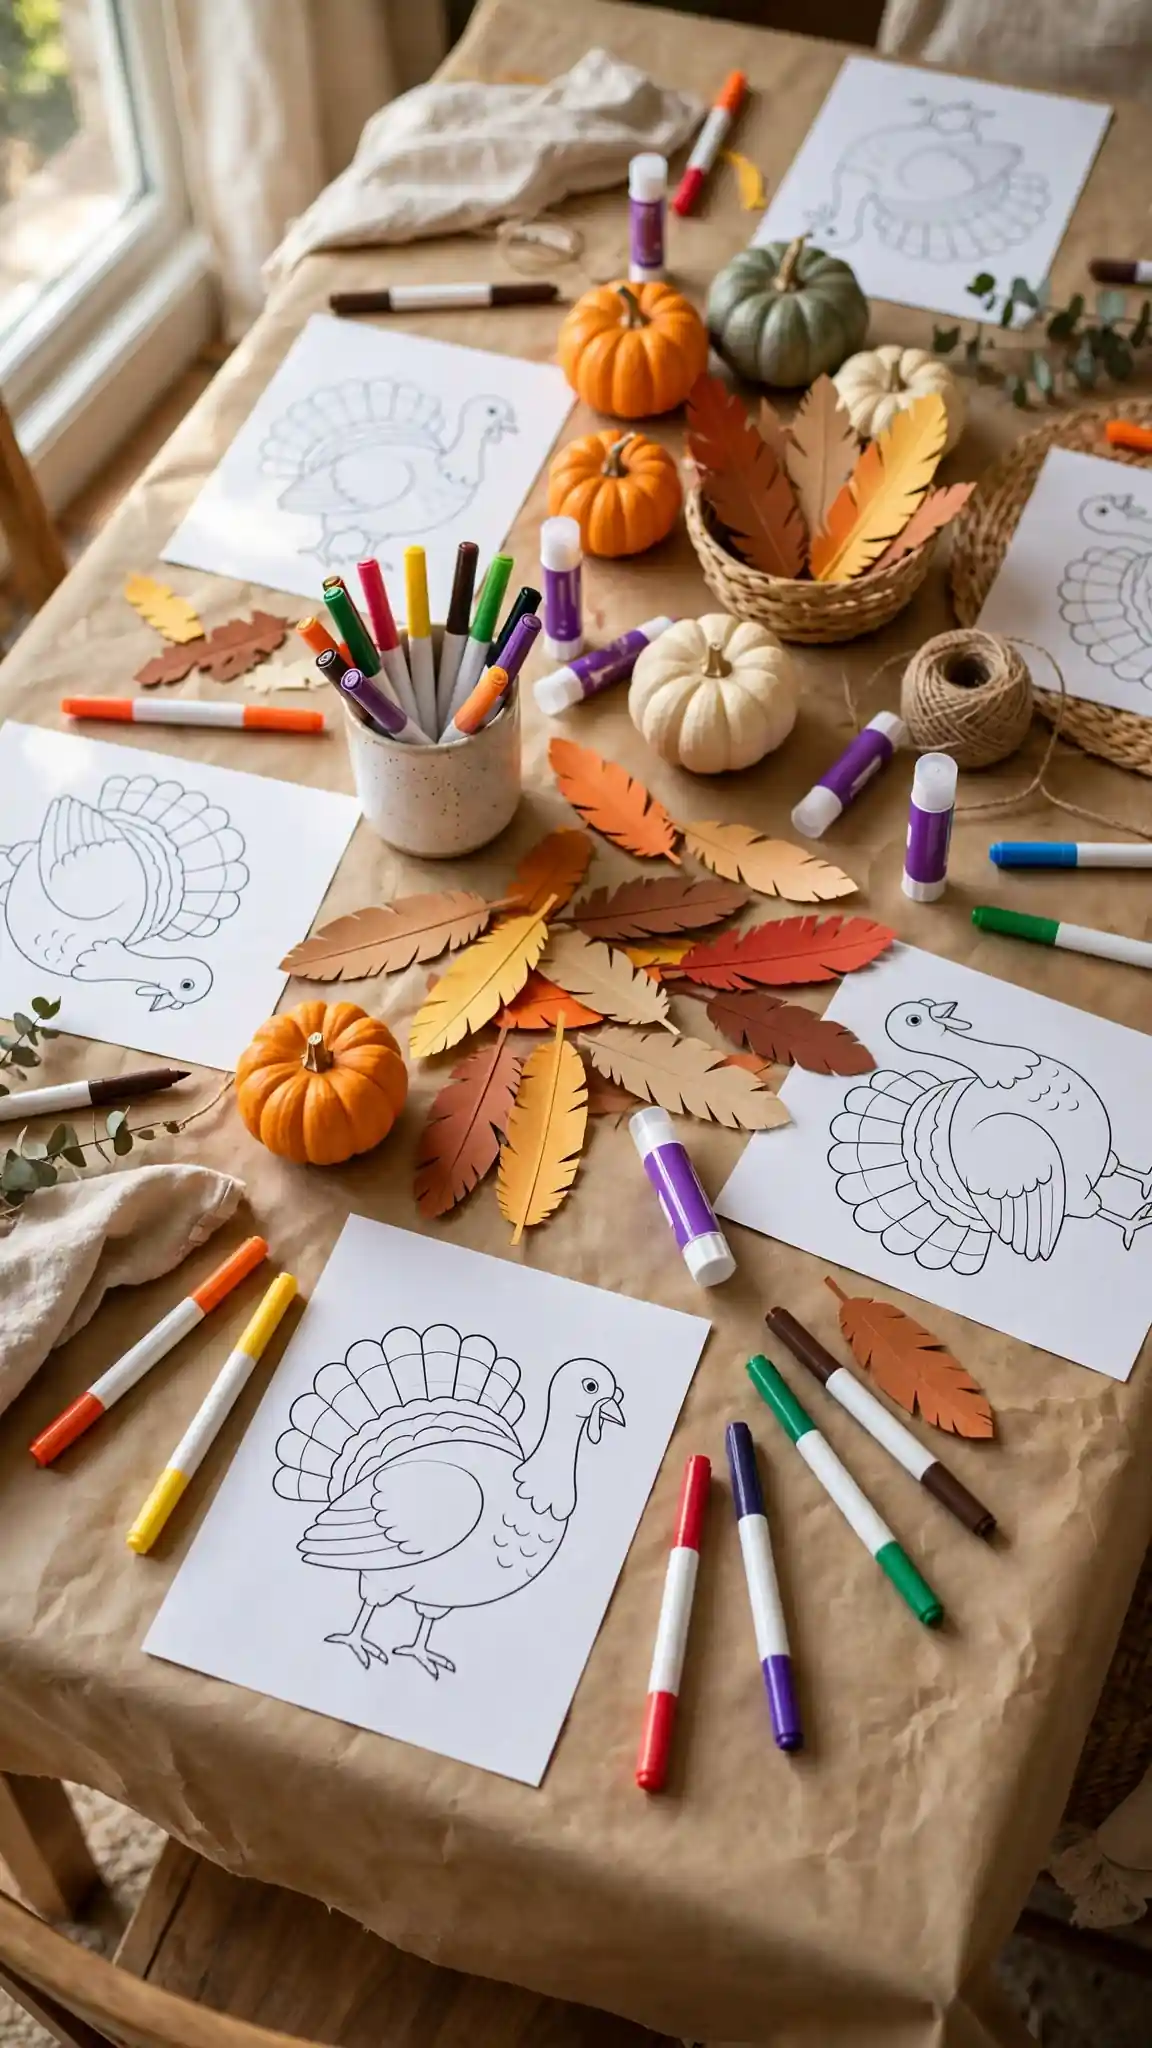
A dedicated kids’ craft table keeps little hands happy while the adults cook, and it doubles as adorable decor when the crafts go on display. Cover a card table with kraft paper, set out coloring pages of turkeys and leaves, washable markers, glue sticks, and pre-cut paper feathers for making hand turkeys. A twenty-four-pack of crayons and a stack of printed coloring sheets costs under ten dollars total at Dollar Tree. Cover the floor under the table with an old sheet or plastic tablecloth so paint and glitter stay off your floors on the busiest cooking day of the year.
Hang the finished hand turkeys and leaf rubbings on the refrigerator or a string with clothespins in the hallway, where they become the sweetest thanksgiving decorations diy gallery in the house. Covering the table in kraft paper means cleanup is as simple as rolling up the mess and tossing it. Set a timer for forty-five-minute craft sessions with a snack break in between, which keeps younger kids engaged without the meltdowns. Pro tip: set out a small pumpkin and washable paint pens so each child can decorate their own mini pumpkin to take home as a party favor.
Final Thoughts
The most memorable Thanksgiving homes are rarely the ones with the biggest decorating budgets; they are the ones where guests can feel the care in every handmade detail. Each of these thanksgiving decorations diy projects was chosen because it is genuinely doable in real life, with real schedules and real budgets, and every one of them creates a moment of warmth your guests will remember. Start with the two or three ideas that excite you most rather than trying to tackle all twenty-four at once. Pick up your supplies this weekend so you can craft at a relaxed pace instead of rushing the night before guests arrive.
As you craft, remember that handmade does not mean perfect, and that is exactly the point. The slightly crooked letter on your chalkboard sign, the pumpkin your child painted, and the garland you strung while watching the parade are what make thanksgiving decorations diy so special. Save your favorite projects to remake next year, pack your supplies carefully so they survive storage, and enjoy the holiday knowing your home tells your family’s story beautifully. Your future self will thank you when next November arrives and the bins are organized, labeled, and ready to make the house glow again.
FAQs
Starting your first round of Thanksgiving crafts? These are the questions we hear most often from readers planning their holiday decor, answered with the practical details that make projects succeed. We cover budgets, timelines, supplies, and storage so you can craft with confidence from the very first project. Bookmark this section and share it with anyone crafting alongside you this season.
From budgets to timelines to keeping handmade decor looking fresh through the holiday, here is everything you need to know before you pick up the glue gun. Read through these quick answers, then dive into the twenty-four projects above with a clear plan and a well-stocked craft basket. A little planning now means relaxed, enjoyable crafting instead of a last-minute scramble.
How much should I budget for thanksgiving decorations diy projects?
Most thanksgiving decorations diy projects in this roundup cost between five and fifteen dollars in supplies, with many using free natural materials like pinecones and leaves. Plan about seventy-five to one hundred dollars total if you are decorating the entryway, dining table, and mantel from scratch.
How far in advance can I make Thanksgiving decorations?
Projects using faux or dried materials can be made anytime from early October onward. Anything with real pumpkins or fresh flowers should be assembled within ten days of Thanksgiving for peak freshness on the holiday itself. Label each finished piece with the year so you can track what holds up best over time.
Where can I buy affordable craft supplies for Thanksgiving projects?
Michaels, Joann, Hobby Lobby, and Target all run fall craft sales through November with coupons up to forty percent off. Dollar Tree is excellent for basics like twine, kraft paper, and mason jars at rock-bottom prices. Sign up for store apps before you shop, since digital coupons often stack with in-store fall sales.
How do I make my thanksgiving decorations diy projects look professional?
Work in odd-numbered groupings, stick to a limited color palette of three to four autumn tones, and add one elevated element like metallic paint or velvet ribbon. Sealing painted pieces and ironing fabric runners also makes handmade work look polished.
Are DIY Thanksgiving decorations safe around candles?
Keep real flames at least twelve inches from dried materials like wheat, leaves, and pinecones, which are flammable. Battery-operated LED candles give the same warm glow with zero risk and are the safer choice for most table and mantel displays.
How should I store handmade Thanksgiving decor after the holiday?
Wrap fragile pieces in tissue, store garlands loosely coiled in bins, and keep everything in a cool, dry place. Label each bin clearly and toss a silica packet inside to prevent moisture damage during storage. Keep a simple inventory list taped inside each bin lid for quick reference next fall.




Leave a comment