


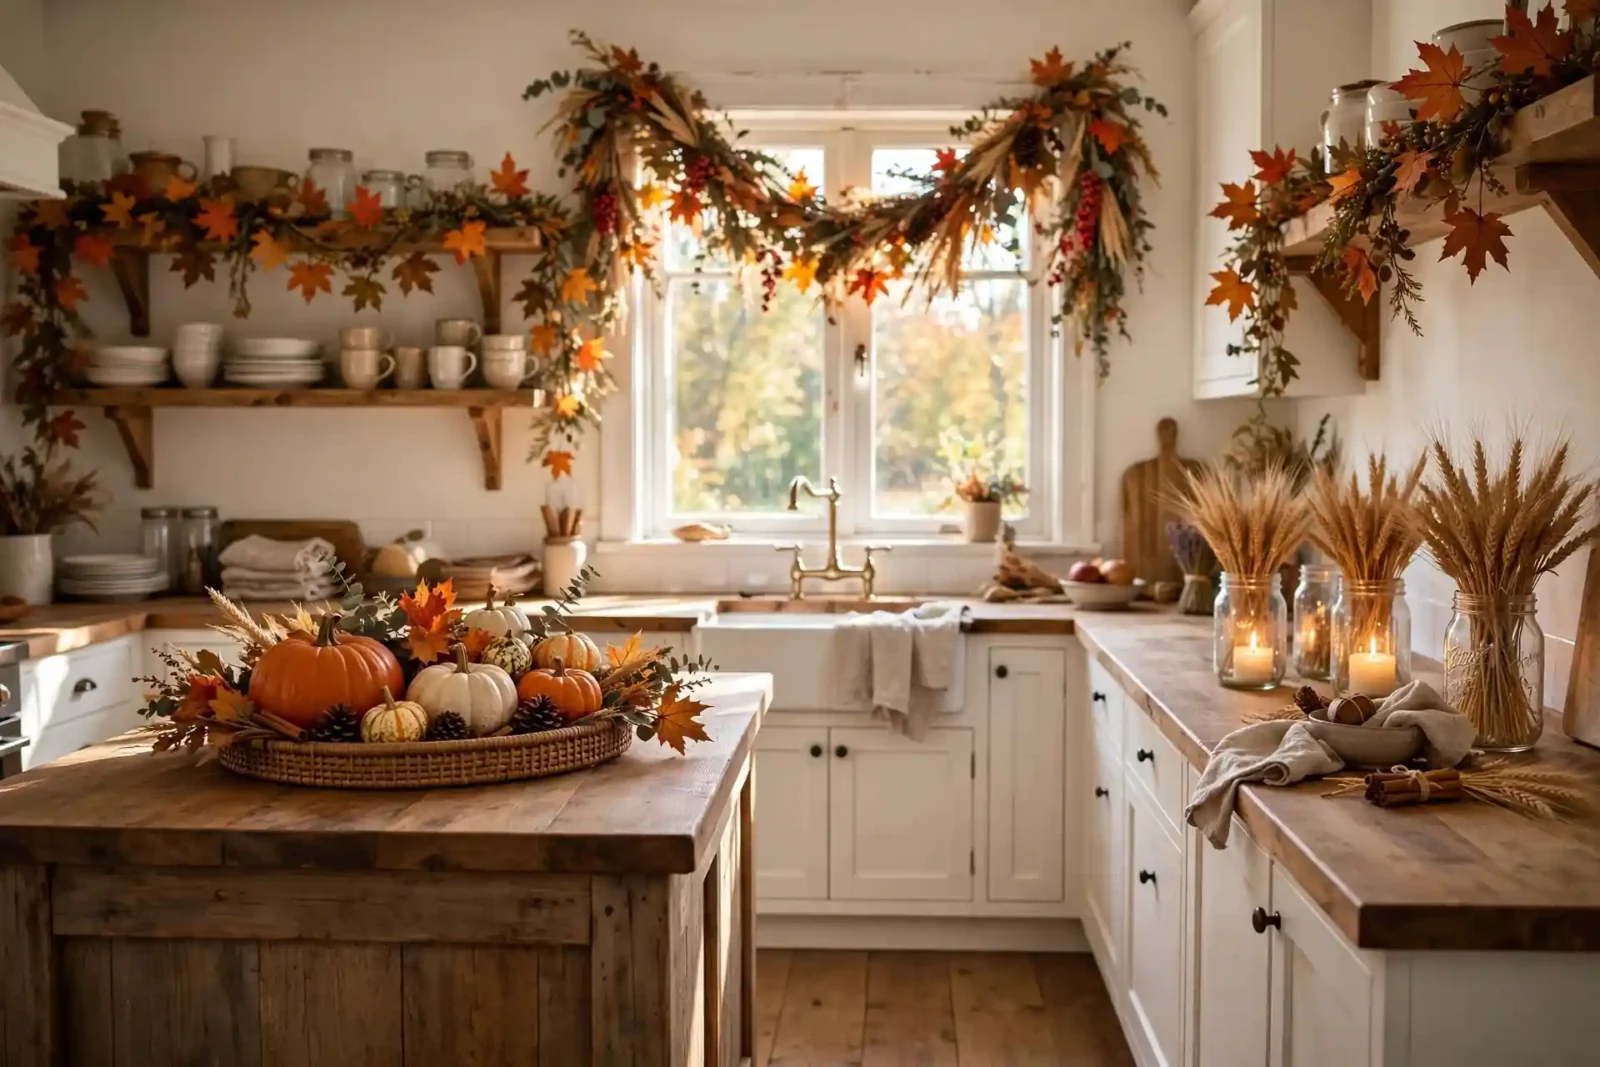
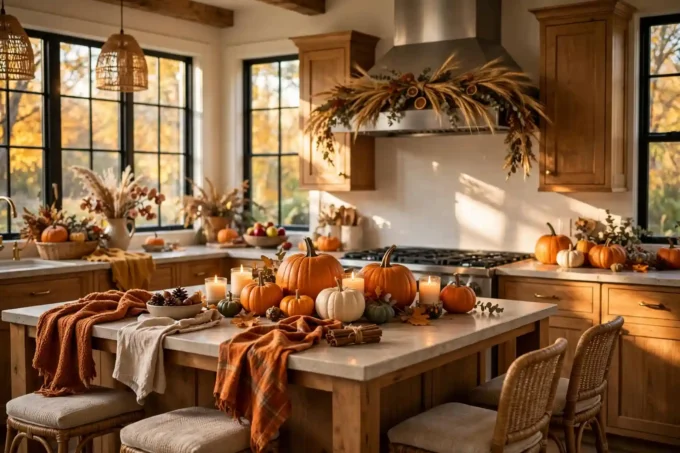
Fall kitchen decor diy projects are the fastest way to make your kitchen feel like the heart of your home this autumn. When you try these fall kitchen decor diy ideas, you can turn plain counters into a cozy harvest scene for less than a family pizza night. Every project uses supplies from Dollar Tree, Walmart, or your own backyard, so the whole kitchen costs under forty dollars. You need no power tools and no crafting experience, and almost every idea finishes in thirty minutes or less. Pour a pumpkin spice latte and turn your kitchen into the autumn retreat you have always wanted.
Store-bought fall kitchen decor diy kits look cute, but they often cost five times more than DIY versions. A pre-made pumpkin centerpiece costs thirty-five dollars at big-box stores, while our tray version below costs about eight dollars and looks more personal. These projects let you match your cabinet color, countertop stone, and kitchen size instead of settling for one-size-fits-all decor. If you love the styled look of farmhouse kitchens on Pinterest, you will find plenty of inspiration in our guide to fall kitchen decor ideas for ready-made pairings. Each idea below lists real prices and US stores, so you know exactly what to buy before you start.
This roundup works for renters, first-time homeowners, and busy parents alike, because nothing here damages walls, cabinets, or countertops. Most ideas are renter-friendly with Command hooks, magnetic strips, and freestanding displays that move in seconds. We organized the twenty-three projects from quick five-minute swaps to slightly bigger weekend crafts, so you can decorate in one afternoon or spread the fall kitchen decor diy fun across the season. Keep a hot glue gun, scissors, and twine in a basket as your basic toolkit, and you will breeze through the list. Small kitchens benefit most, since a single garland or tray can change the whole mood of a compact space.
1. Fall Kitchen Decor DIY Mini Pumpkin Tray Centerpiece
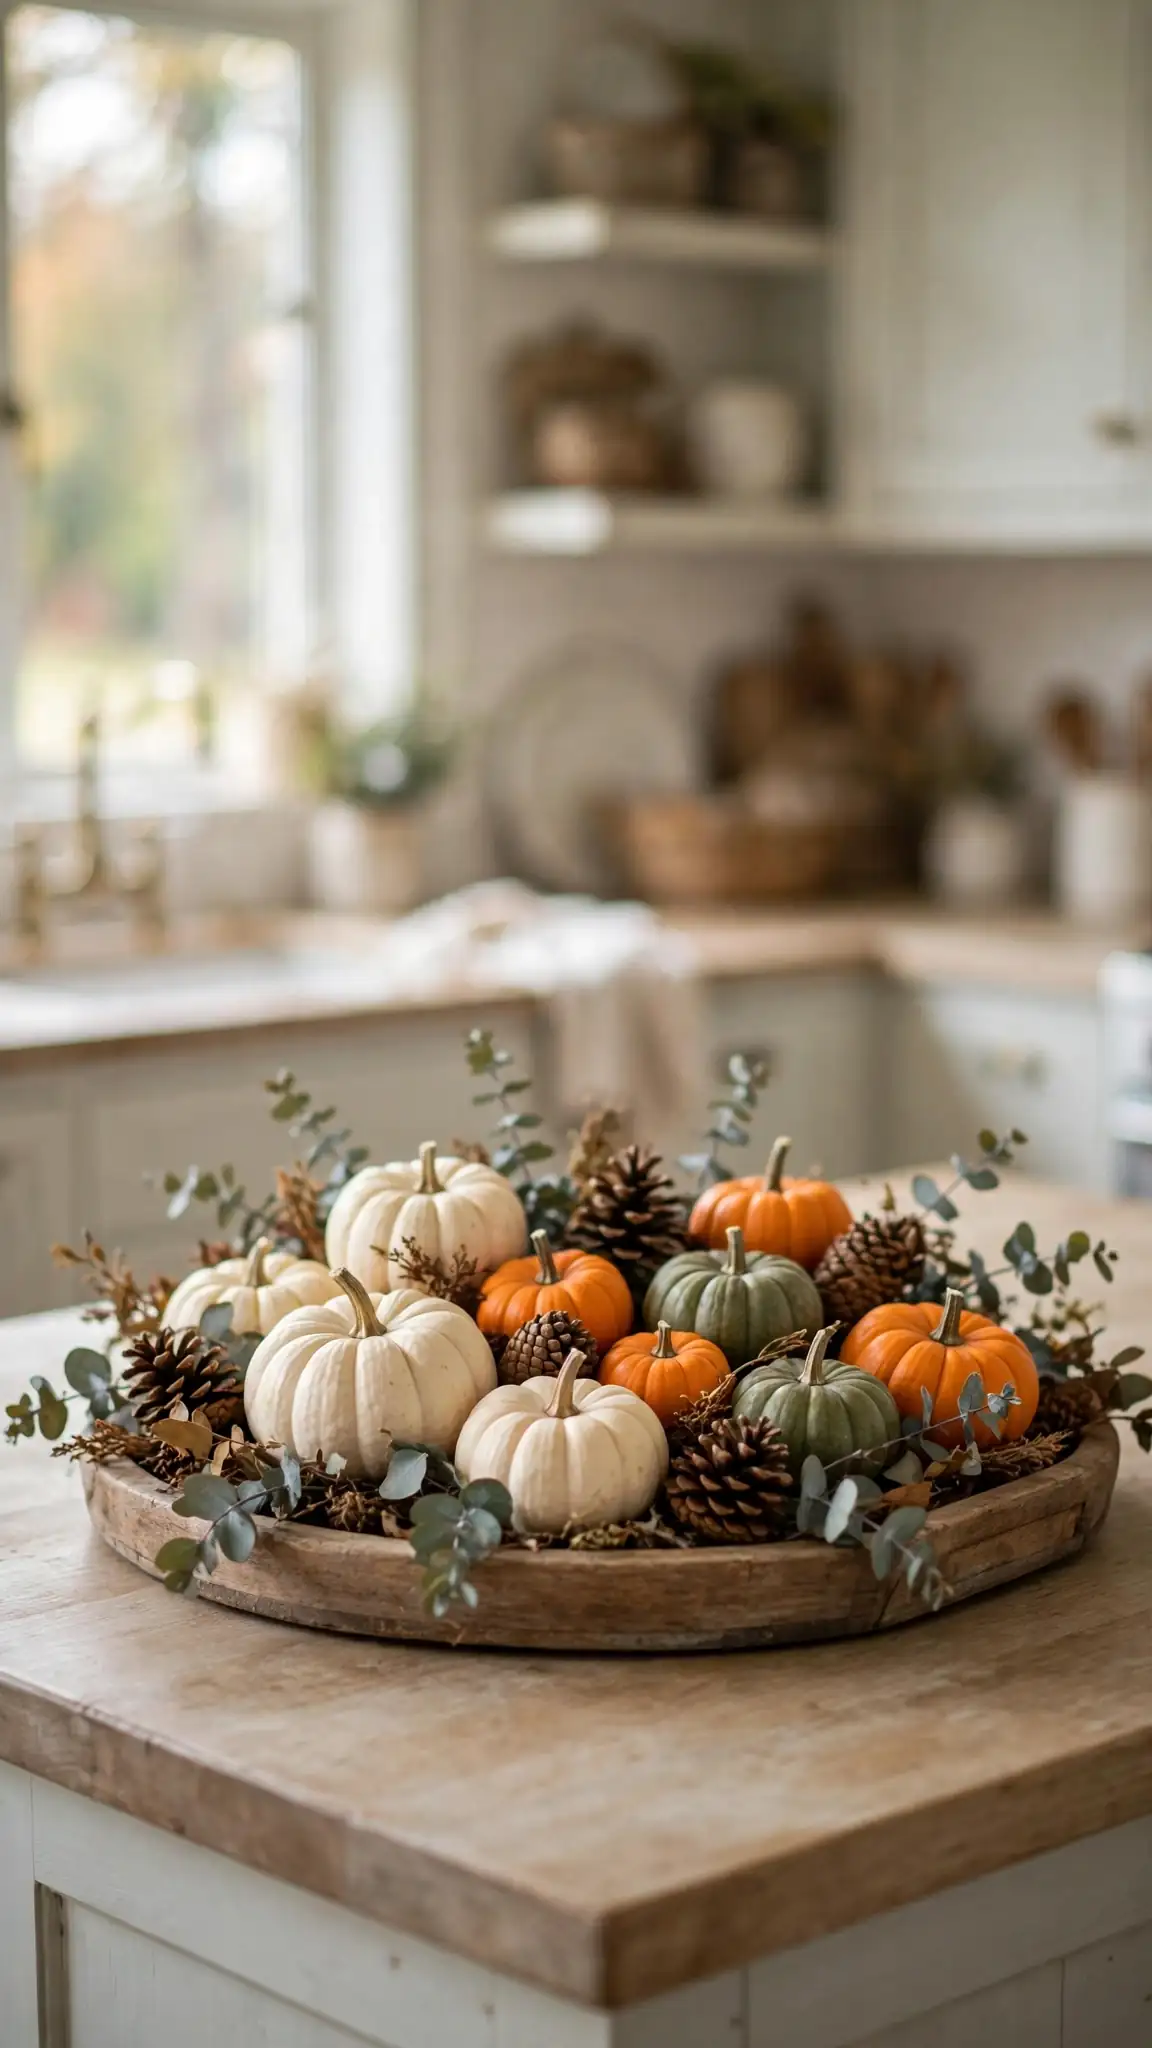
Start with a twelve by eighteen inch wooden tray from Target’s Bullseye section for five dollars, or grab a thrifted one for about two dollars. Fill it with six to eight mini pumpkins in white, orange, and green, which cost about fifty cents each at Aldi or Trader Joe’s through October. Tuck dried eucalyptus stems, four dollars a bunch at Trader Joe’s, and a few pinecones you gathered outside around the pumpkins to fill the gaps. Set the finished tray in the center of your kitchen island or breakfast table where it catches the morning light. The tray keeps every crumb contained, and you can lift the whole display in one move when you need the counter for cooking.
Stretch this display into Thanksgiving by swapping the mini pumpkins for gourds and adding dried corn in late November, with no extra spending. For a farmhouse finish, stain a raw wood tray with a four-dollar sample pot of walnut stain from Home Depot before you arrange anything. Small kitchens can scale down to a ten-inch round tray on a bar cart or counter corner and still get the full effect. Keep real pumpkins away from stove heat and direct sun so they last three to four weeks instead of one. Pro tip: dab a little petroleum jelly on cut pumpkin stems to slow rotting and keep your centerpiece fresh twice as long.
2. Plaid Dish Towels Tied with Cinnamon Sticks
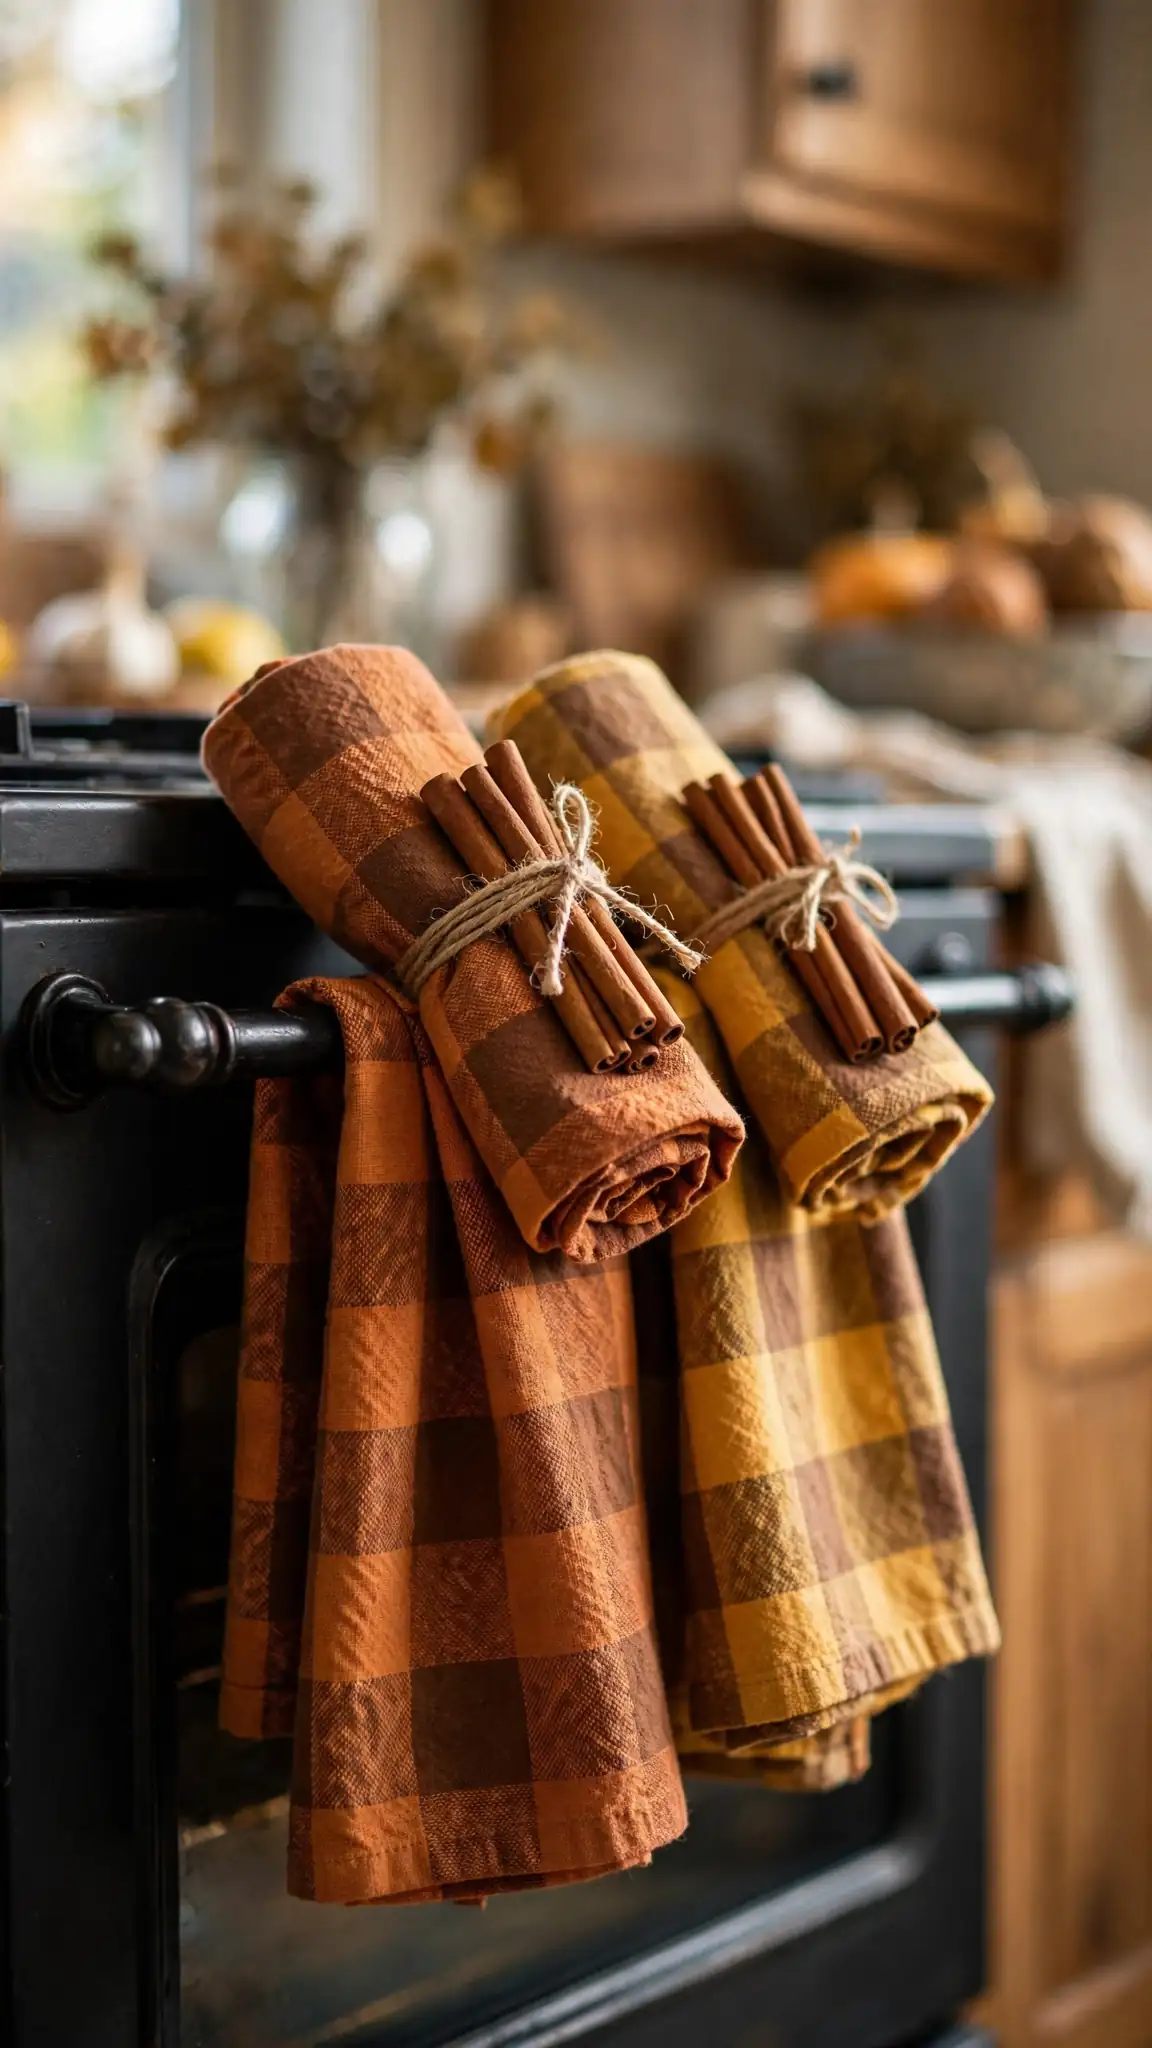
Swap your everyday dish towels for buffalo plaid or harvest-print tea towels, which sell for a dollar twenty-five each at Dollar Tree or three for ten dollars at Walmart. Fold each towel in thirds and roll it loosely, then tie a bundle of three cinnamon sticks around the middle with natural jute twine. A one-pound bag of cinnamon sticks costs about six dollars at Walmart or Costco and covers at least eight towel bundles with plenty left over. Drape one rolled towel over your oven handle and stack two more in a small basket by the sink. The cinnamon gives off a faint spicy scent every time the oven warms up, which makes the whole kitchen smell like fall baking.
Choose towels in rust, mustard, and forest green to match classic autumn palettes, or go with cream and tan plaid for a neutral farmhouse kitchen. If you have an open-shelf kitchen, line up four rolled towels on the lowest shelf like a little textile display. Refresh the cinnamon scent each month by lightly sanding the sticks with fine sandpaper, which releases the oils again. When the season ends, untie the bundles and store the towels with your regular linens while saving the cinnamon for simmer pots. Pro tip: buy an extra bag of cinnamon sticks in October when holiday baking stock is fullest and prices are lowest.
3. Paper Bag Fall Leaf Garland Above the Range
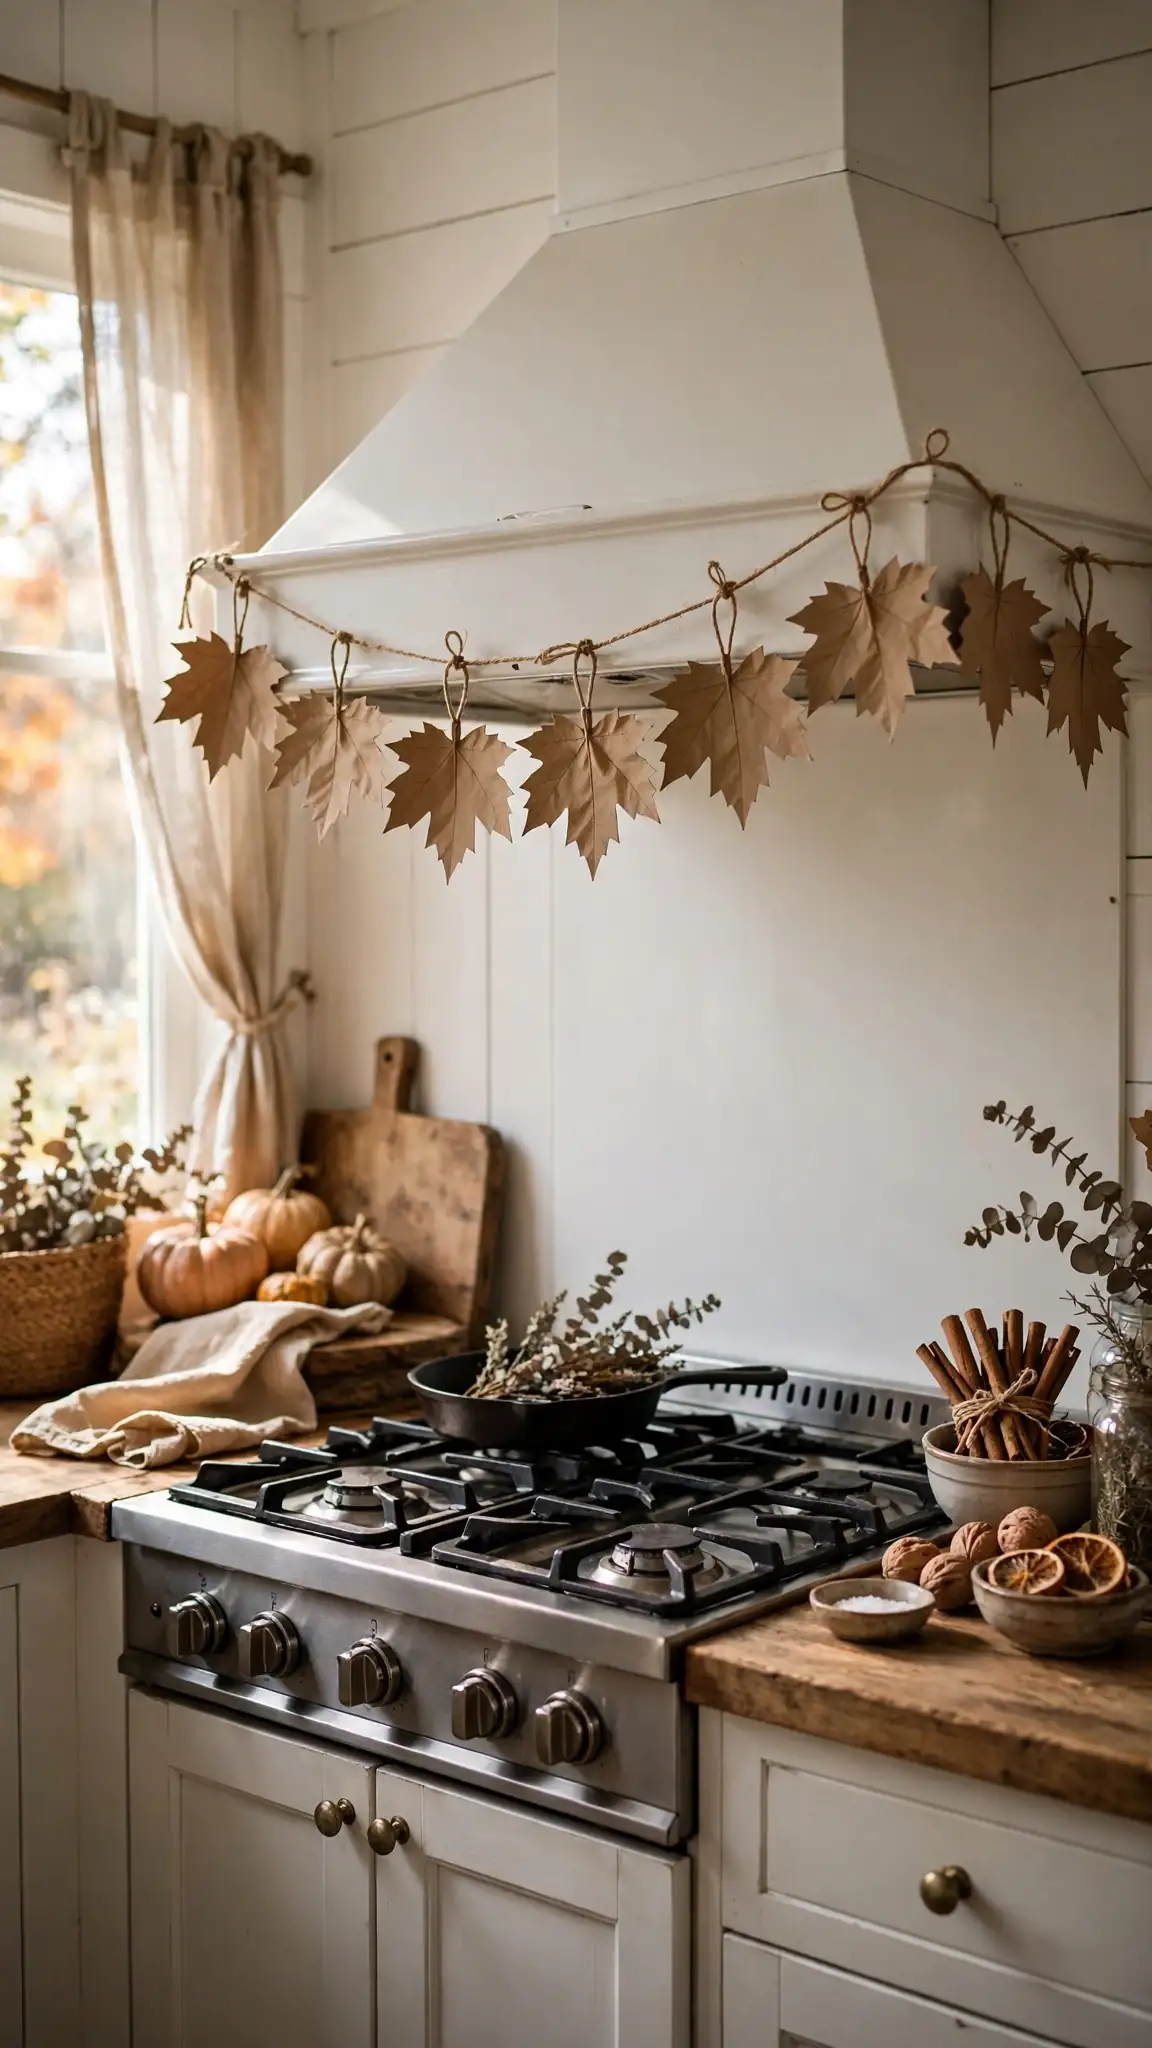
Cut leaf shapes from brown paper grocery bags, which are free and give the garland a lovely rustic kraft-paper look. Draw a simple maple or oak leaf template on cardboard once, then trace and cut about twenty leaves in three sizes for a full, layered effect. Punch a small hole near each stem and thread the leaves onto a six-foot length of jute twine, spacing them two inches apart and alternating sizes. Hang the garland across the front of your range hood or along a shelf above the stove using small Command hooks that remove cleanly. The whole project costs nothing if you already own twine, and it takes about forty minutes including cutting.
Paint the leaf edges with a dry brush of burnt-orange or gold acrylic paint for extra dimension, using seventy-seven-cent bottles from Walmart’s craft aisle. Kids love helping with this one, so make it a family craft night and cut double the leaves for a matching garland on the pantry door. Keep the garland at least twelve inches above open flames and never let it touch hot cookware, since paper and heat do not mix. At the end of the season, the paper leaves compost easily, making this the most eco-friendly project on the list. Pro tip: lightly crinkle each leaf before stringing to give it a natural curled shape that catches the light.
4. Spray-Painted Pinecone Bowl Filler
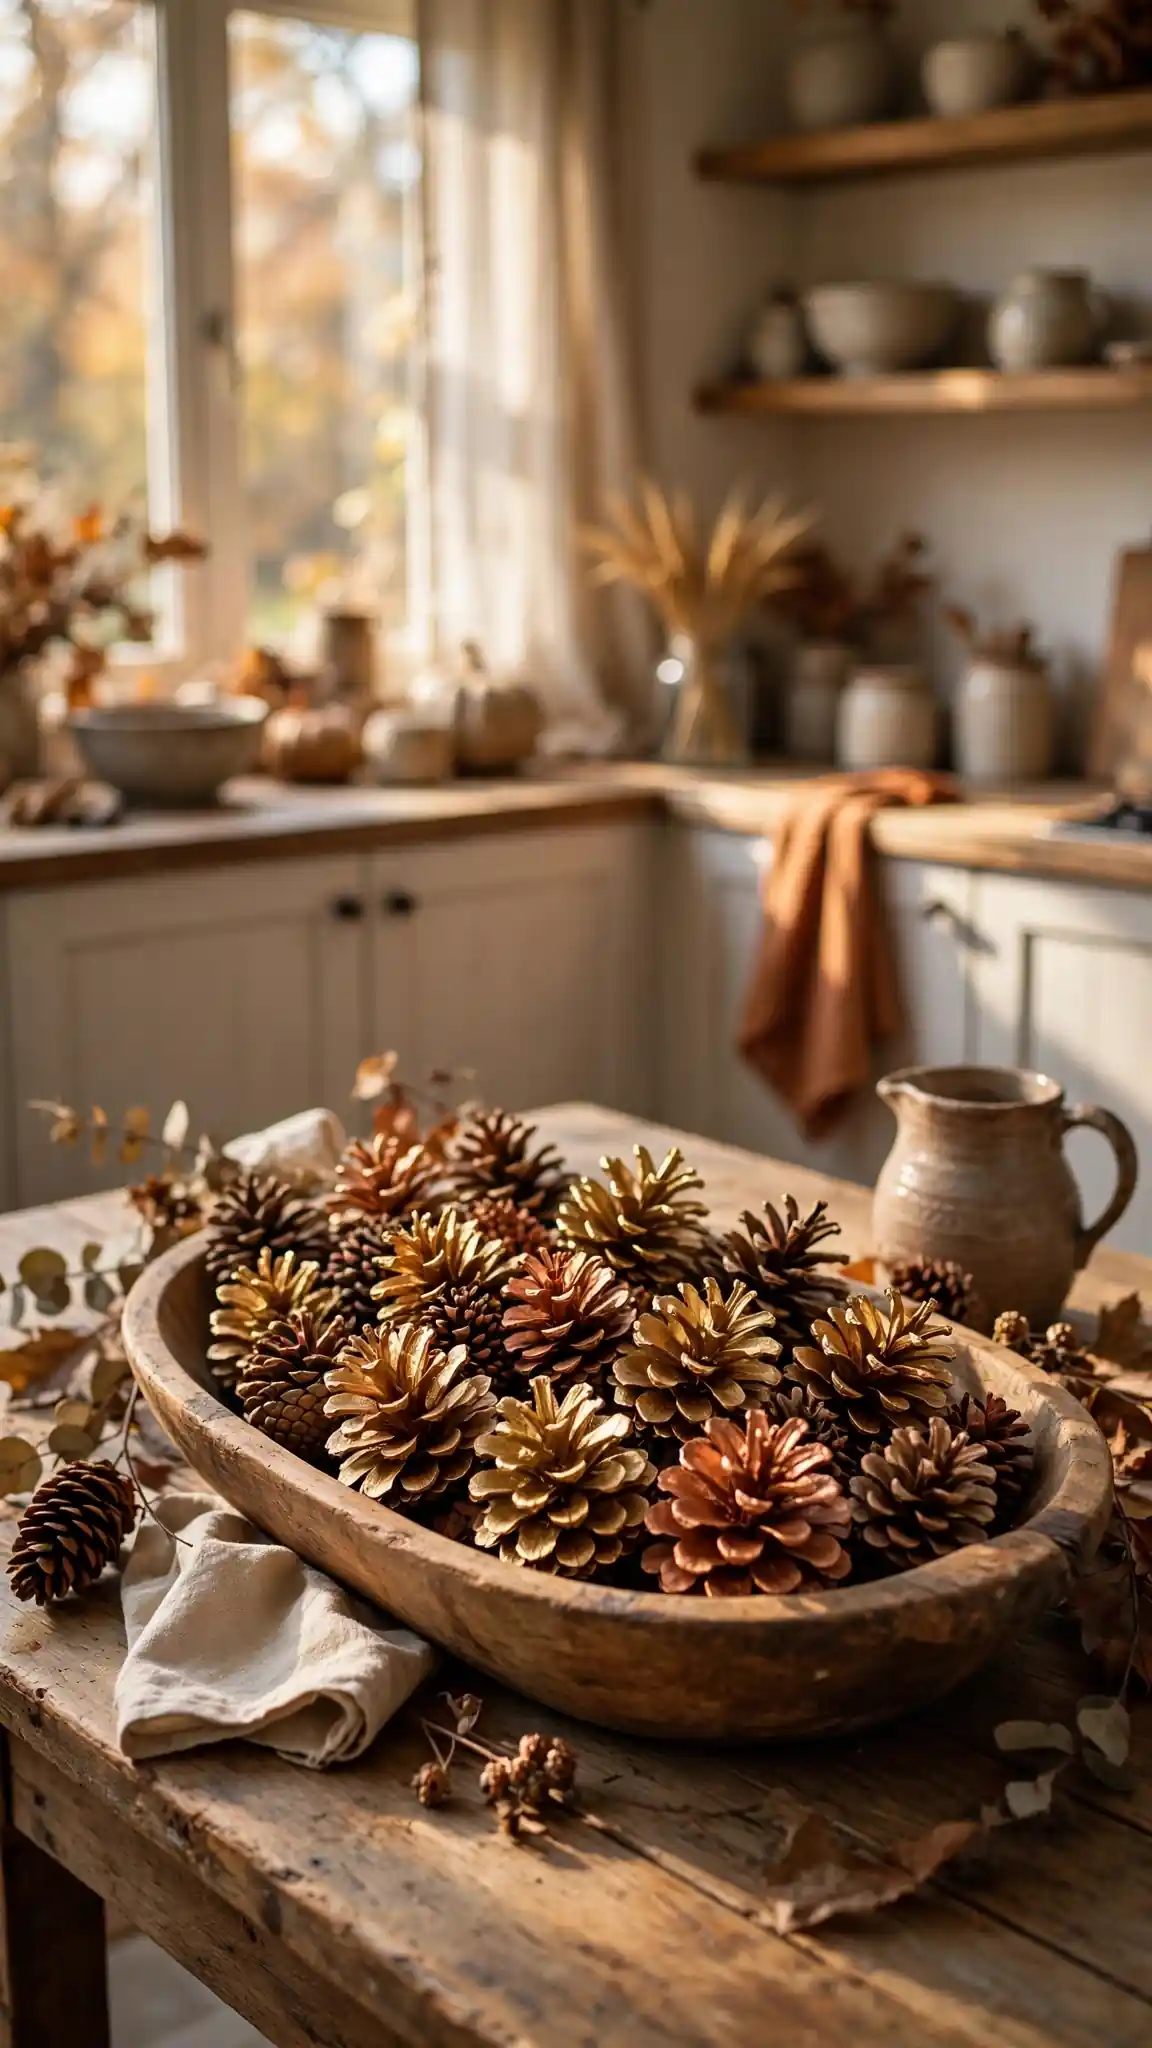
Gather a basket of pinecones from your yard or a local park, choosing ones fully open and three to four inches long. Bake them on a foil-lined sheet at two hundred degrees for one hour to kill any bugs and help them open wider, then let them cool completely. Lay them on newspaper outside and spray with metallic gold or copper spray paint, about five dollars a can at Home Depot, using two light coats. Pile the finished pinecones into a twelve-inch dough bowl from Hobby Lobby, which runs about twelve dollars with their regular forty-percent-off coupon. Set the bowl on your kitchen table as a centerpiece that looks far more expensive than it was.
Mix in a few unscented pinecones in their natural brown for contrast, or add dried orange slices for a pop of color that smells amazing. A nine-inch white ceramic bowl from Target for eight dollars makes a modern alternative to the wooden dough bowl in contemporary kitchens. This filler lasts for years if you store it in a sealed bag between seasons, so the five-dollar paint can covers many autumns. Keep the bowl away from toddlers, since small pinecone scales can be a choking hazard for very young children. Pro tip: spray one side, wait twenty minutes, then flip and spray the other side so every angle shines evenly.
5. Mason Jar Wheat Bundles with Candlelight
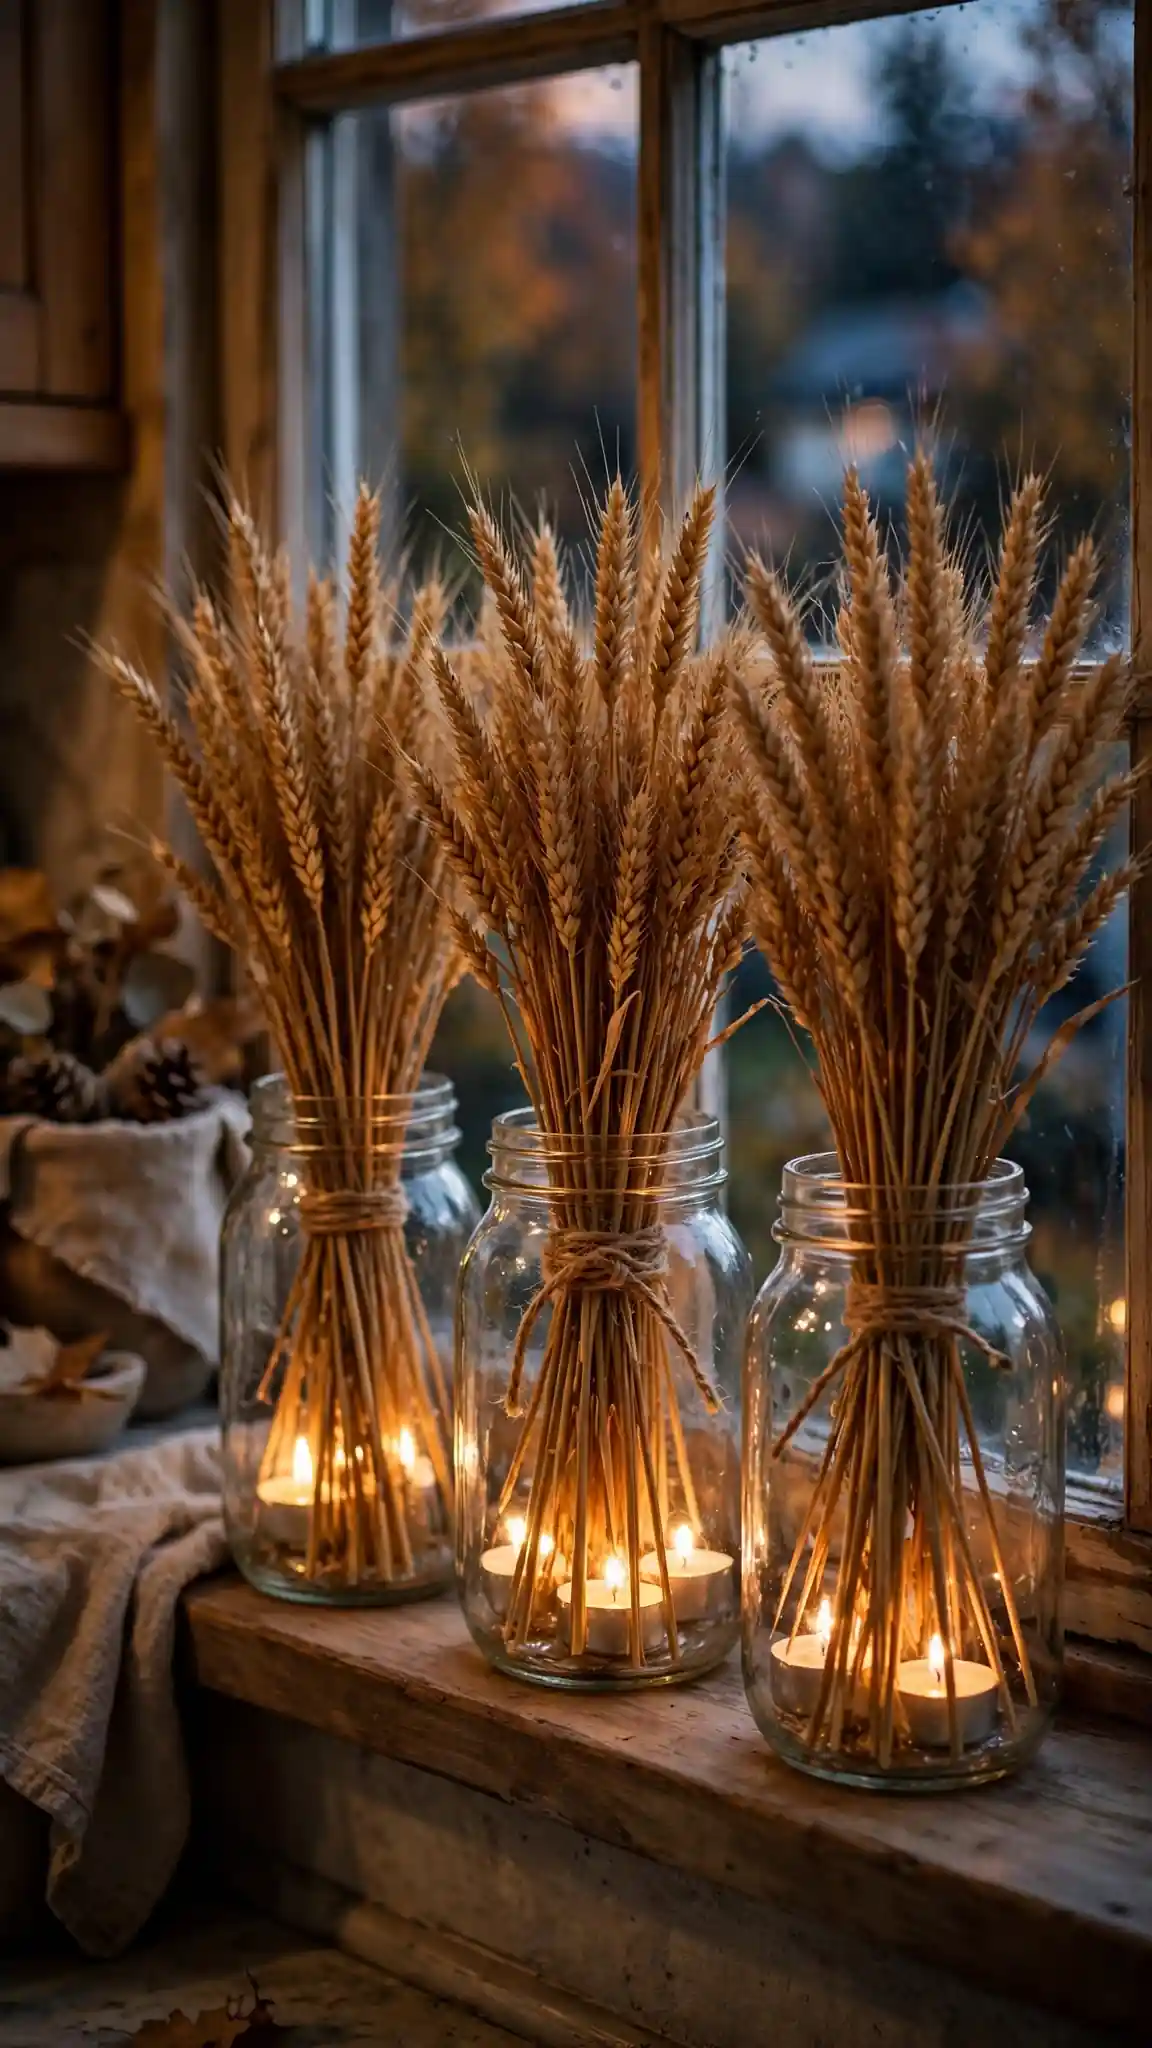
Fill quart-size mason jars, one dollar twenty-five each at Dollar Tree, with bundles of dried wheat stalks cut to twelve inches tall. A bundle of fifty wheat stems costs about six dollars on Amazon or at a local craft store and fills three jars generously. Tie natural twine around the jar necks in a simple bow, then tuck a battery-operated tea light, four dollars for a six-pack at Walmart, among the stems. Line three jars down the center of your kitchen windowsill or group them on a cake stand for a tiered effect. The warm LED glow shining through the golden wheat looks magical after sunset and costs pennies in batteries per month.
Swap the wheat for dried lavender in cream jars for a French farmhouse twist, or use pampas grass stems for a taller, airier look on high shelves. Real flames are risky near dried plants, so always use LED candles with dried botanicals and keep them on a timer for four hours each evening. In small kitchens, a single pint-size jar with one wheat bundle fits perfectly on a floating shelf or beside the coffee maker. When spring arrives, replace the wheat with fresh greenery and reuse the same jars and lights year-round. Pro tip: trim wheat stems at an angle and vary the heights by an inch so the arrangement looks naturally gathered, not stiff.
6. Chalkboard Thankful Sign for the Fridge

Pick up an eight by ten inch framed chalkboard for three dollars at Michaels or Dollar Tree’s craft section. Write the word THANKFUL in large block letters with a white chalk marker, five dollars for a two-pack at Walmart, then add small doodles of pumpkins and leaves in the corners. Stick four adhesive magnetic strips, three dollars for a roll at Target, to the back corners so the sign hangs securely on your refrigerator door. Change the message monthly, from HELLO FALL in September to GIVE THANKS in November, to keep the display fresh all season. The whole sign takes fifteen minutes and becomes a fun spot where kids can add their own drawings.
Use a damp magic eraser to wipe the board completely clean between messages without ghosting from old chalk marker lines. If your fridge is stainless steel and magnets slide, add a dab of museum putty behind the sign for extra grip that still removes cleanly. Pair the sign with two small magnetic pumpkin clips holding your favorite fall recipes for a coordinated fridge gallery. For a fancier look, hot-glue a small burlap bow to the top corner of the frame in harvest colors. Pro tip: practice your lettering on paper first, then trace lightly in pencil on the board before committing with the chalk marker.
7. Apple Crate Candle Lanterns on the Counter
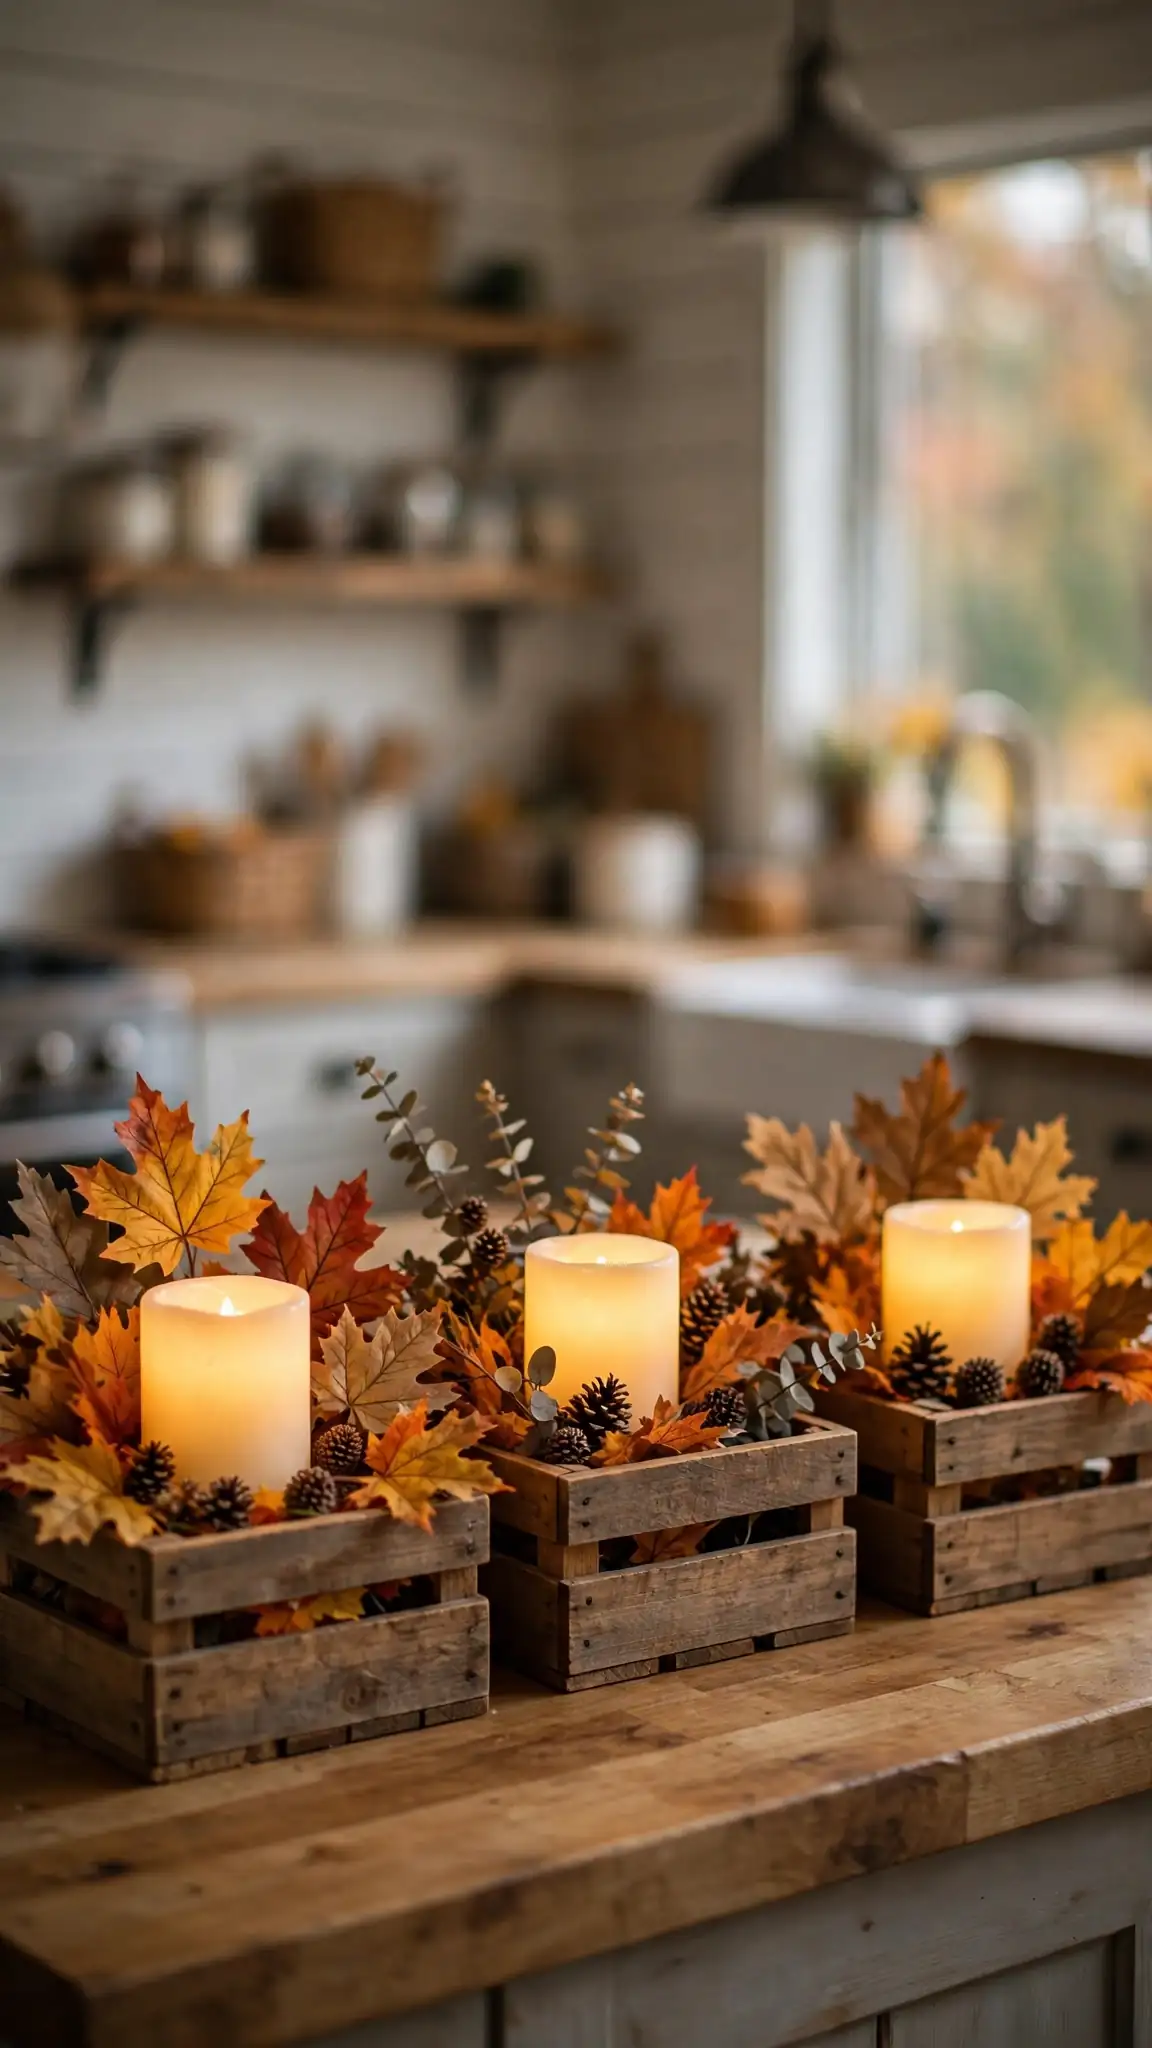
Mini wooden apple crates, four dollars each at Michaels, make charming rustic lanterns with a candle nested inside. Place a three by four inch LED pillar candle, eight dollars for a set of three at Target, in the center of each crate and surround it with faux leaves and tiny pinecones. Line two or three crates along the back of the counter, where they add warm height without blocking your workspace. The crates also work beautifully flanking your range hood or styling a kitchen island, where they pair with more kitchen island decor ideas for a pulled-together look. Because the candles are flameless, you can leave them glowing all evening without worrying about curtains, kids, or pets nearby.
Stain the crates with dark walnut or paint them matte black for a modern farmhouse contrast against white counters. Fill any gaps with excelsior wood shavings, three dollars a bag at Hobby Lobby, which looks like straw and hides the candle base neatly. If you prefer real candles, use enclosed glass hurricanes inside the crates and never leave them burning unattended. After the holidays, store the crates nested together and reuse them as produce holders or bathroom organizers. Style the crates beside a small stack of cookbooks or a potted herb for a lived-in countertop vignette. Pro tip: set the LED candles on a six-hour timer so your crates glow automatically every evening without you touching a switch.
8. Dried Corn Husk Wreath for the Pantry Door
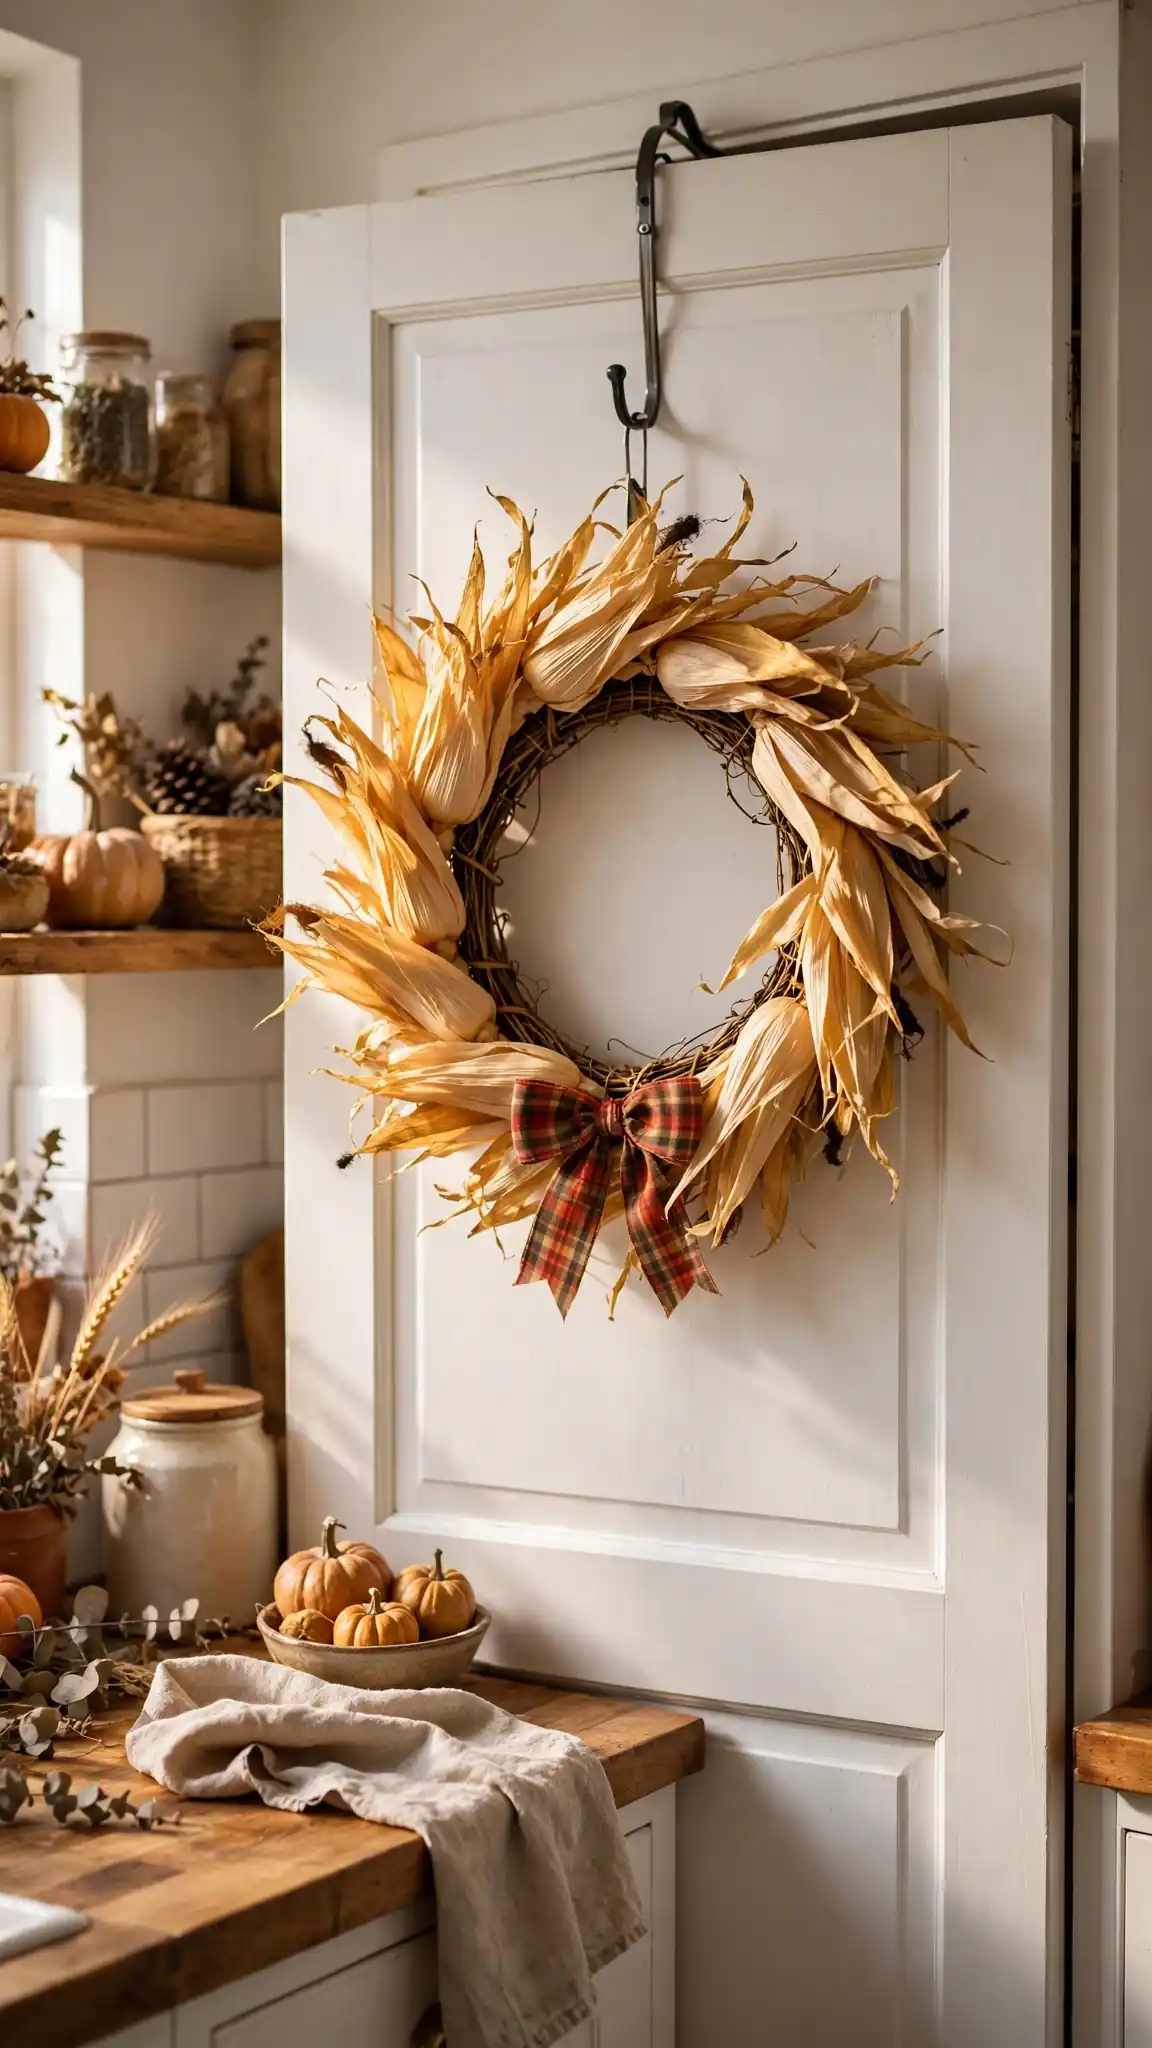
Soak dried corn husks, three dollars a bag in the Hispanic foods aisle at Walmart, in warm water for twenty minutes until they turn soft and pliable. Wrap the damp husks around a ten-inch grapevine wreath form, four dollars at Dollar Tree, overlapping each layer and securing with a hot glue gun as you go. Build up two full layers for a lush look, letting some husk tips stick out naturally for texture and movement. Hang the finished wreath on your pantry door with an over-the-door wreath hanger, six dollars at Target, so it swings freely without scratching the paint. The golden-tan husks bring gorgeous natural texture that suits farmhouse and traditional kitchens perfectly.
Tuck a few dried mini ears of corn or a small plaid bow into the bottom of the wreath for a classic harvest accent. Mist the finished wreath lightly with water once a month to keep the husks from becoming brittle and cracking. This wreath stores flat in a garment bag between seasons and easily lasts three to four autumns with gentle handling. For apartment dwellers, a smaller eight-inch version fits perfectly on a cabinet door or the side of the refrigerator. Pro tip: work with the husks while they are still slightly damp, since fully dried husks crack and fully soaked ones take days to dry on the form.
9. Harvest Garland Across Open Kitchen Shelves
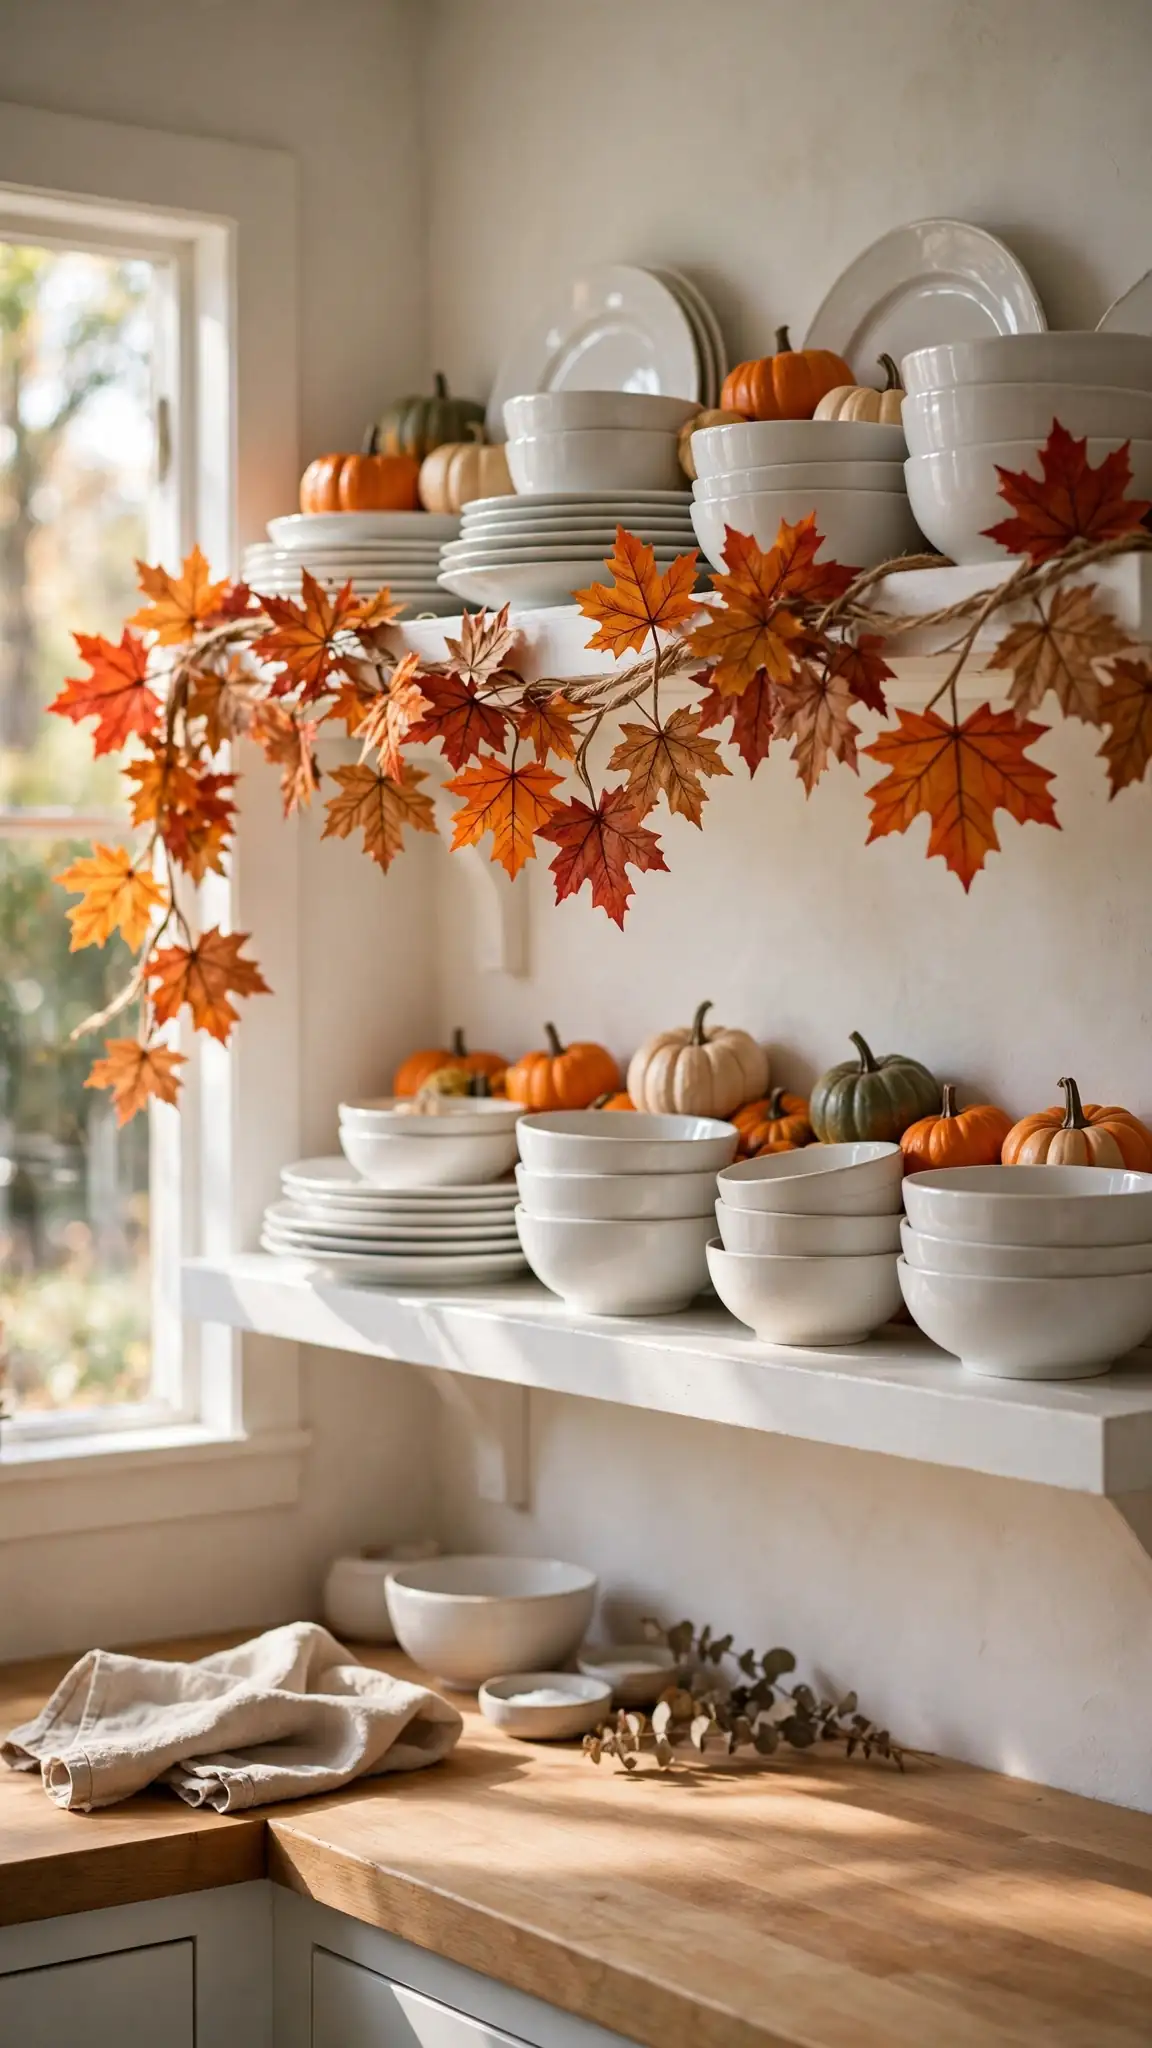
Drape a six-foot faux fall garland across the front edge of your open kitchen shelves for instant autumn warmth. Hobby Lobby sells realistic maple-leaf garlands for ten dollars, and their forty-percent-off coupon brings it under six dollars most weeks. Weave the garland loosely so it dips slightly between shelf brackets, then tuck three to five mini pumpkins behind dishes on the shelves for depth. The garland frames your everyday dishes like a picture frame, turning functional storage into seasonal decor. This is the single fastest transformation on the list, taking under ten minutes from box to beautiful, and it works on floating shelves, plate racks, and even the top of kitchen cabinets.
Layer two garlands together, one green eucalyptus and one autumn maple, for a fuller designer look that still costs under fifteen dollars. Secure the garland with small clear Command clips every eighteen inches so it never slides off when you grab a plate. If your shelves hold heavy daily dishes, keep the garland toward the front lip where it will not interfere with reaching items. At season’s end, roll the garland around a cardboard tube and store it in a dry closet to prevent tangling. Pro tip: fluff each leaf cluster by hand after hanging, since garlands always arrive flattened from packaging and look twice as full once separated.
10. Hand-Painted Foam Pumpkins in Cream and Sage
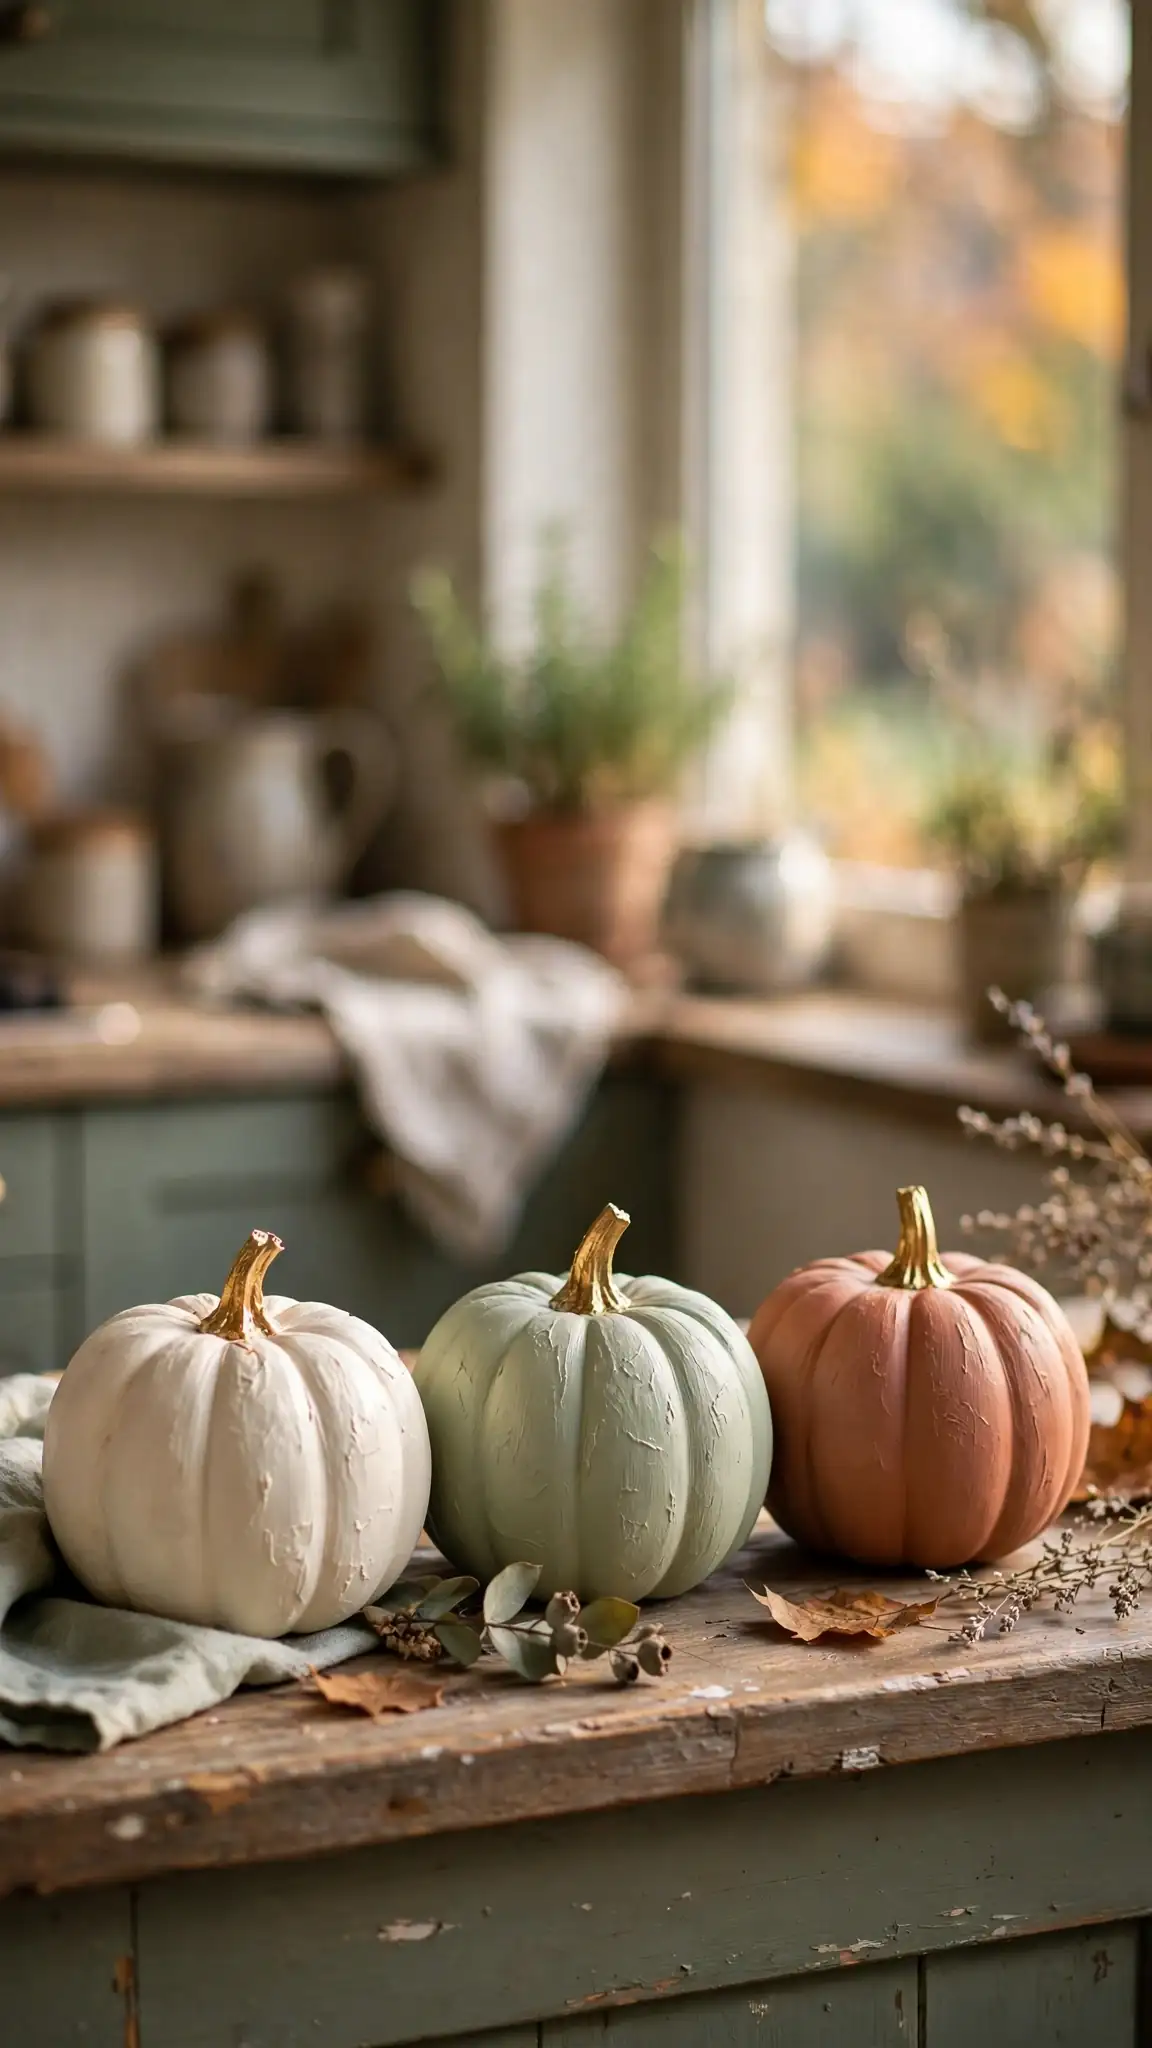
Buy smooth white foam pumpkins, two dollars each at Dollar Tree in September, and transform them with seventy-seven-cent acrylic craft paint from Walmart. Paint two pumpkins warm cream, two soft sage green, and one muted terracotta for a modern neutral harvest palette that matches any kitchen. Apply two thin coats with a foam brush, letting each coat dry twenty minutes, then lightly sand the raised ribs with fine sandpaper for a realistic aged finish. Arrange the painted pumpkins in a row on your windowsill or cluster them on a wooden cutting board leaning against the backsplash. The matte finish looks like expensive ceramic from a boutique, not a dollar-store craft.
Add hand-painted gold stems with metallic acrylic paint for an extra touch of elegance that photographs beautifully. These foam pumpkins never rot, so you can use them year after year and even leave them out from September through Thanksgiving. Let kids paint their own with washable tempera paint for a fun afternoon, then display the family collection together on the kitchen table. Store them wrapped in tissue paper in a labeled bin so the paint stays chip-free between seasons. Pro tip: wipe foam pumpkins with a damp cloth before painting to remove the factory coating, which helps the acrylic grip the surface smoothly.
11. Burlap Runner with a Stenciled Autumn Saying
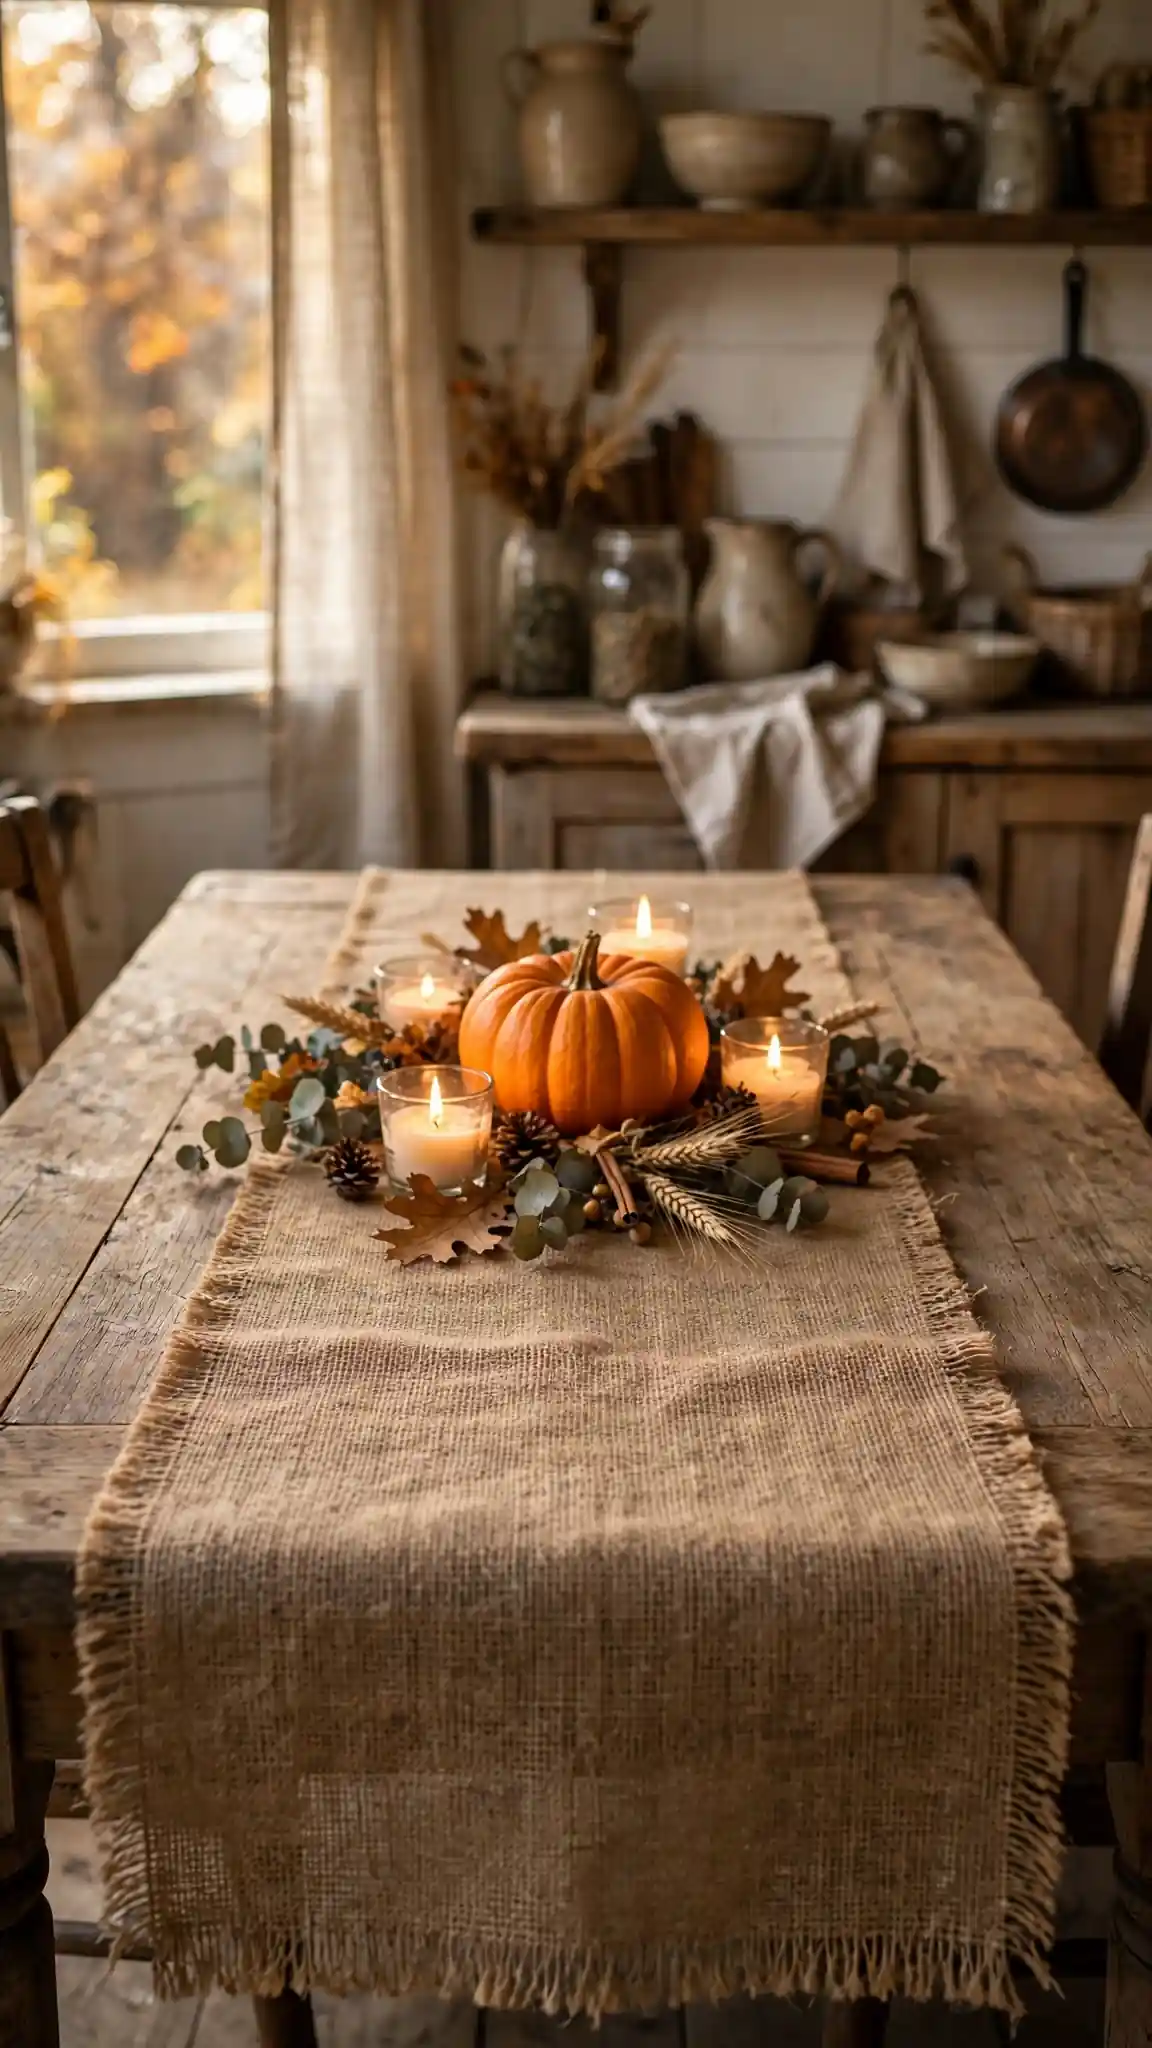
Cut a fourteen by seventy-two inch burlap runner from a three-dollar-per-yard roll at Walmart or Amazon, which covers most kitchen islands and dining tables. Center a reusable fall stencil, four dollars at Michaels, reading GATHER or GRATEFUL on the fabric and dab burnt-orange fabric paint through it with a stencil brush. Two light coats prevent bleeding under the stencil edges and give crisp, professional-looking letters. Let the runner dry flat for two hours, then iron the back side on low heat to set the paint permanently. The natural burlap texture adds farmhouse warmth under your centerpiece while protecting the table from scratches and heat marks.
Hem the raw edges with iron-on hem tape, three dollars at Joann, for a no-sew finish that stops fraying in the wash. Layer the burlap over a cream cotton tablecloth for a soft, collected look, or let it run alone on a wood table for rustic simplicity. Spot-clean spills with a damp cloth and mild soap, since full machine washing can distort the burlap weave. Make a matching set of four burlap placemats from the leftover fabric for a coordinated table under ten dollars total. Pro tip: tape the stencil down with painter’s tape on all four sides and use an almost-dry brush to keep the lettering razor sharp.
12. Fall Kitchen Decor DIY Acorn Napkin Rings
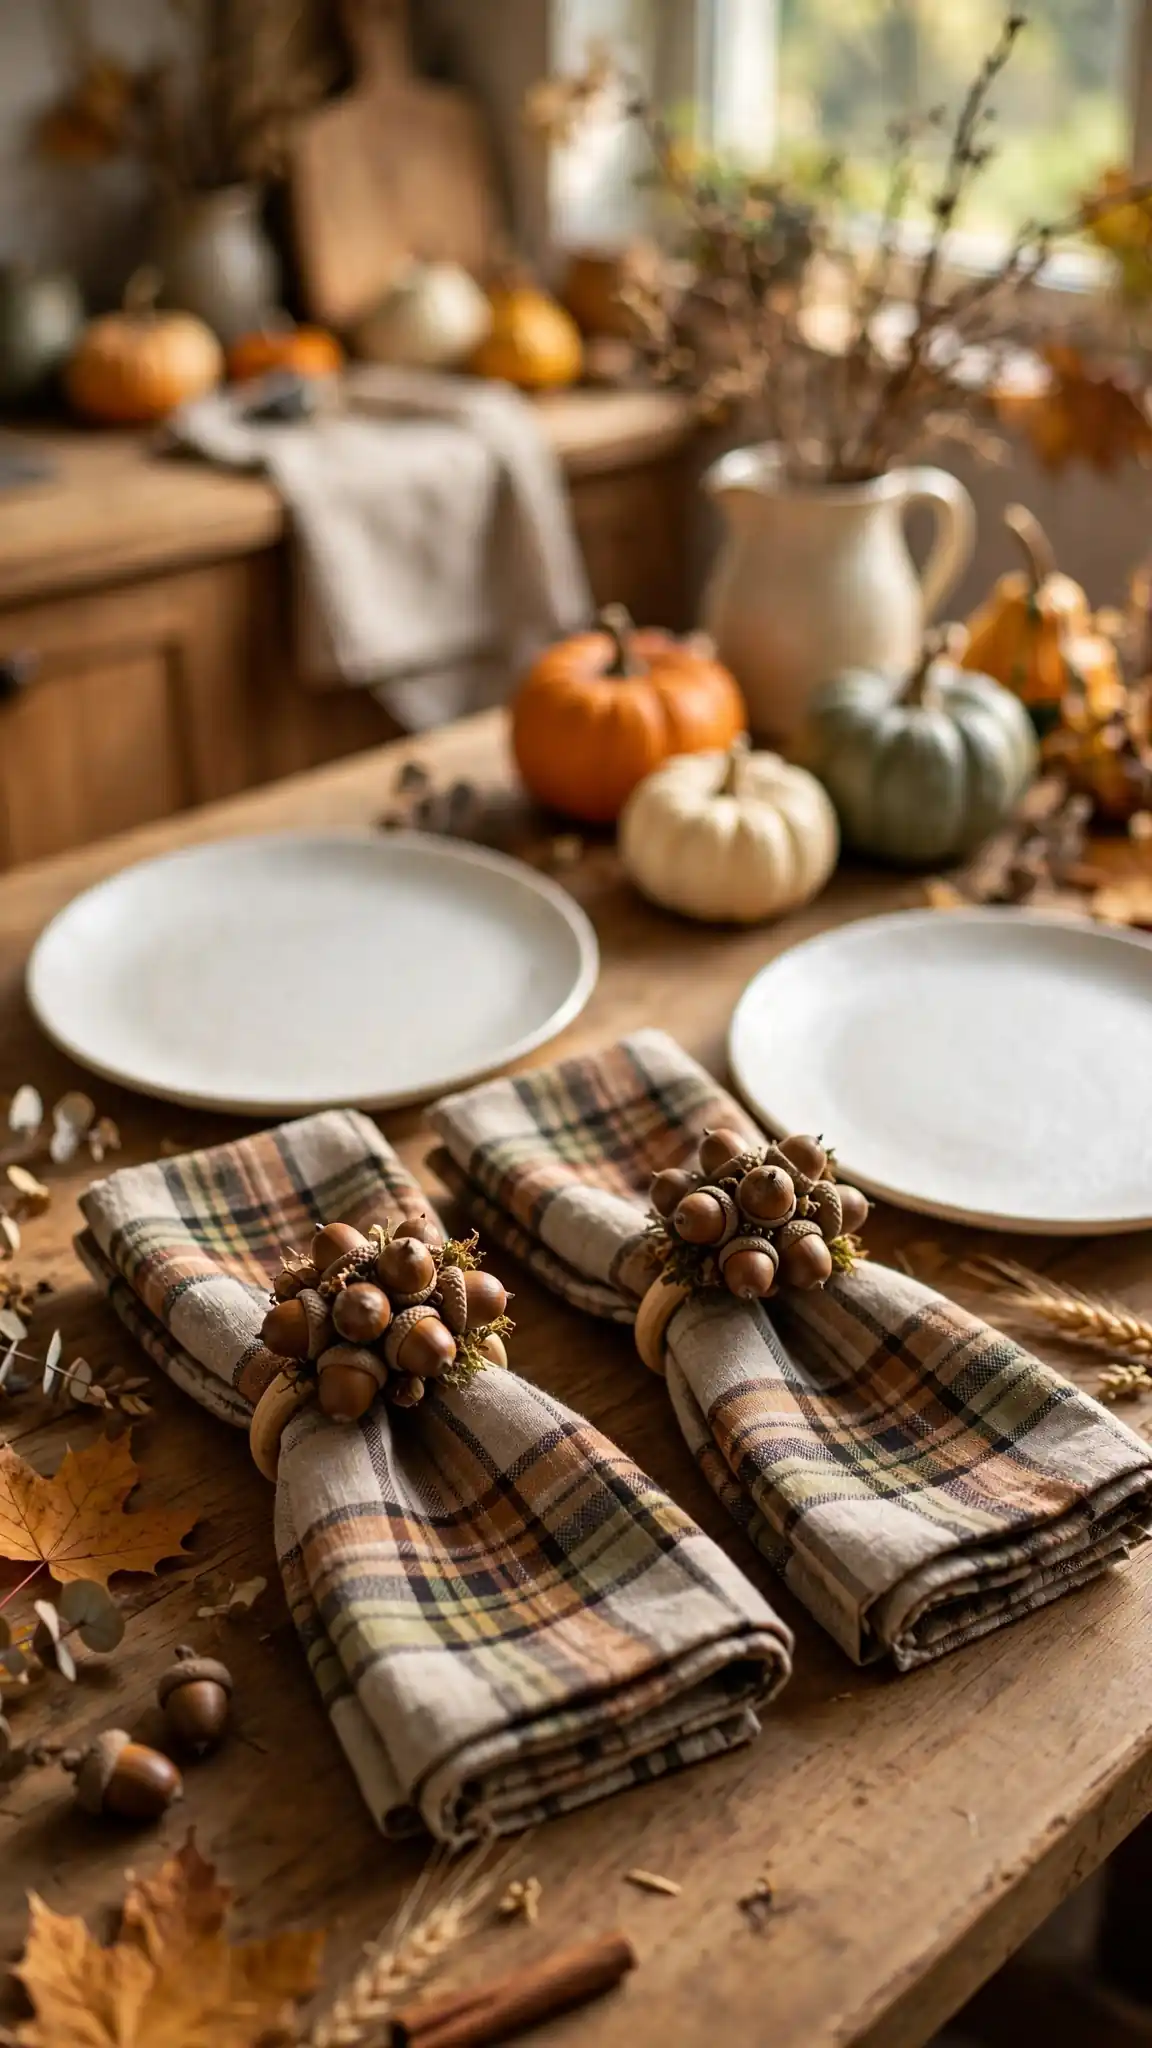
This fall kitchen decor diy classic turns free backyard acorns into charming napkin rings for your autumn table. Collect about forty acorns with their caps intact, wash them in warm soapy water, and bake at two hundred degrees for thirty minutes to dry them fully. Hot-glue five acorns in a tight cluster around each plain wooden napkin ring, three dollars for a six-pack at Michaels, covering the wood completely. Spray the finished rings with clear matte sealer for durability through many dinners. Set them on plaid or linen napkins at each place setting, and your everyday weeknight dinner instantly feels like a harvest celebration.
Mix in a few faux berries or tiny pinecones between the acorns for extra color and texture on each ring. If acorns are scarce in your area, buy a bag of fifty natural acorns for five dollars on Amazon or Etsy. These rings pair perfectly with the burlap runner from idea eleven and the mini pumpkin centerpiece from idea one for a fully coordinated table. Store them in a divided craft box so the acorn clusters do not crush each other between uses. Pro tip: sort acorns by size before gluing and use the largest ones as the centerpiece of each cluster for a balanced, professional look.
13. Fairy Lights Twinkled Inside Glass Canisters
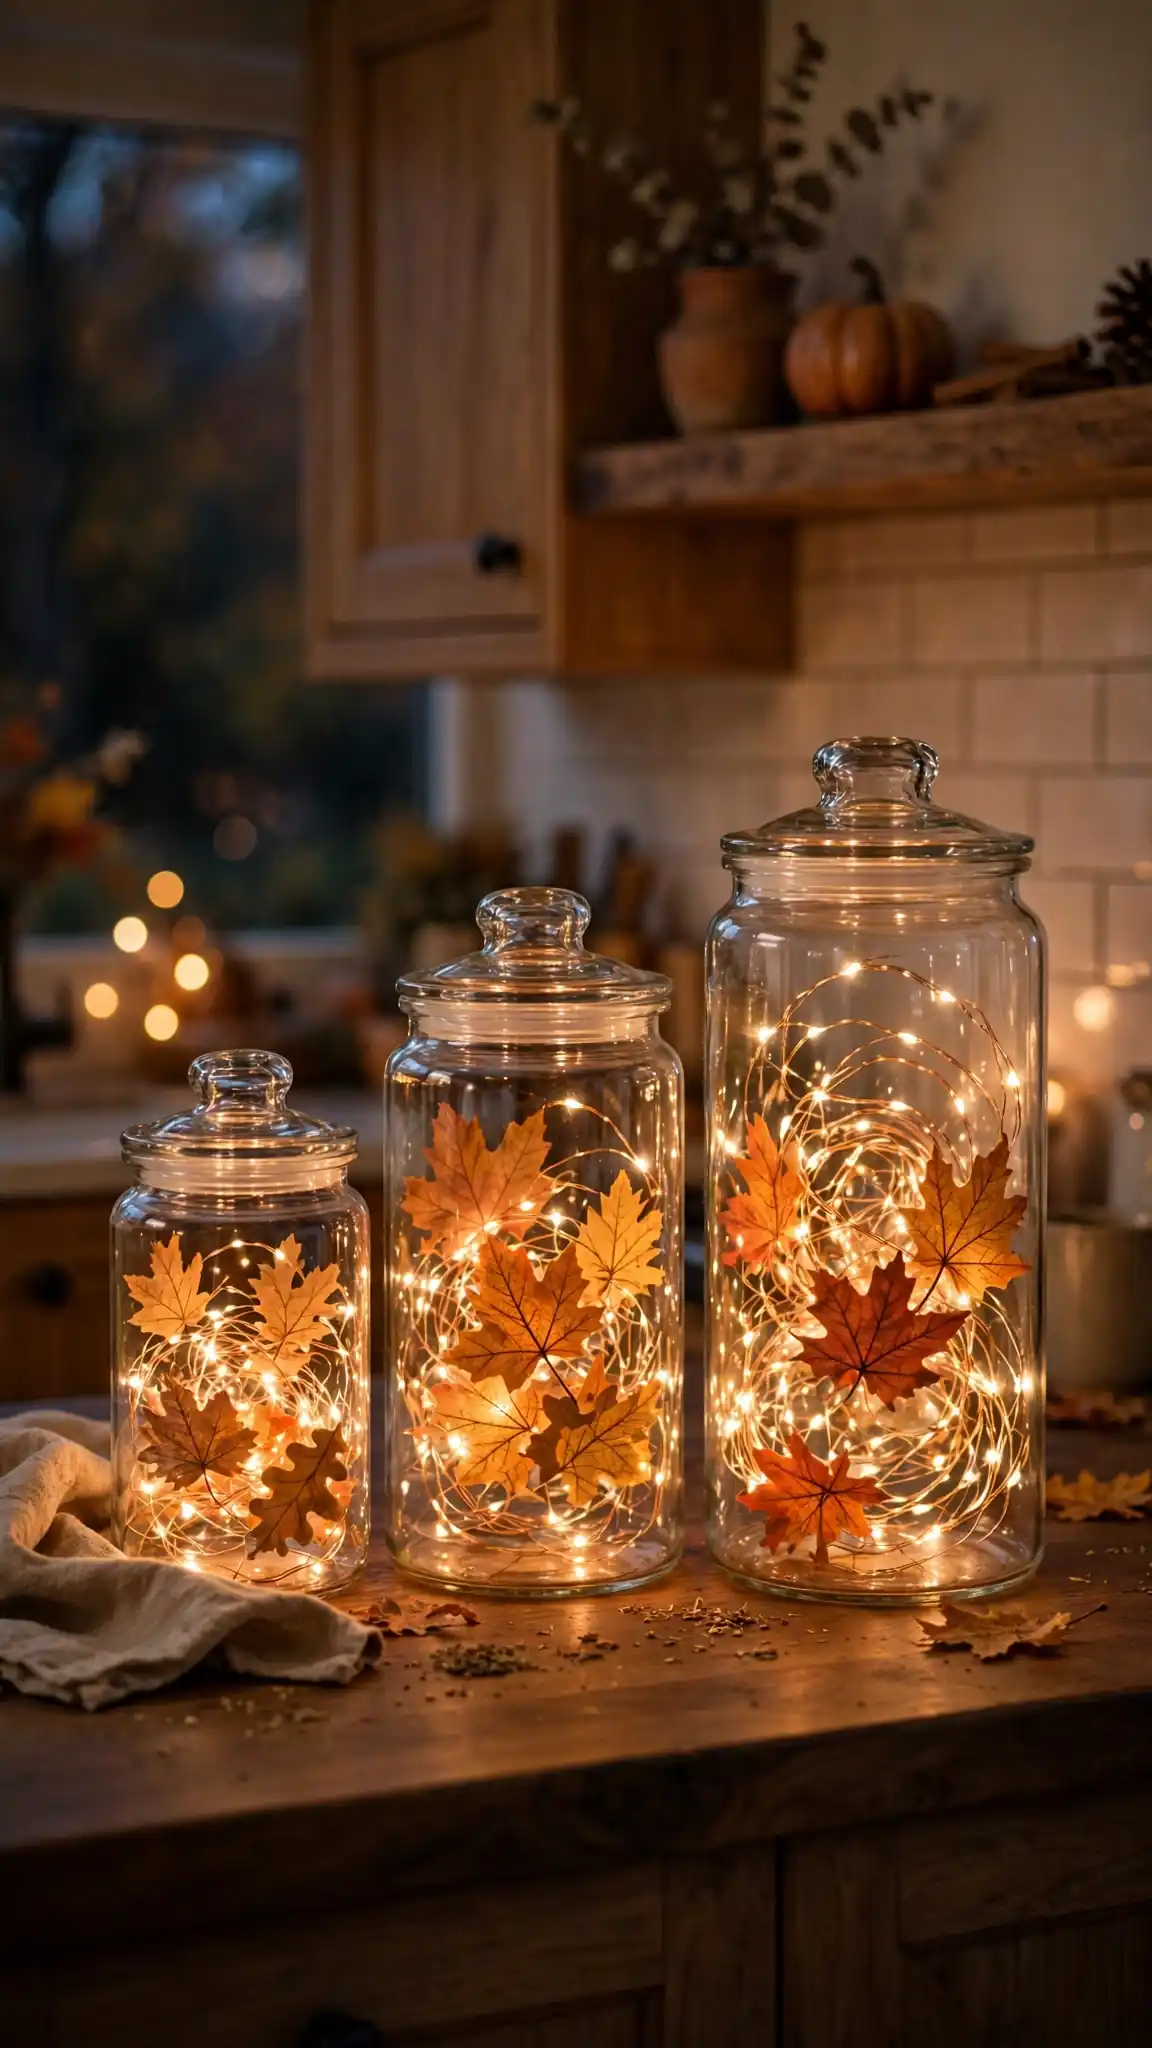
Fill clear glass canisters with twenty-light copper wire fairy lights, six dollars for a two-pack on Amazon, for a magical glow on your countertop. Coil one light string loosely inside each canister, letting the tiny LEDs nestle among the glass curves, and hide the slim battery pack behind the canister base. A set of three graduated canisters from Target’s kitchen section costs about fifteen dollars and creates a beautiful clustered display. The warm white lights make your morning coffee routine feel cozy and turn the kitchen into a welcoming space on dark autumn evenings. Most battery packs include a six-hour timer, so the lights switch themselves on at dusk and off before bed.
Drop a few faux fall leaves or cinnamon sticks into the canisters with the lights for a seasonal twist that costs nothing extra. In December, swap the leaves for mini ornaments and pine sprigs to carry this display straight into Christmas. Keep the battery packs accessible rather than sealed inside, so you can change the two AA batteries every three to four weeks. This idea works beautifully inside glass apothecary jars on open shelves too, adding sparkle at eye level. Pro tip: choose warm white LEDs around 2700K rather than cool white, because cool light looks clinical while warm light reads cozy and inviting.
14. Terracotta Pots of Fall Herbs on the Windowsill
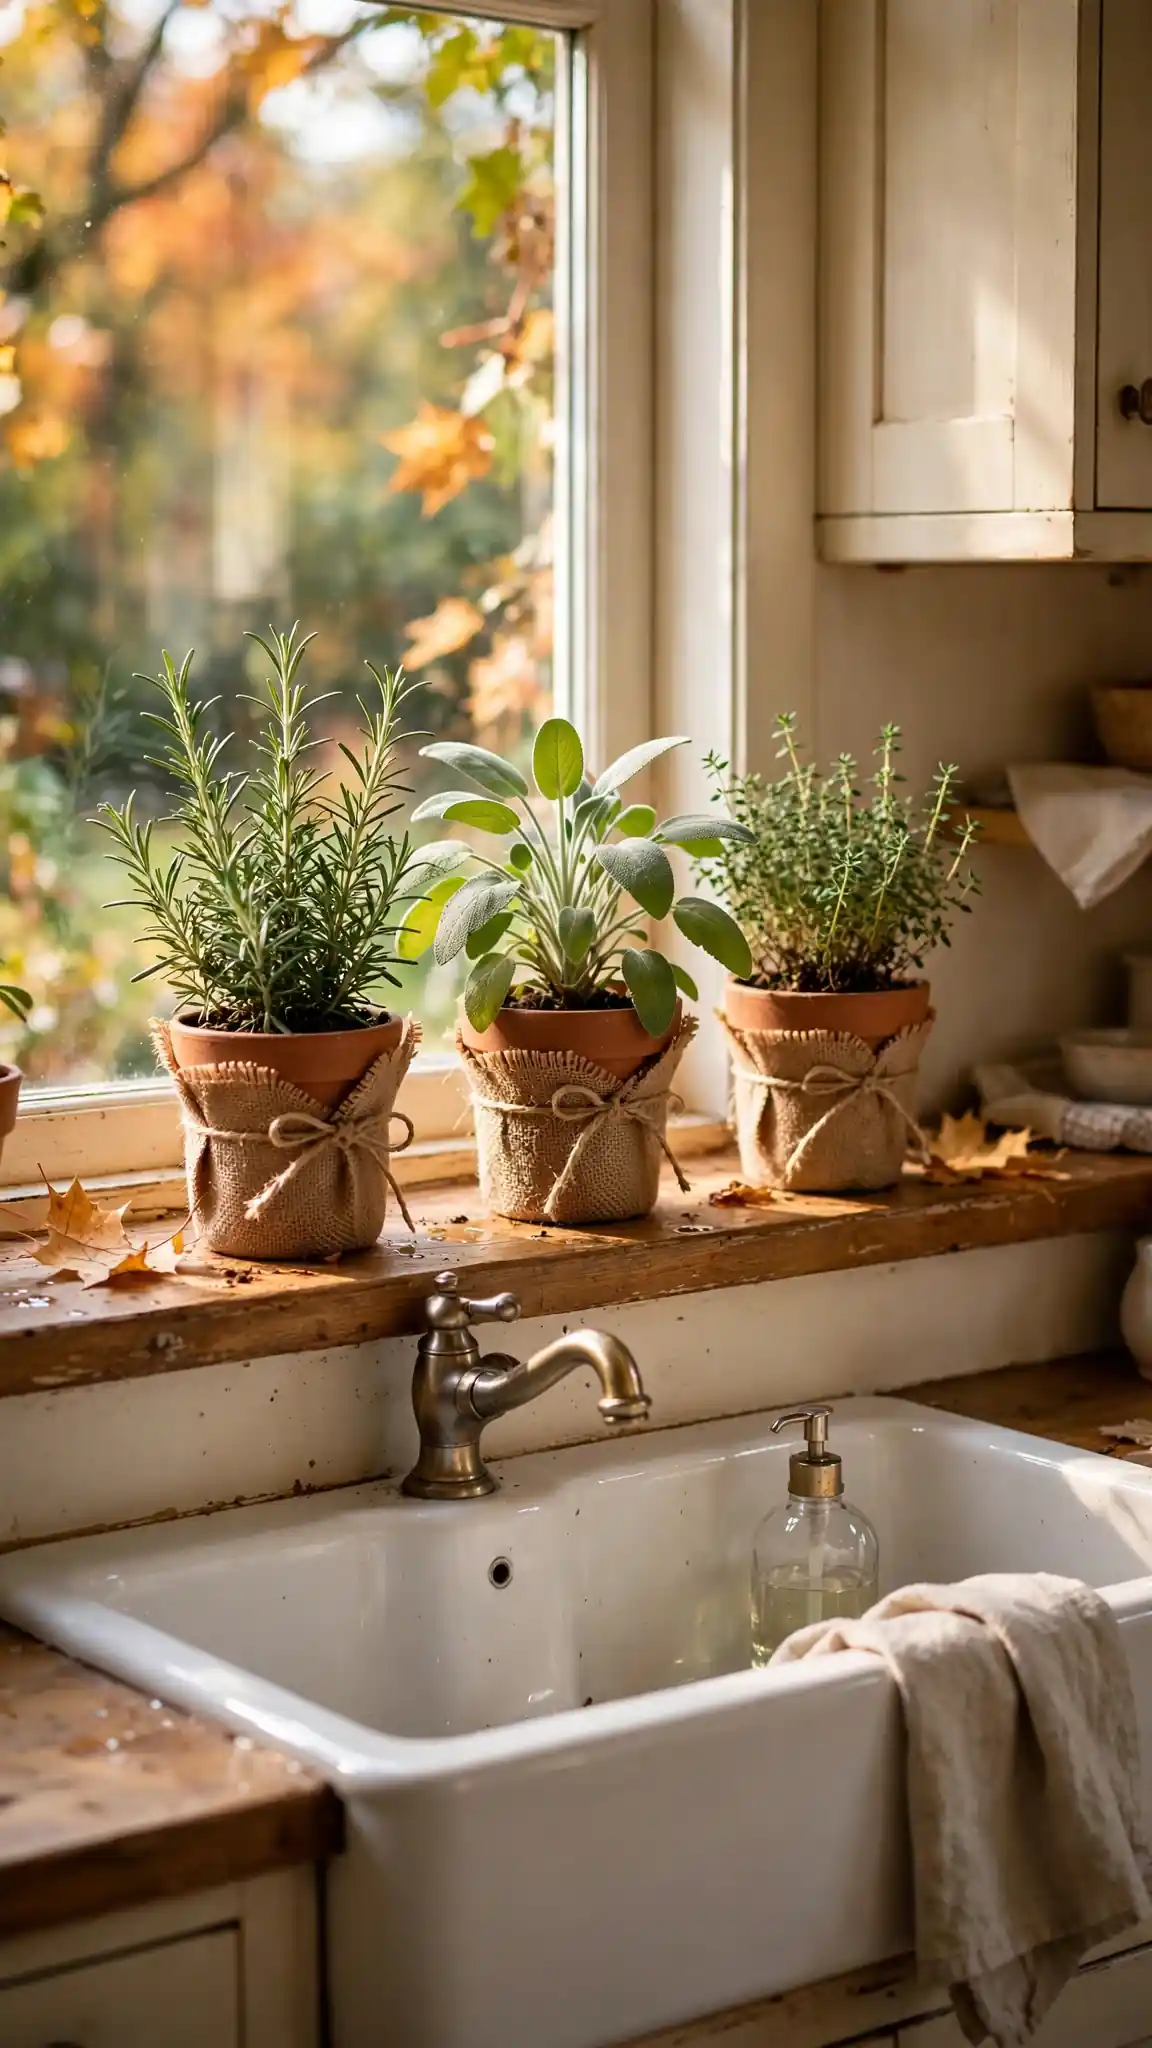
Pot fresh rosemary, sage, and thyme in four-inch terracotta pots, one dollar each at Home Depot, for decor you can actually cook with. Herb starter plants cost about four dollars each in the garden center through October, and they thrive on a sunny kitchen windowsill with watering twice a week. Wrap each pot in a square of burlap tied with twine for a finished harvest look that hides the plain orange clay. Line three to five pots along the windowsill above your sink, where they get daily light and stay within arm’s reach while cooking. Snipping fresh sage for your Thanksgiving stuffing from your own windowsill garden feels wonderfully satisfying.
Tuck a small chalkboard plant marker, one dollar for a four-pack at Dollar Tree, into each pot labeled with the herb name in white chalk. If your windowsill is narrow, use a twelve-inch wooden window box for eight dollars at Michaels to hold three pots in a single neat row. Bring the pots indoors before the first frost and they will keep producing through winter with enough light. Terracotta wicks moisture fast, so check the soil daily and water when the top inch feels dry to the touch. Pro tip: pinch back the top leaves of basil and thyme weekly to encourage bushy growth instead of tall, leggy stems.
15. Cinnamon Bundles Tied to Cabinet Knobs
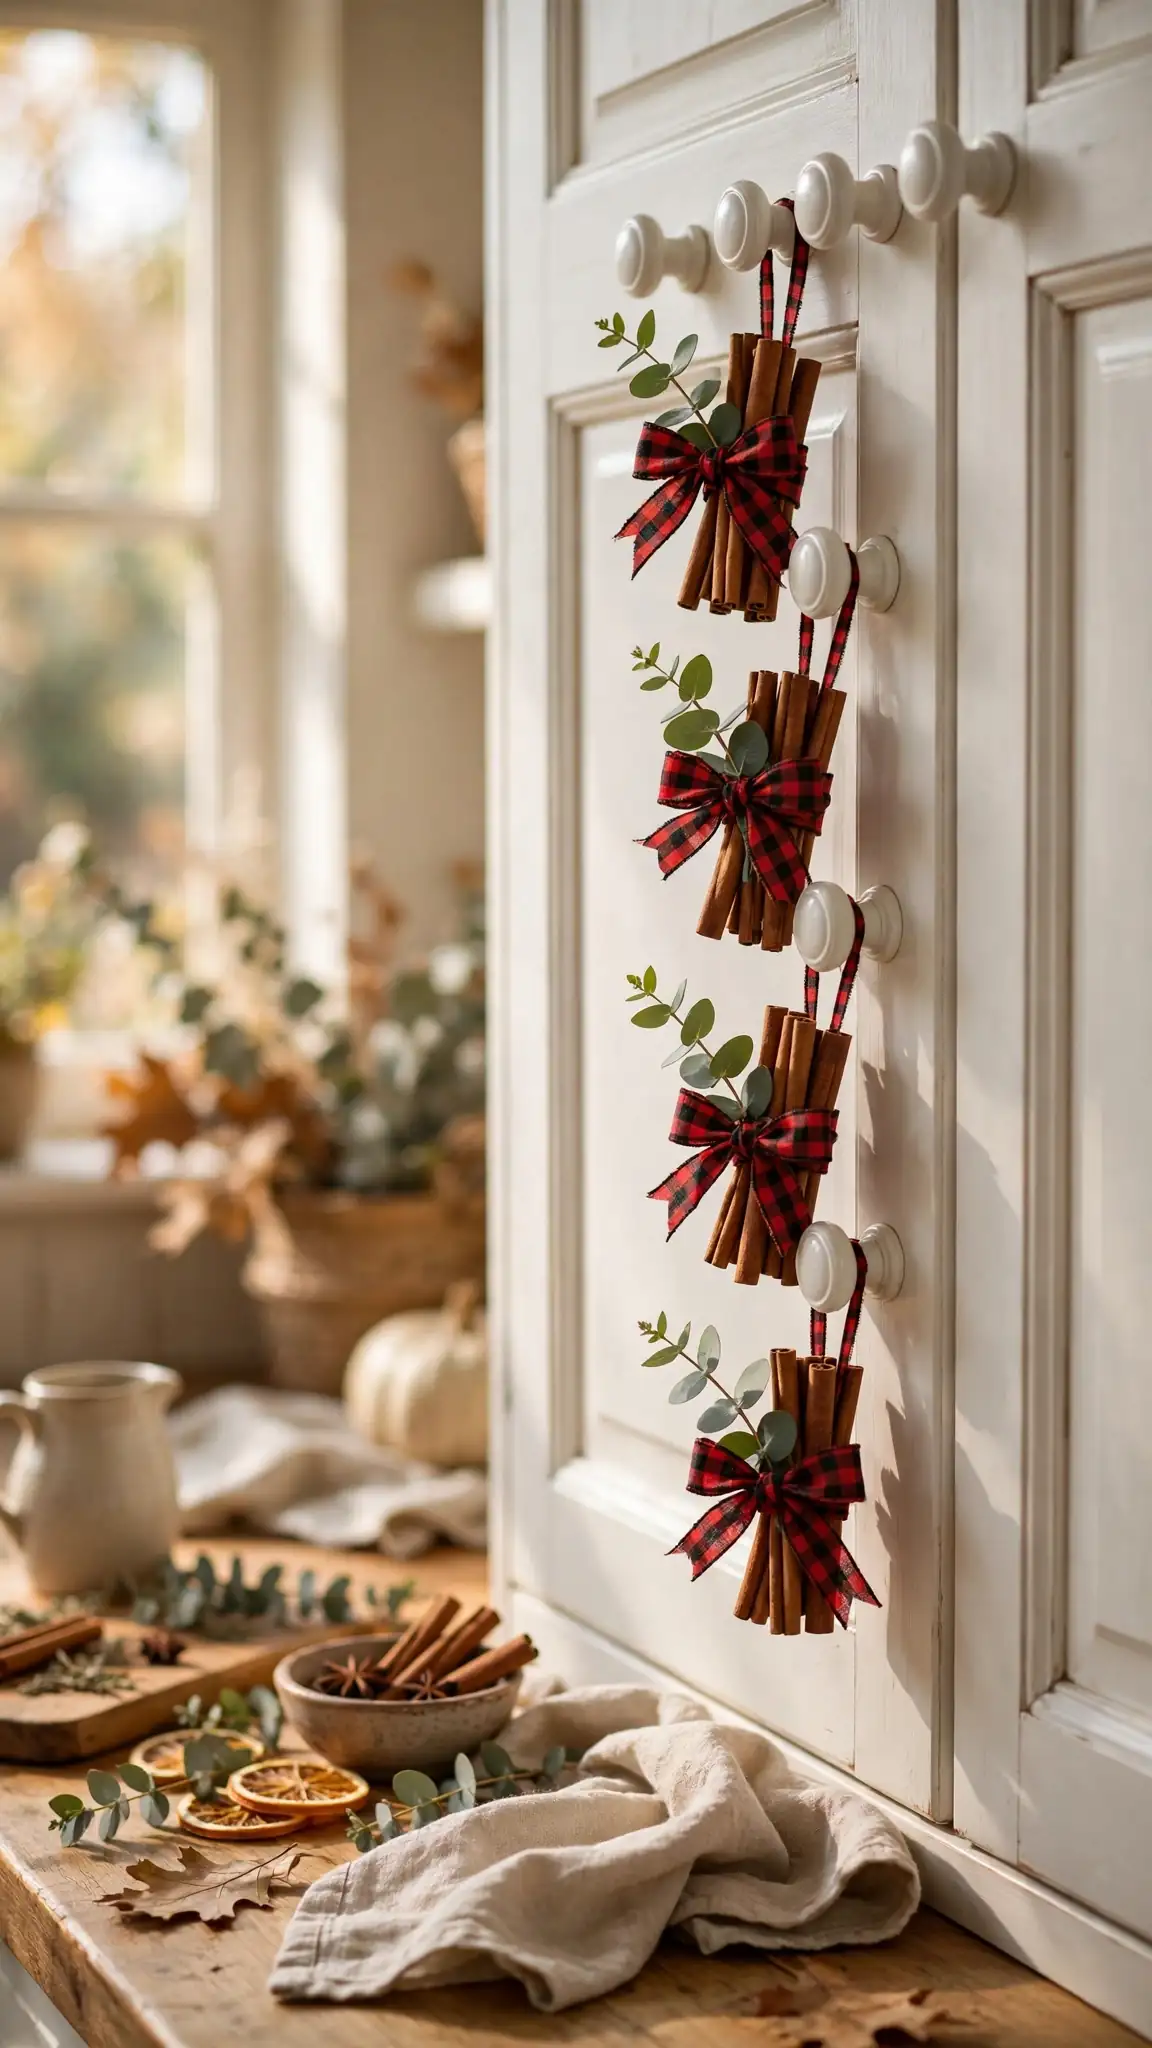
Tie bundles of five cinnamon sticks with plaid ribbon and hang one from every other cabinet knob for a subtle spicy accent throughout the kitchen. Cinnamon sticks cost about three dollars for a twenty-count bag at Big Lots or Aldi in the fall baking aisle. Cut twelve-inch ribbon lengths in buffalo plaid or burnt orange, loop each bundle, and simply drape it over the knob where the ribbon catches naturally. This five-minute project scents the air gently every time you open a cabinet, and guests always comment on the charming detail. The bundles also look adorable tied to the handles of a kitchen cart or the knobs of a pantry door.
Add a sprig of faux eucalyptus or a dried orange slice to each bundle for extra visual interest in farmhouse kitchens. Replace the cinnamon once a season, and toss the old sticks into a stovetop simmer pot for one last burst of fragrance before composting them. If you have small children who might pull the bundles down, hang them on upper cabinets only, well out of reach. Match the ribbon to your dish towels from idea two for a pulled-together look across the whole kitchen. Pro tip: dab one drop of cinnamon essential oil on each bundle monthly to refresh the scent without buying new sticks.
16. Woven Basket of Gourds by the Coffee Bar
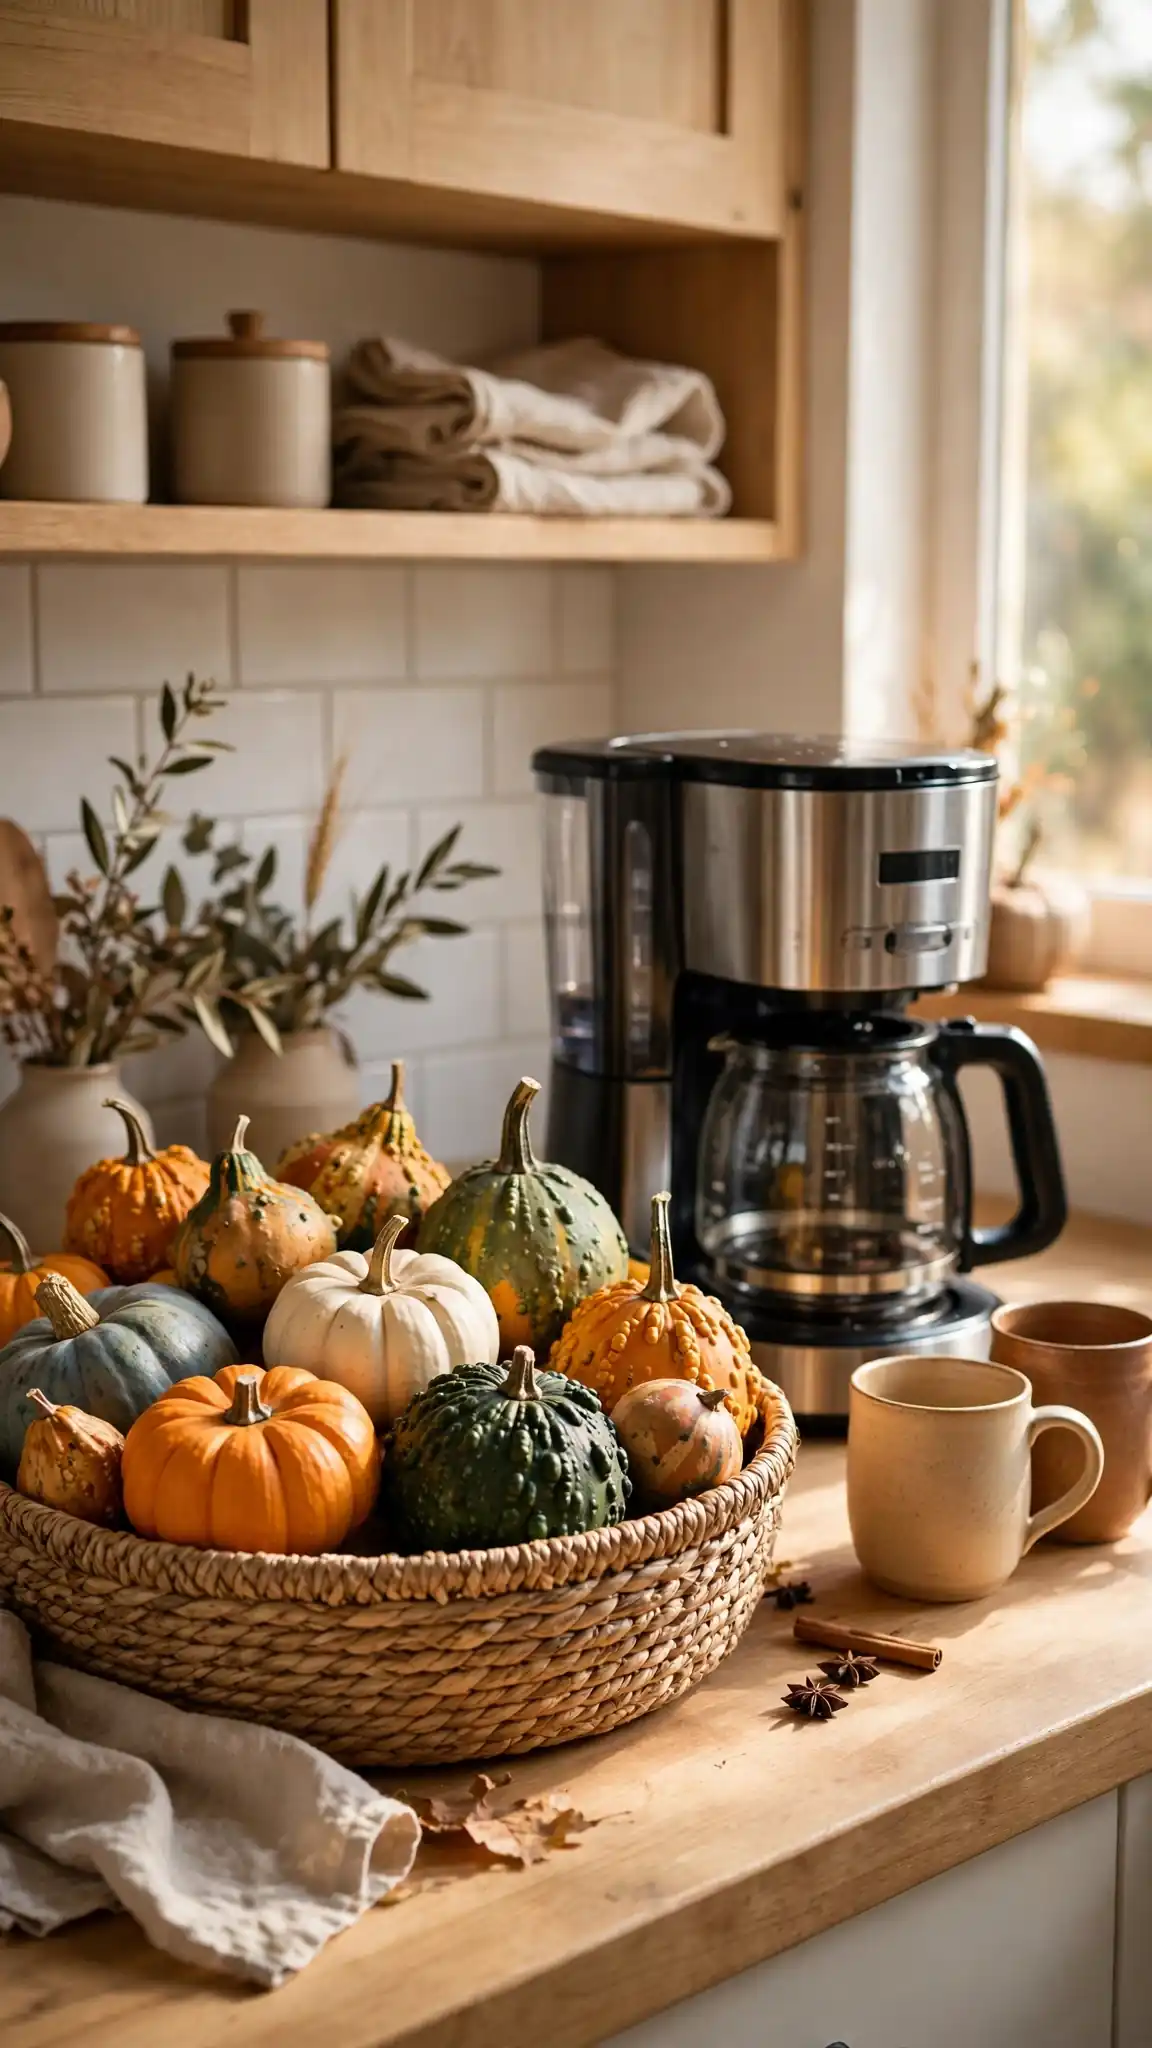
Set a medium seagrass basket, ten dollars at Target, beside your coffee maker and fill it with an eight-dollar bag of mixed gourds from Aldi or a farmers market. Choose gourds in varied shapes, warty, striped, and smooth, for the most interesting display, and nestle them in shredded kraft paper so they sit at different heights. The basket corrals the gourds neatly while adding warm natural texture next to your mugs and coffee supplies. This corner vignette makes your morning routine feel seasonal without taking up precious counter space near the stove. When guests visit, the basket doubles as a conversation piece about your local fall produce.
Drape a small plaid napkin over the basket rim for a cozy touch that ties into your autumn kitchen. After Thanksgiving, replace the gourds with pinecones and ornaments to transition the basket into Christmas decor. Wipe gourds with a vinegar-damp cloth before displaying to remove field dirt and help them last six to eight weeks indoors. If your coffee bar is tiny, use a six-inch basket with just three gourds for the same effect in miniature. For a wider selection of seasonal basket fillers and tabletop accents, explore the Target fall tabletop decor for affordable pieces that match this look. Pro tip: choose gourds with intact stems, since broken stems invite rot and shorten the display life dramatically.
17. Simmering Potpourri Gift Jars for the Stovetop
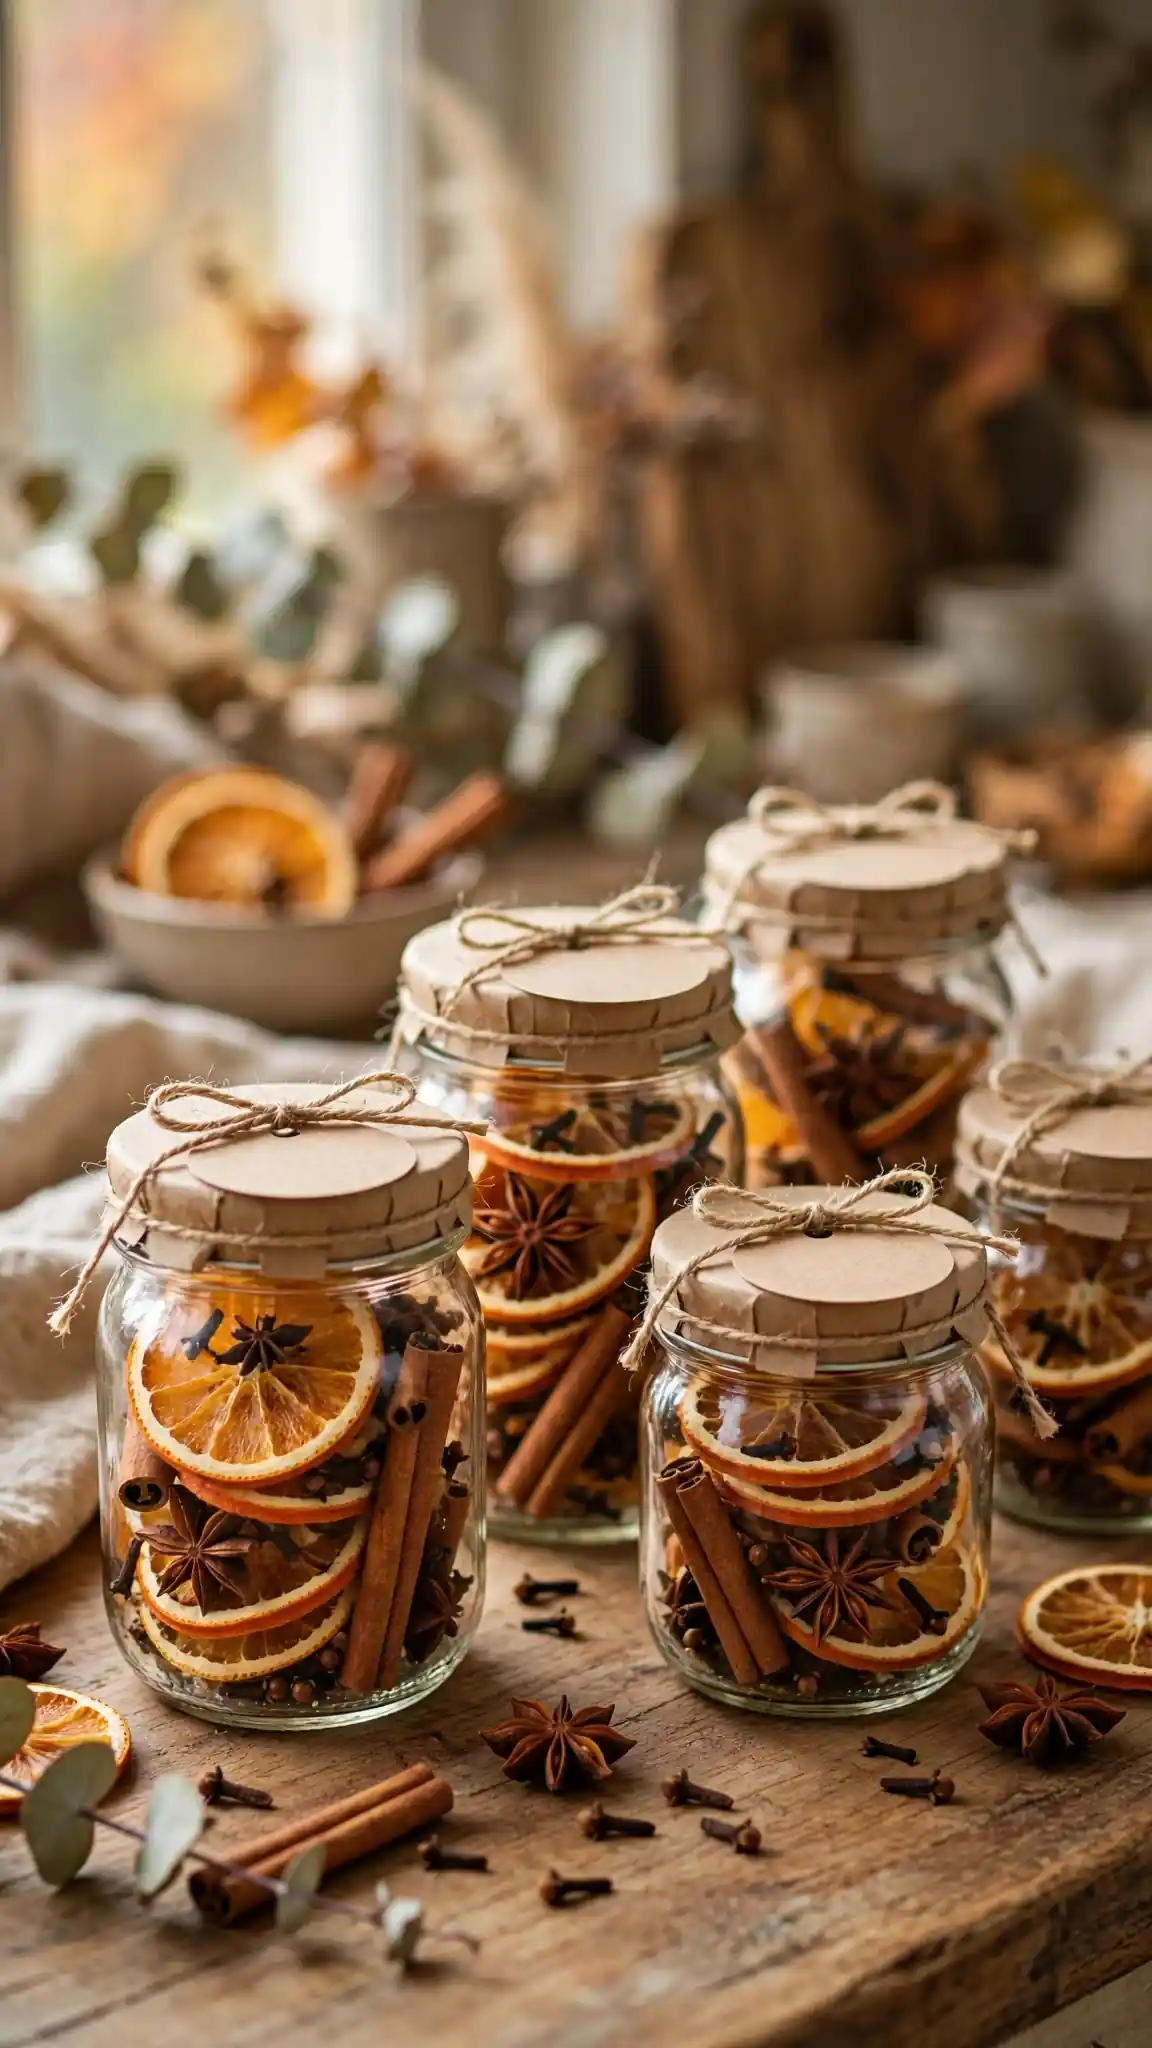
Layer dried orange slices, cinnamon sticks, whole cloves, and star anise in eight-ounce mason jars for gifts that make any kitchen smell like autumn. Dried orange slices cost about seven dollars for a bag on Amazon, or slice and dry your own at two hundred degrees for three hours. Fill each jar three-quarters full, tuck in a sprig of dried rosemary, and screw on the lid with a kraft paper gift tag tied in twine. Include a small card reading simmer in two cups of water on low for instant fall fragrance. Each jar costs under four dollars to assemble, making them perfect hostess gifts, teacher gifts, or neighbor surprises through the season.
Keep one jar for yourself and simmer it on the stovetop whenever guests are coming, refilling the water as it evaporates through the evening. Never leave a simmering pot unattended, and keep the heat on the lowest setting to avoid boiling the pot dry. After the holidays, refresh the jars with dried cranberries and pine sprigs for a Christmas version of the same gift. Store assembled jars in a cool, dark pantry for up to six months before the citrus oils fade. Pro tip: add a teaspoon of vanilla extract to the simmer water for a warm bakery scent that makes visitors think you have been baking all day.
18. Buffalo Check Placemats from Remnant Fabric
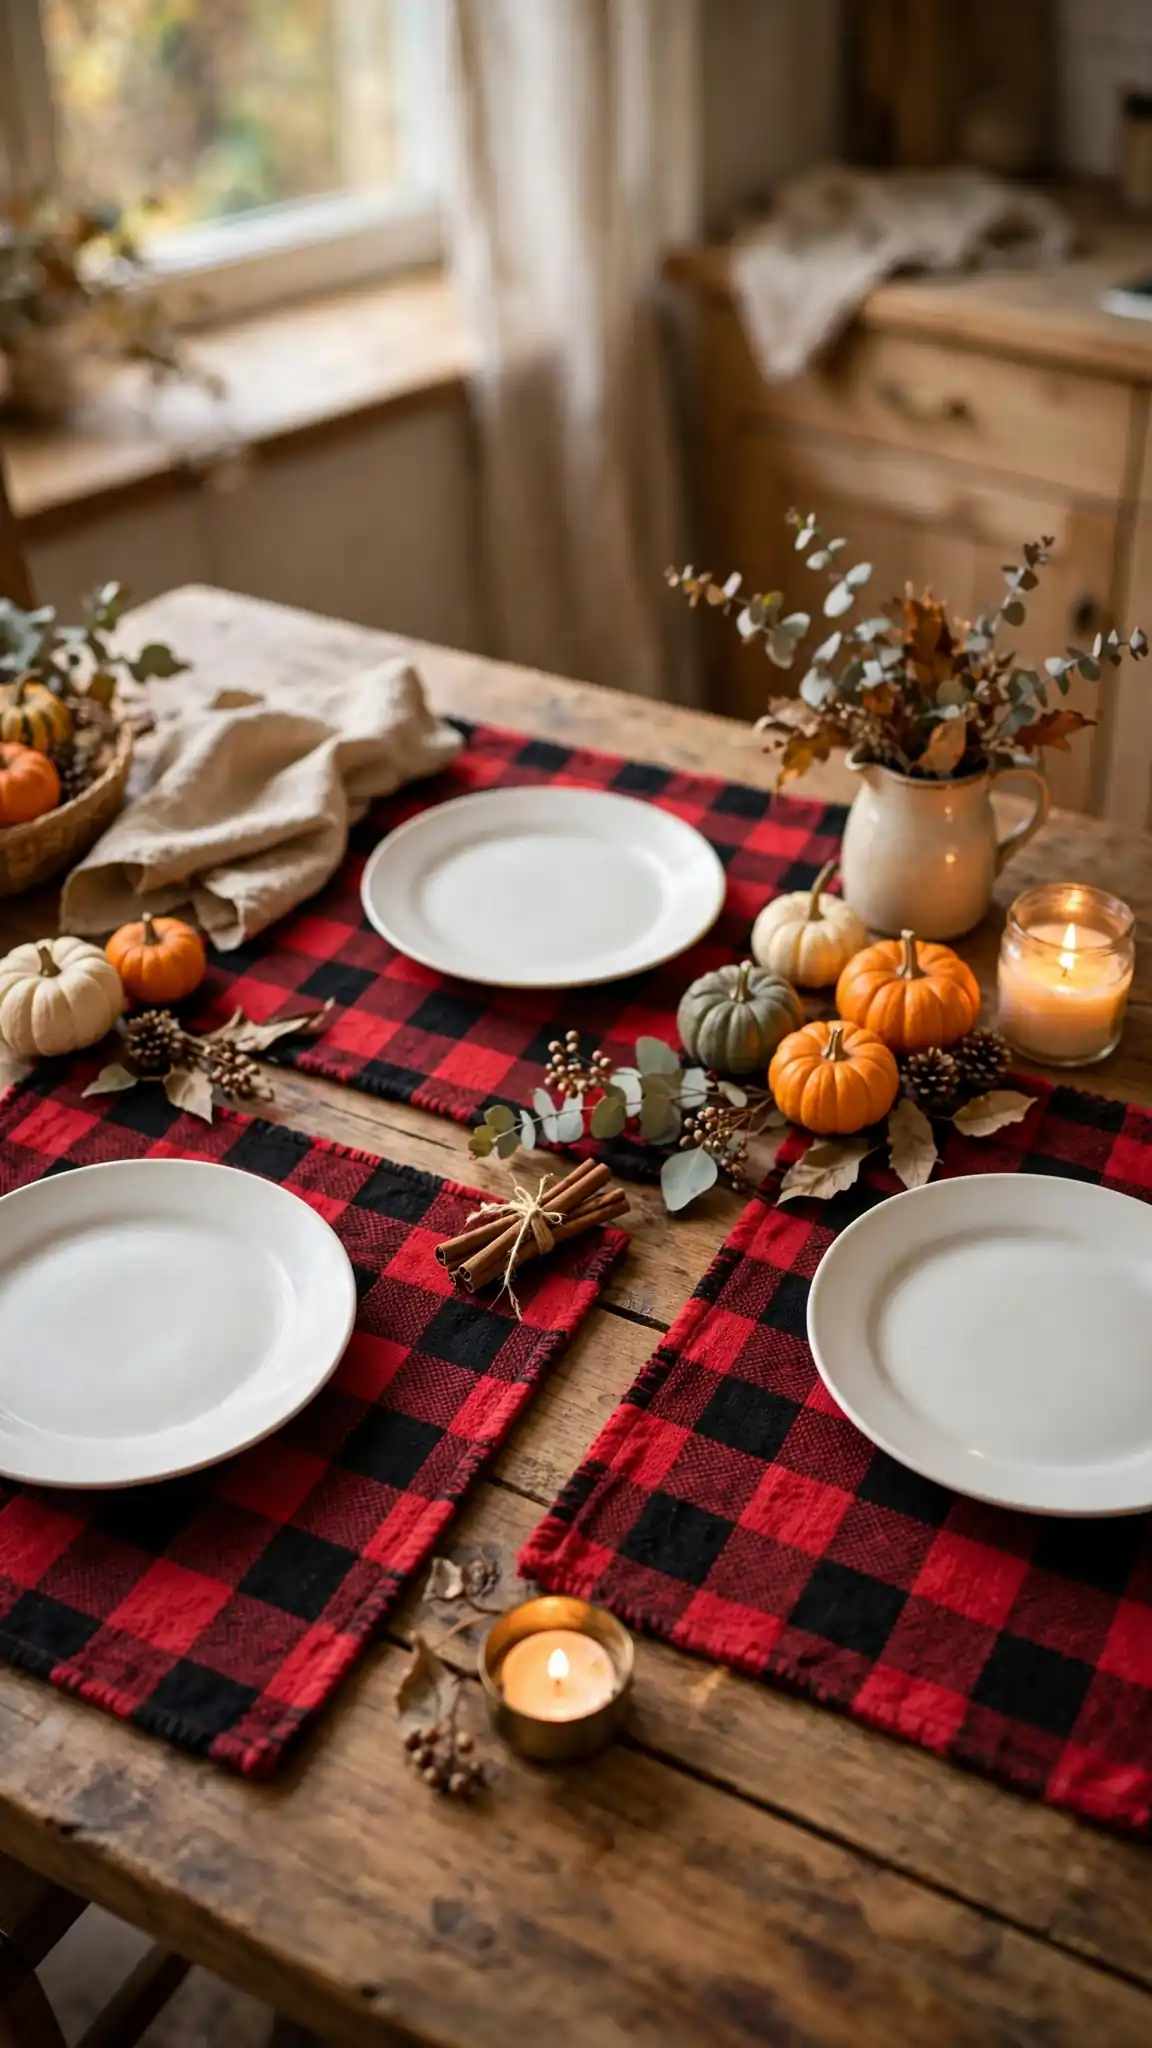
Buy buffalo check fabric remnants at Joann, where end-of-bolt pieces often sell for four dollars per yard in the clearance bin. Cut six twelve by eighteen inch rectangles, which yields a full set of placemats from just over one yard of forty-four-inch-wide fabric. Fold each edge under half an inch and press with an iron, then secure with iron-on hem tape for a completely no-sew project that takes under an hour. The classic red-and-black or neutral tan-and-cream checks instantly read as autumn at the table. These washable placemats protect your table from hot plates while pulling your whole fall tablescape together.
Back each placemat with inexpensive white felt, two dollars a yard at Walmart, for extra heat protection and a finished look on both sides. Mix buffalo check placemats with the burlap runner from idea eleven for a layered farmhouse table that looks straight out of a magazine. Machine wash on gentle and tumble dry low, then press quickly to keep the edges crisp through many uses. Cut leftover scraps into napkin-size squares for matching cocktail napkins at zero extra cost. Pro tip: choose a medium-scale check rather than tiny gingham, because larger checks read bolder and more modern on the table.
19. Paper Pumpkin Magnet Board on the Fridge Door
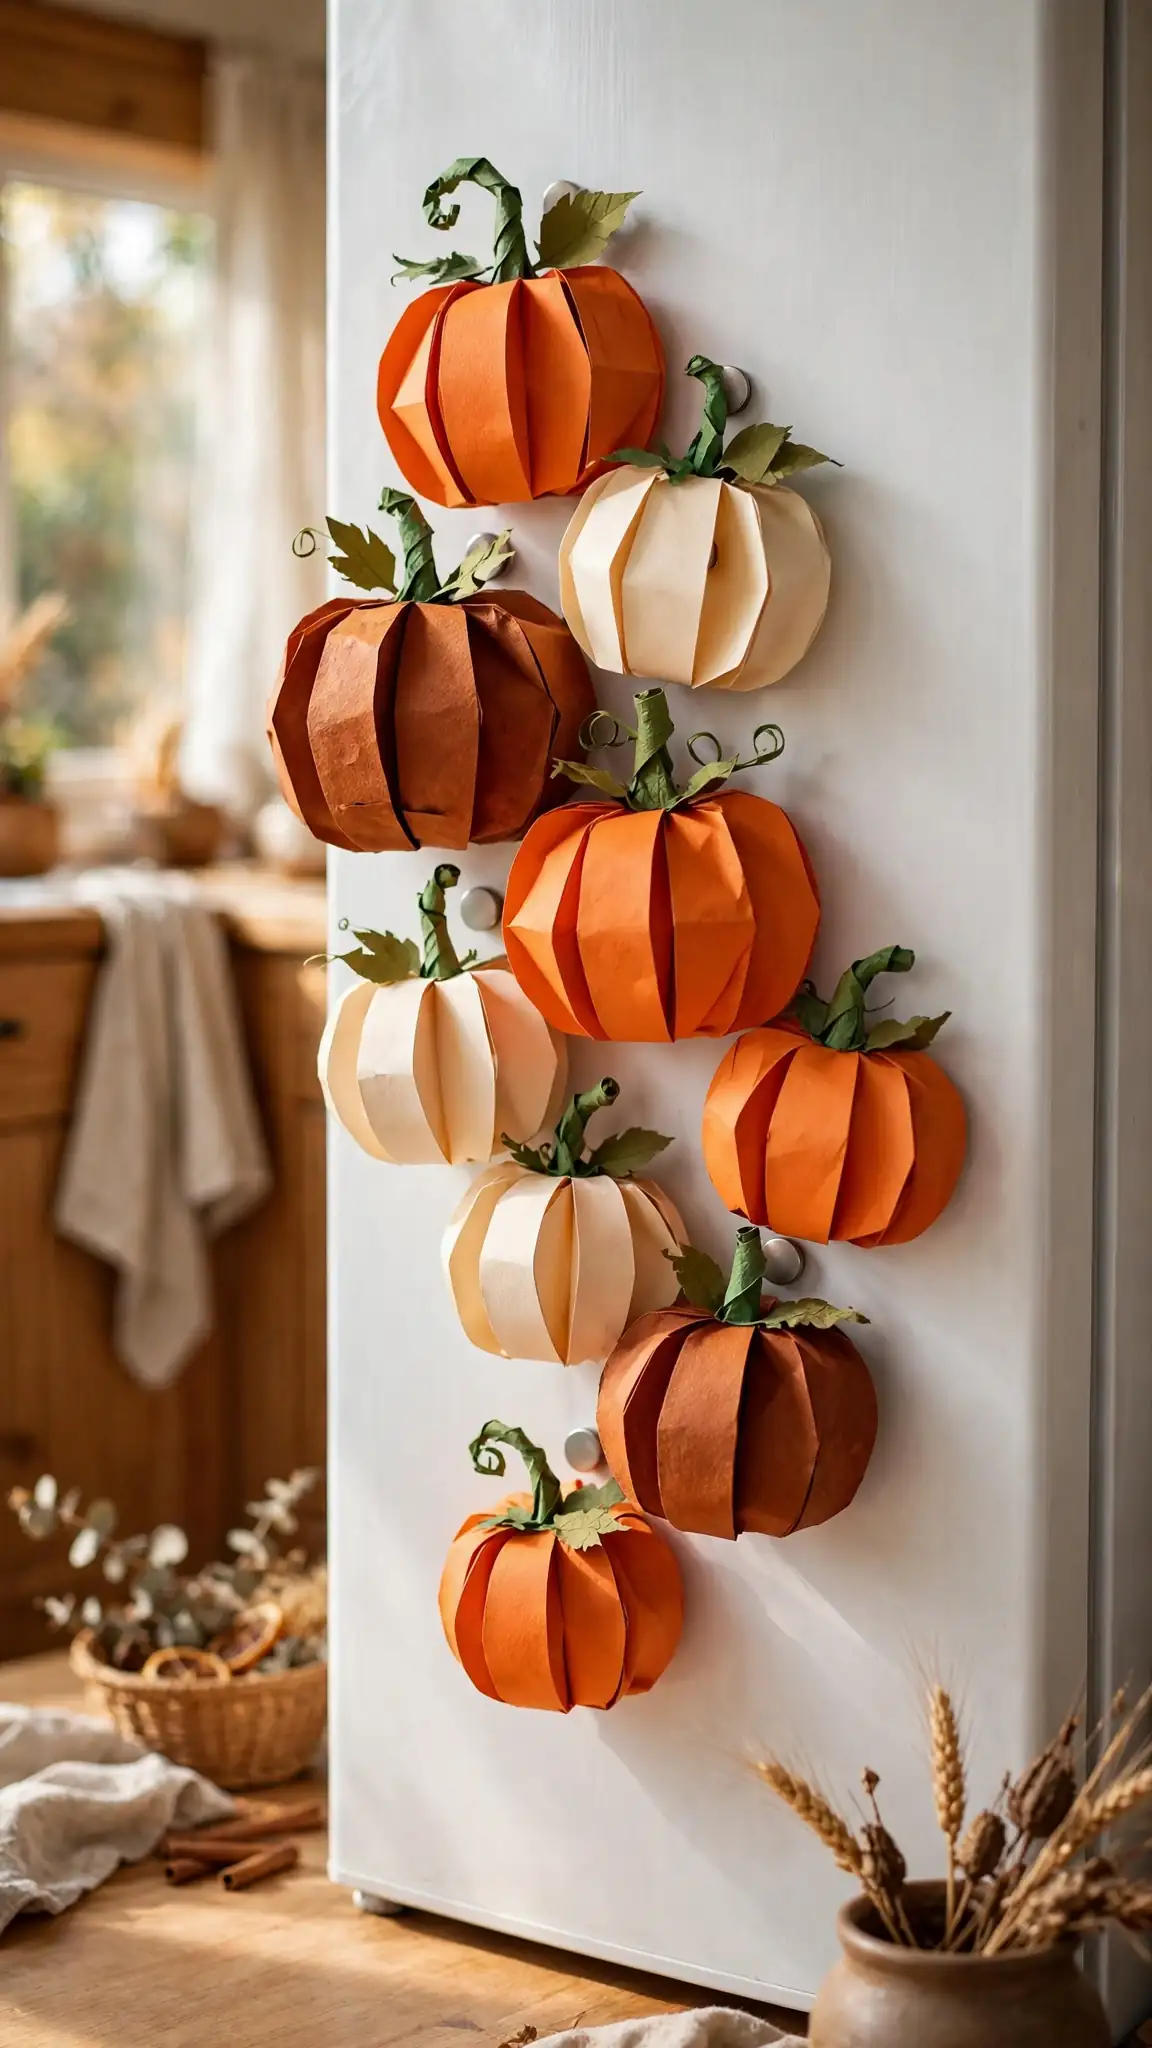
Cut pumpkin shapes from orange, rust, and cream cardstock, seventy-five cents a sheet at Michaels, in three graduated sizes for a layered look. Glue a small adhesive magnet, four dollars for a fifty-pack on Amazon, to the back of each pumpkin and arrange them in a cascading cluster on your refrigerator door. Add green paper stems and curly pipe-cleaner vines for extra detail that kids love to help create. The whole display costs under six dollars and takes twenty minutes, yet it brings a burst of handmade autumn color to the busiest spot in the kitchen. Rearrange the pumpkins weekly into new patterns to keep the display feeling fresh.
Write family members’ names on the pumpkins with a gold paint pen to turn the display into a fun fall seating chart for Thanksgiving dinner. Laminate the paper pumpkins with clear contact paper if you want them to survive sticky little fingers through the whole season. This is a perfect rainy-day craft for kids, since there is no heat, no paint, and no mess beyond paper scraps. Store the flat pumpkins in a manila envelope between seasons and they will last for years. Pro tip: use a pumpkin-shaped paper punch for the smallest size to get perfectly uniform mini pumpkins in seconds.
20. Mini Chalkboard Menu Board with Fall Recipes
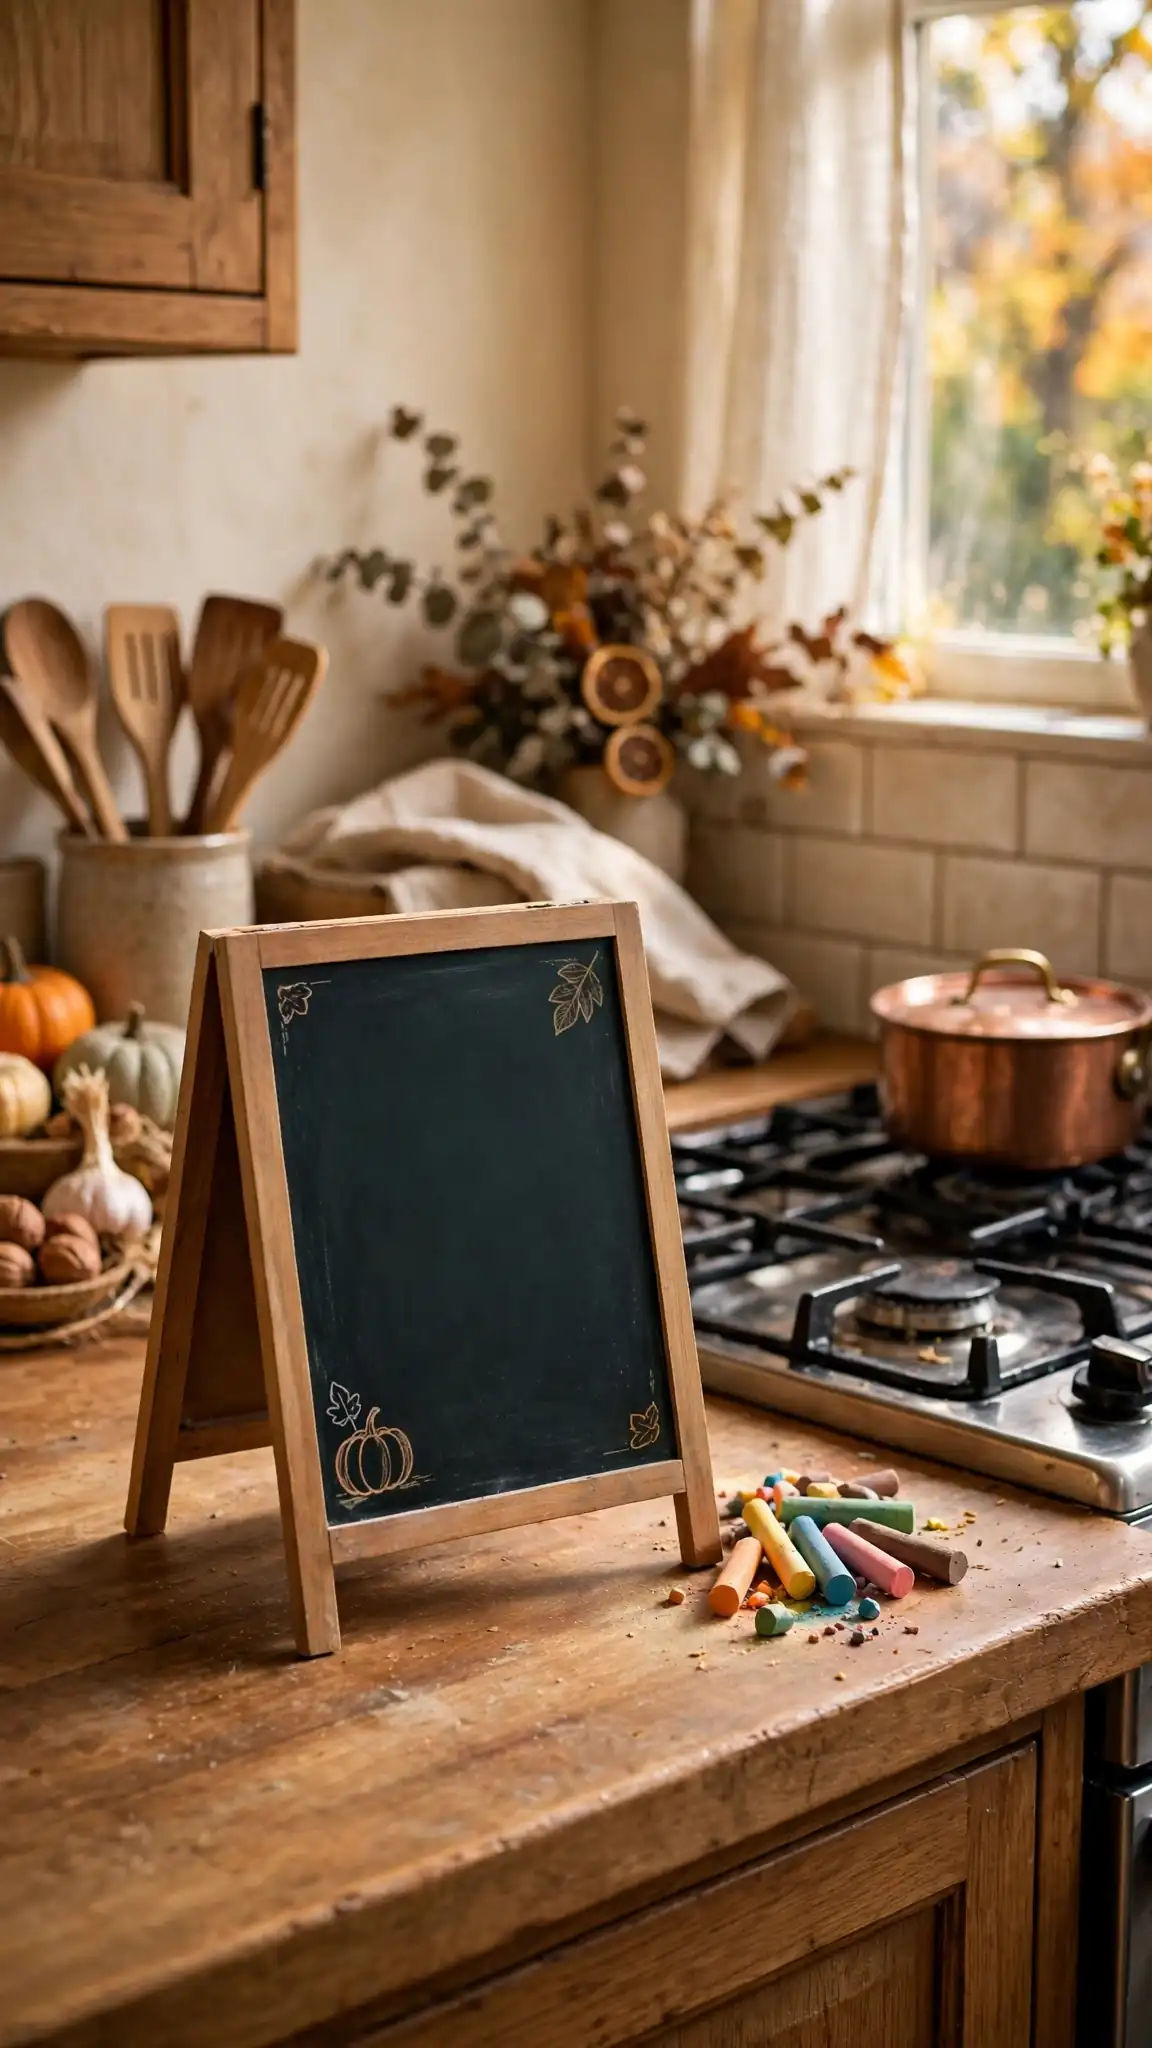
Prop a twelve-inch A-frame chalkboard, eight dollars on Amazon, on your kitchen counter and write your weekly fall menu in colorful chalk markers. List Monday’s butternut squash soup, Wednesday’s apple cider pork chops, and Friday’s pumpkin pancakes to build delicious anticipation all week. The board doubles as decor and a practical planning tool that ends the nightly what is for dinner debate. Lean it against the backsplash near the stove or stand it on the island where everyone can read it. Restaurants use menu boards because they work, and your family will love the cozy bistro feeling it brings to an ordinary kitchen.
Doodle small pumpkins, leaves, and mugs of cocoa in the corners with orange and gold chalk markers for seasonal flair. Update the menu every Sunday evening as a calming weekly ritual, and let kids pick one dinner to feature with their name beside it. Wipe the board with a damp cloth between weeks to prevent chalk buildup that dulls the black surface. In December, switch the menu to holiday baking plans and cookie exchange dates without buying anything new. Pro tip: snap a photo of each week’s menu before erasing, so you build a personal archive of family-favorite fall meals to repeat next year.
21. Flannel Table Runner Layered Under Your Tablecloth
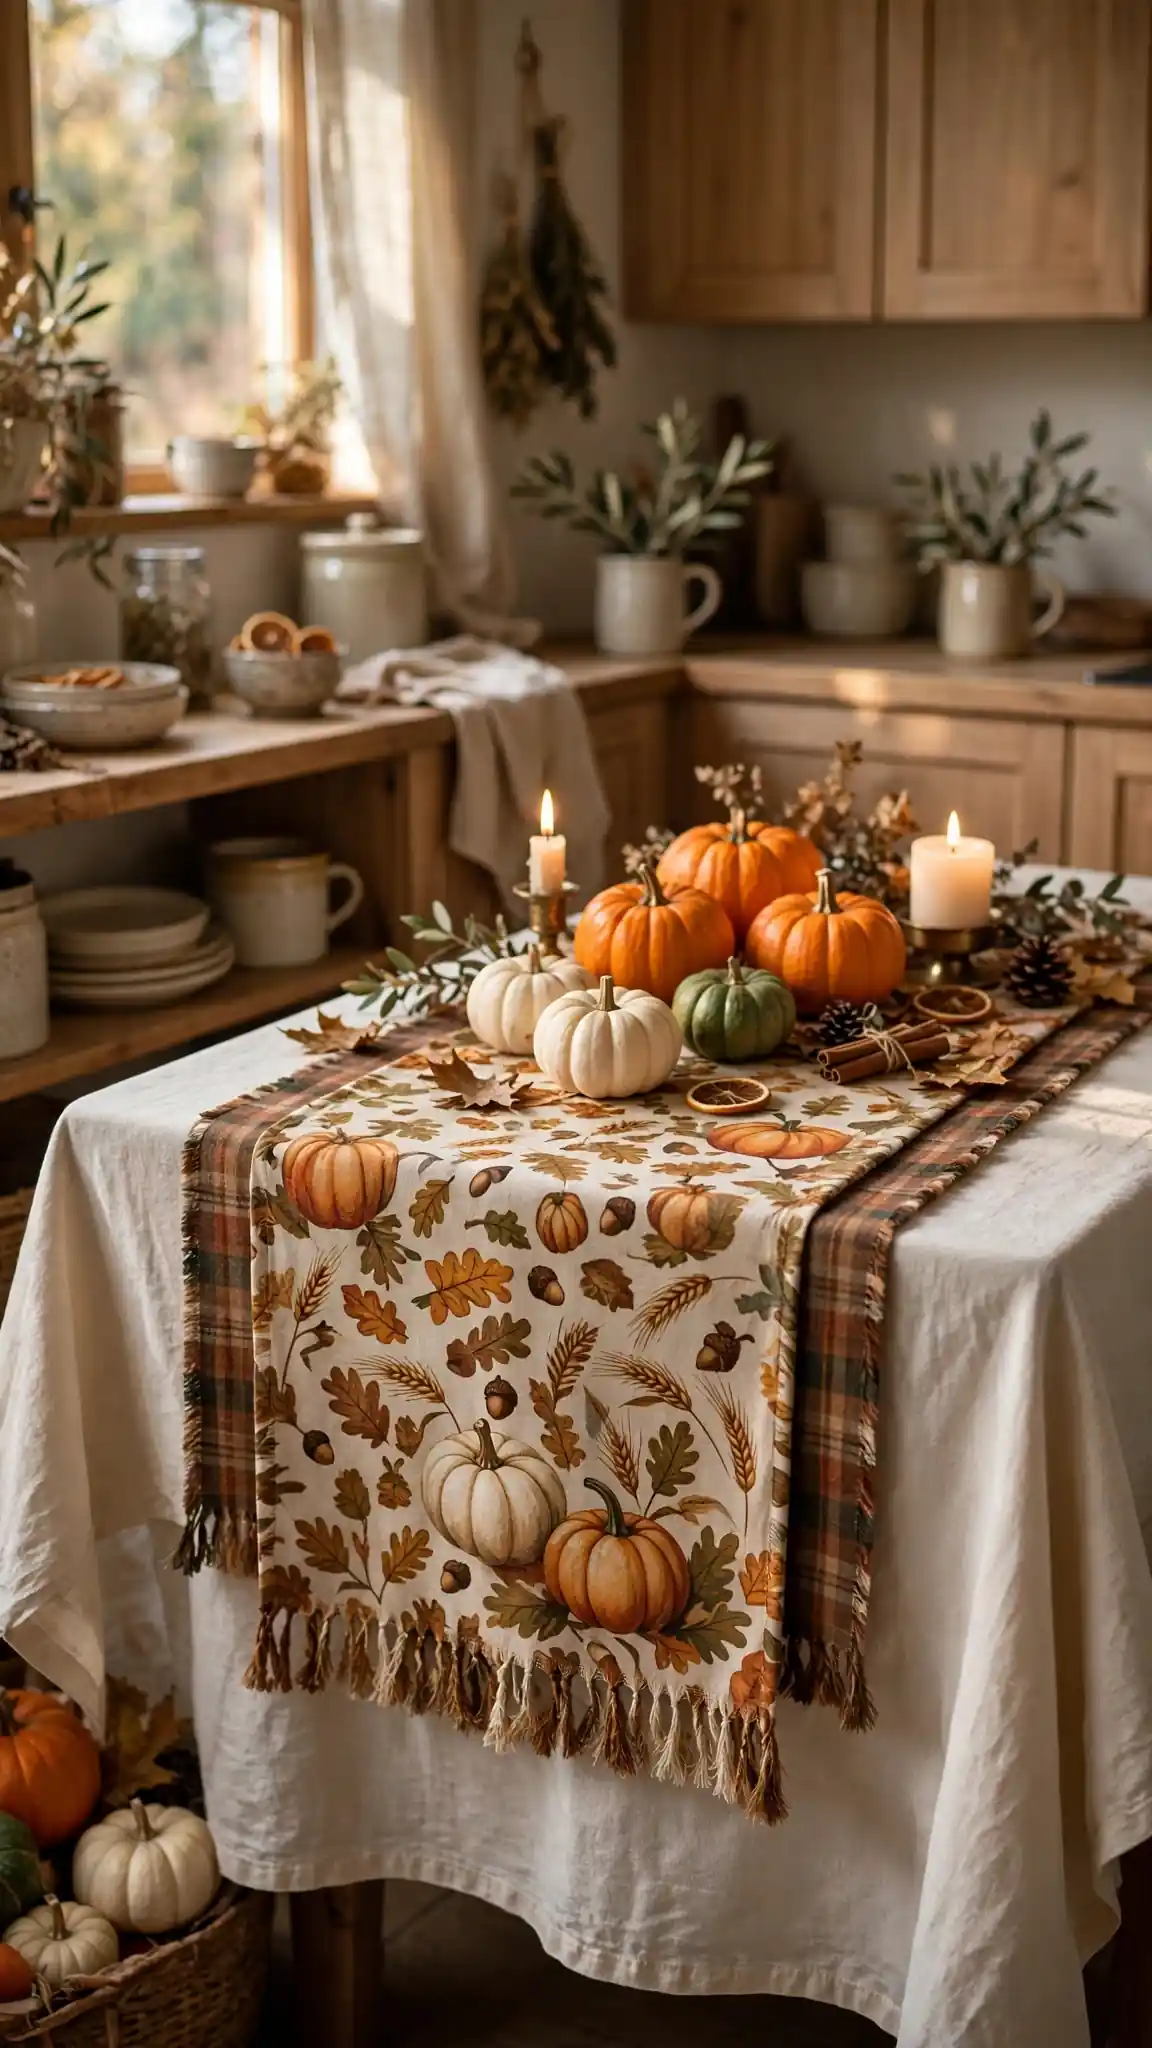
Buy one and a half yards of harvest-print flannel, six dollars per yard at Walmart, and fringe the short ends by cutting half-inch strips for a cozy no-sew runner. Lay the flannel down the center of your table first, then drape your regular tablecloth over it so two inches of flannel peek out on each side. The unexpected layer of soft plaid or pumpkin print adds warmth and texture that a single tablecloth cannot achieve alone. Flannel washes beautifully and gets softer with every cycle, so this runner survives the whole season of spills and gatherings. Choose patterns with rust, mustard, and sage to echo the classic autumn palette.
Cut the flannel into matching placemats with fringed edges for a coordinated set that costs under twelve dollars total. For round tables, cut the flannel into a sixty-inch circle and let it drape as a full table topper under a sheer overlay. This layering trick also works on kitchen islands and sideboards, where a flannel runner softens hard stone or wood surfaces. Store the runner folded in your linen closet, since flannel resists wrinkles better than cotton. Pro tip: wash flannel once before cutting to pre-shrink it, so your finished runner keeps its exact size through the season.
22. Harvest Swag Tied Over the Kitchen Window
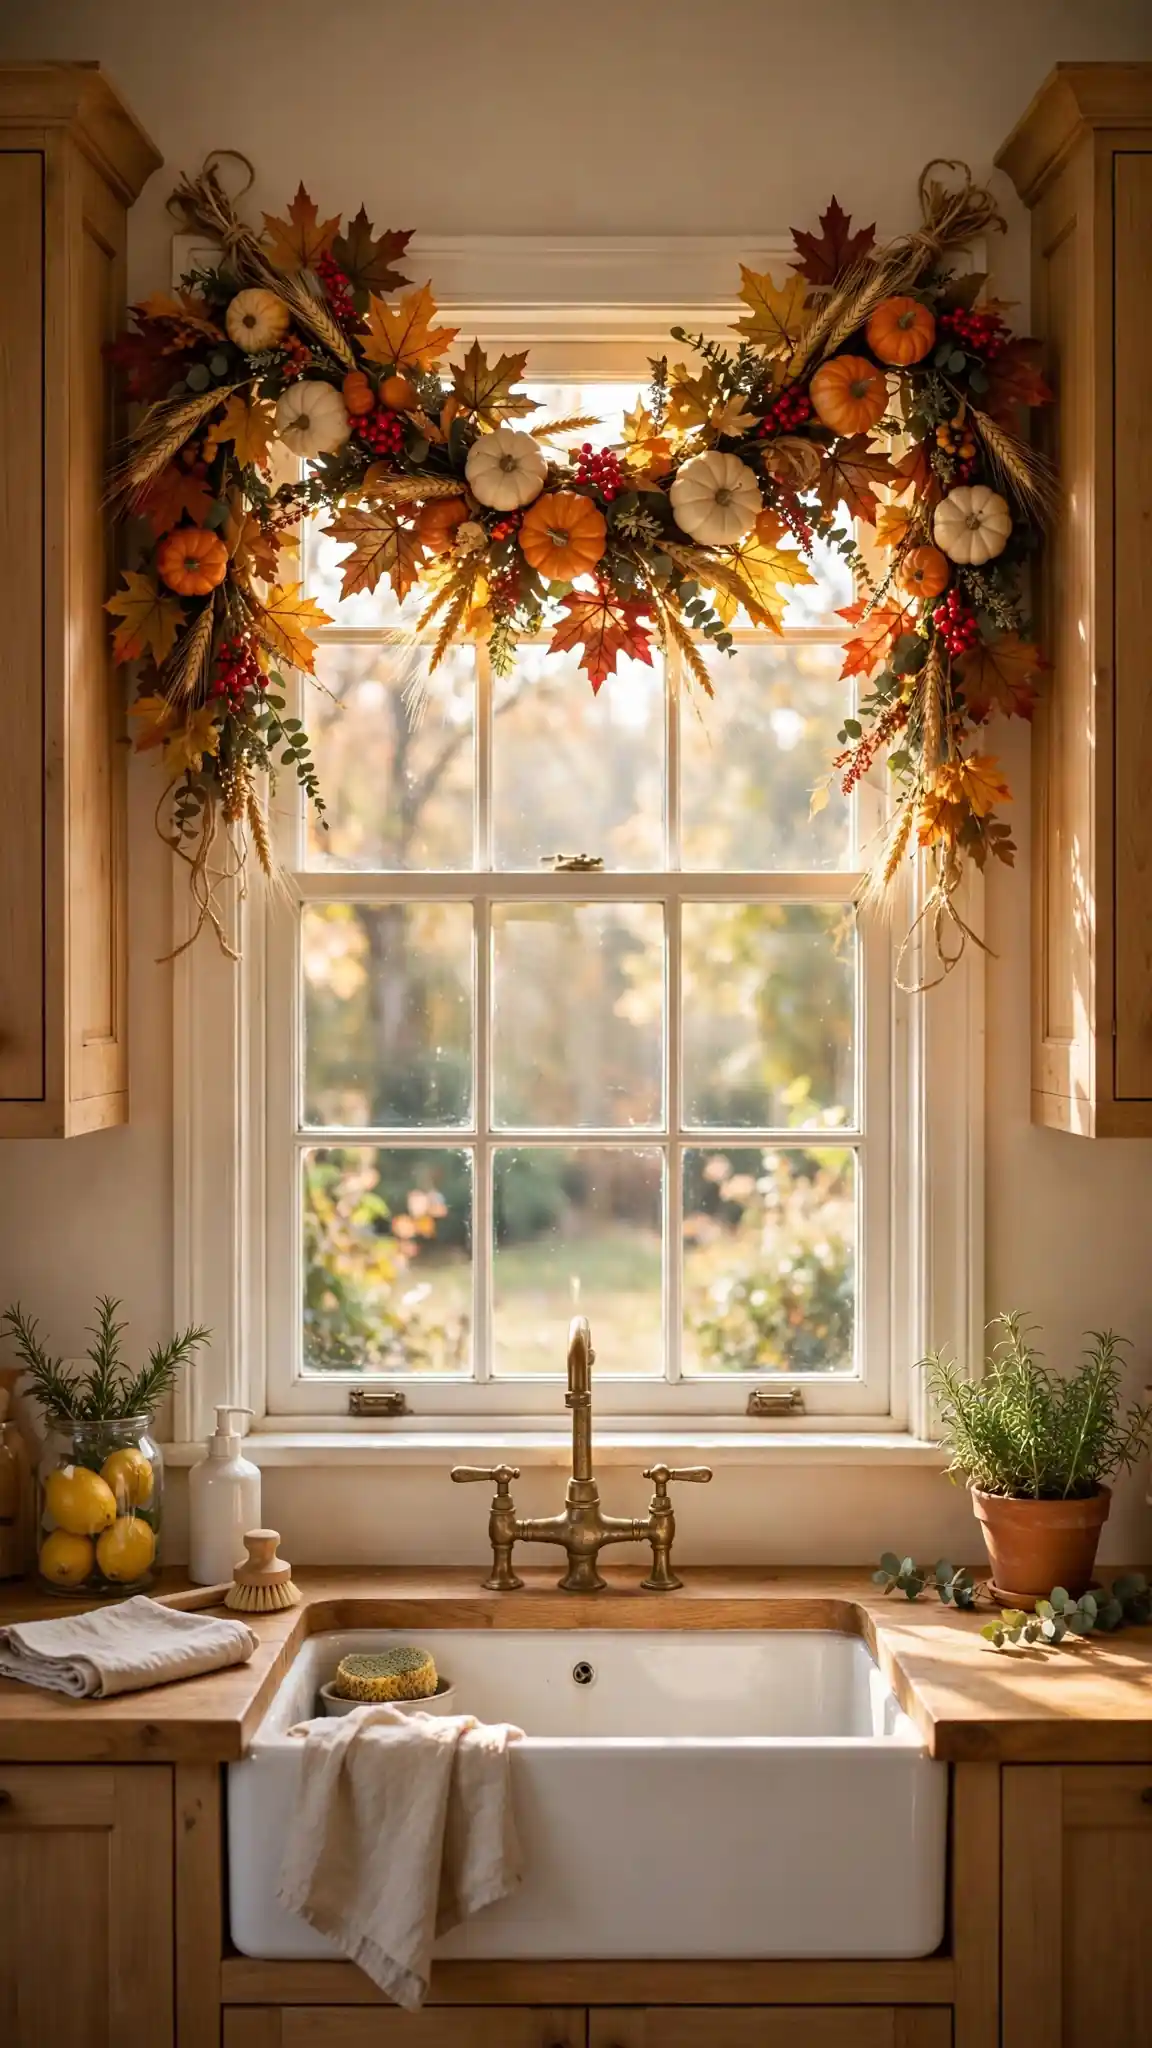
Hang a twenty-four-inch faux harvest swag, twelve dollars at Hobby Lobby with their weekly coupon, centered over your kitchen window for a gorgeous finishing touch. Secure it with a small suction-cup hook rated for three pounds, three dollars for a two-pack at Target, pressed firmly onto the clean glass. The swag’s mix of maple leaves, berries, mini pumpkins, and wheat frames your window like a natural valance that never needs laundering. Morning light filtering through the faux foliage casts beautiful dappled shadows across your sink and counters. This single piece ties together every other project in the room and takes five minutes to hang.
Fluff the swag branches outward and downward after hanging so it looks full and natural rather than flat from its packaging. For wide windows, hang two swags overlapping in the center with a plaid bow covering the join for a custom thirty-six-inch display. Take the swag down before deep-cleaning windows to avoid water spots on the faux leaves, then rehang in seconds. Store it hanging in a garment bag so the branches keep their shape for next autumn, ready for another round of fall kitchen decor diy. Pro tip: add a string of battery fairy lights woven through the swag for a softly glowing window display on dark October evenings.
Final Thoughts
These twenty-three fall kitchen decor diy ideas prove that a cozy autumn kitchen does not require a big budget or professional decorating skills. Most projects cost under ten dollars, take less than an hour, and use supplies from stores you already visit every week. Start with two or three favorites, like the pumpkin tray centerpiece and the cinnamon dish towels, then add more each weekend as the season unfolds. Your kitchen is where family gathers, homework happens, and holiday memories are made, so it deserves to feel as warm and welcoming as the rest of your home this fall.
The real magic of fall kitchen decor diy is how personal each project becomes when you make it yourself. That hand-painted pumpkin carries your brushstrokes, the paper garland holds an afternoon of laughter with your kids, and the simmering potpourri smells like your family’s autumn. Take photos of your finished kitchen and share them with friends who need inspiration, because handmade seasonal decor always sparks the best conversations. When Thanksgiving arrives, you will already have a warm, festive kitchen ready to welcome everyone you love. Save this guide and revisit it each September, because these simple crafts only get easier and more enjoyable every year you repeat them.
FAQs
New to seasonal decorating and wondering where to begin with your kitchen? These are the questions readers ask most about fall kitchen projects, from budgets and timing to keeping everything safe around heat and little hands. The answers below draw on the twenty-three ideas above and years of reader feedback. Read through them before you shop, and you will start your decorating with confidence instead of guesswork.
Whether you are decorating a tiny apartment kitchen or a spacious farmhouse, the same principles apply: start small, choose a color palette, and build your display one project at a time. This relaxed approach keeps decorating fun instead of overwhelming, and it leaves room in your budget for fresh pumpkins each month. Bookmark this page and return whenever you need a quick answer before your next fall decorating weekend.
How much does fall kitchen decor diy usually cost?
Most fall kitchen decor diy projects cost between three and twelve dollars each, and decorating a whole kitchen typically totals under forty dollars. Dollar Tree, Walmart, and Aldi offer the best prices on pumpkins, craft supplies, and seasonal accents. Reusing items like mason jars and baskets across seasons cuts costs even further.
What are the easiest fall kitchen decorations for beginners?
Start with the mini pumpkin tray centerpiece, plaid dish towels with cinnamon sticks, and the paper bag leaf garland. Each takes under thirty minutes, needs no special skills, and uses inexpensive supplies. These three projects alone can transform a plain kitchen into a cozy autumn space in one afternoon.
When should I start decorating my kitchen for fall?
Most decorators start in early to mid-September, right after Labor Day, when stores stock their best fall selections. Real pumpkins last longest when displayed from late September onward in cool indoor spots. Keep your fall kitchen decor up through Thanksgiving, then transition pieces toward Christmas.
How can I do fall kitchen decor diy in a rental?
Choose freestanding displays like trays, baskets, and canisters that need no wall mounting. Use Command hooks and magnetic strips for garlands and signs, since both remove cleanly without damage. Every project in this guide is renter-friendly except wall painting, which we skipped entirely.
Is it safe to use candles in fall kitchen decorations?
Real candles are safe only in enclosed glass hurricanes placed away from curtains, dried plants, and paper crafts. For worry-free decorating, use battery-operated LED candles, which look convincingly real and include timers. Never leave any open flame unattended, and keep all candles away from the stovetop.
How do I store fall kitchen decorations after the season?
Wrap fragile items in tissue paper and store them in labeled plastic bins in a dry closet or attic. Roll garlands around cardboard tubes to prevent tangling, and store wreaths flat or hanging in garment bags. Proper storage lets most fall kitchen decor last three to five seasons.





Leave a comment