



In a small kitchen, counter space is precious. When every appliance, utensil and spice jar ends up on the counter, cooking becomes frustrating and the room feels cluttered. The solution is smarter storage that uses walls, cabinet doors, corners and every hidden inch.
These 22 small kitchen storage ideas help you free up counters and keep essentials within reach. For related inspiration, see our open shelving kitchen ideas and these kitchen remodel on a budget ideas.
Principles for small kitchen storage:
- Go vertical with shelves, rails and hooks.
- Use cabinet doors and corners.
- Store rarely used items high or elsewhere.
- Declutter duplicates before organizing.
1. Wall-Mounted Rail With Hooks
A wall-mounted rail with hooks turns a bare backsplash into one of the hardest-working storage spots in your kitchen. Mount a 24- to 36-inch stainless steel rail to studs or with heavy-duty drywall anchors, then add S-hooks for spatulas, ladles, small saucepans, and oven mitts. IKEA’s KUNGSFORS rail and basic stainless bars at Home Depot or Lowe’s run $18 to $40, and installation takes about 30 minutes with a drill, level, and a pencil for marking. Hang daily-use tools within arm’s reach of the stove so your utensil crock and top drawer finally get some breathing room. Position the rail roughly 18 inches above the countertop so tall pots hang without knocking into anything.
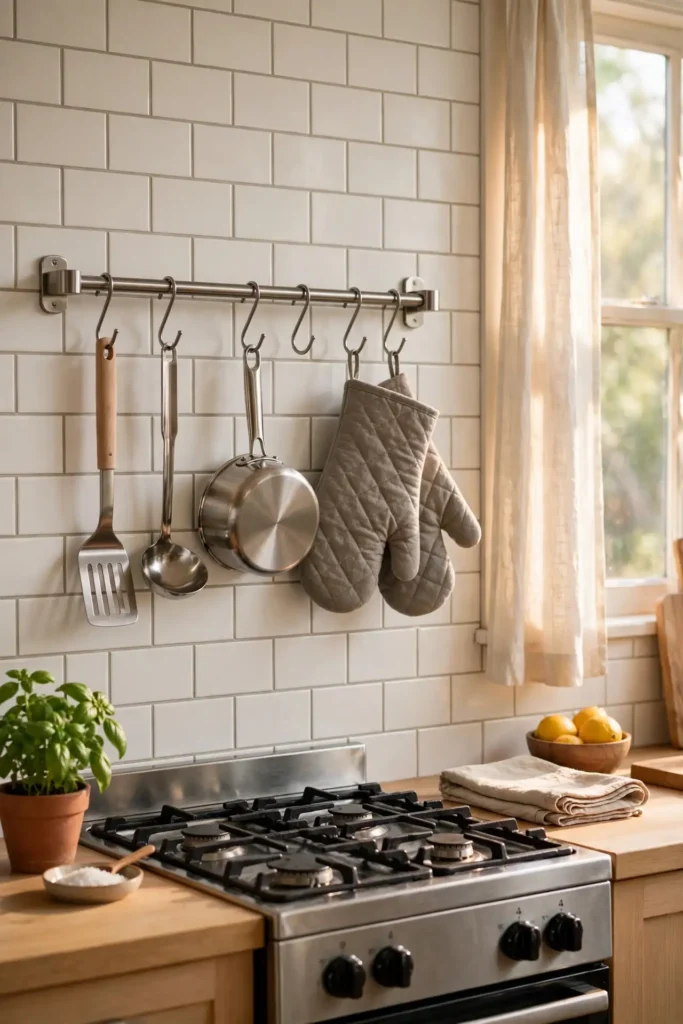
To get the most from your rail, group items by task instead of scattering them randomly. Keep cooking tools nearest the range, measuring cups and spoons by the prep area, and oven mitts at the end where you grab them heading to the oven. Leave an inch or two between hooks so pieces slide off easily without clanking neighbors. If your wall is tile, use a masonry bit and plastic anchors, and always check for pipes or wiring before drilling. In about an hour you can clear a full drawer and a chunk of counter, and the open, restaurant-style look makes even a galley kitchen feel bigger and more intentional.
2. Magnetic Knife Strip
A magnetic knife strip frees an entire countertop slot that a bulky knife block eats up. Mount a 12- to 18-inch strip on the backsplash or the side of a cabinet at least 8 inches above the counter so blades clear small appliances. Strong neodymium strips at Amazon or Target cost $15 to $30 and hold chef’s knives, paring knives, and kitchen shears securely. Before mounting, press painter’s tape on the wall to test placement, then fasten into studs or anchors with the included screws. Always place blades spine-first onto the magnet, then roll the edge down, so the cutting edge never drags across the surface and dulls.

Beyond knives, the strip handles metal spice tins, small measuring tools, and even a phone holder while you follow recipes. Keep the strip out of reach of small children, and choose a model with a full-length magnet rather than scattered discs so heavy cleavers stay put. Wipe it down weekly with a damp cloth because steel dust and crumbs cling to magnets over time. If you rent, look for strips with strong adhesive backing rated for 10 pounds or more, though screwed-in versions hold better long term. This single slim bar can reclaim nearly a square foot of counter and keeps your sharpest tools safer than a crowded drawer.
3. Floating Shelves
Floating shelves open up visual space in a small kitchen while adding genuinely useful storage. A pair of 24-inch oak or walnut shelves mounted 16 inches apart beside the range holds everyday dishes, oils, and spices in arm’s reach. Brackets and boards at IKEA or Home Depot cost $25 to $60 per shelf, and sturdy metal brackets hidden inside the shelf give a clean, bracket-free look. Mount into studs or use toggle bolts rated for 50 pounds so a stack of plates stays secure. Keep items you use daily on the lower shelf and prettier, less-used pieces up top so the display looks styled without extra effort.
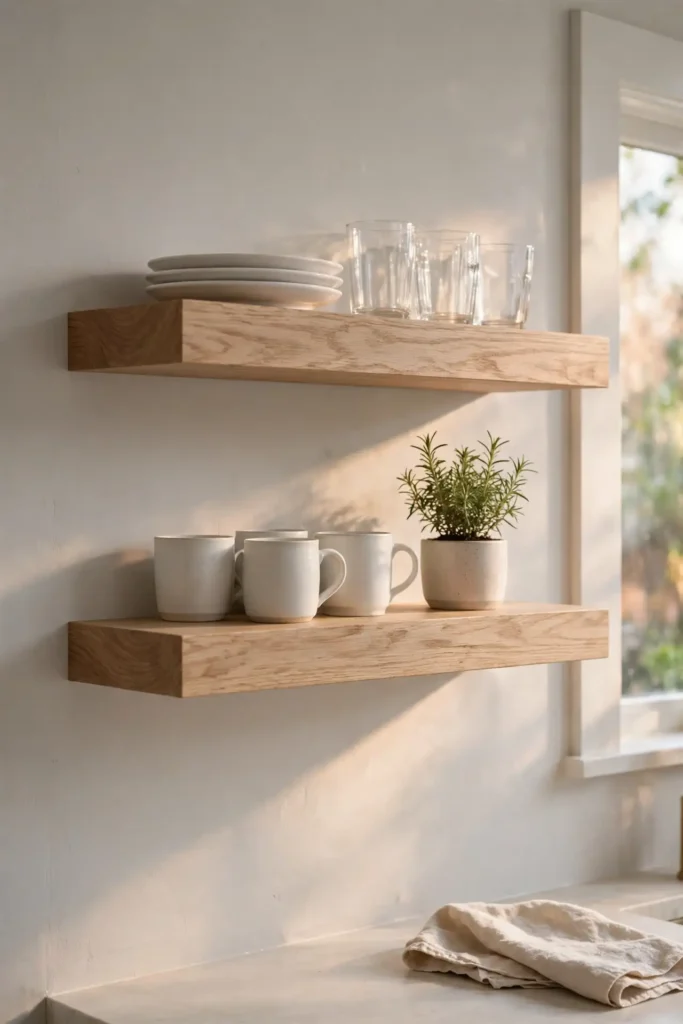
Style open shelves with a light hand: group three or four like items together, leave breathing room between groups, and repeat one or two colors for cohesion. Avoid overloading the front edge so nothing can be knocked off by an elbow. Wipe shelves weekly since open storage collects grease near the stove. If your kitchen is narrow, run one long shelf instead of two short ones for an airier feel. Done well, floating shelves replace an upper cabinet’s worth of storage while making the kitchen feel twice as open, and they cost a fraction of new cabinetry.
4. Pegboard Wall
A pegboard wall turns any spare stretch of wall into customizable storage that grows with your needs. Mount a 2-by-4-foot painted pegboard on 1-by-2-inch furring strips so hooks have clearance behind the board, then arrange hooks, small shelves, and baskets for pans, utensils, and spice jars. A sheet of pegboard at Home Depot costs about $20, plus $15 for hooks and accessories. Paint it the same color as the wall for a built-in look or a bold accent color for a focal point. Rearranging takes seconds, so the layout evolves as your cooking habits change.

The trick to a pegboard that looks good is density control: fill about 70 percent of the board and leave the rest open so it reads as organized, not cluttered. Outline each tool’s spot with a paint pen so everything has a home and you notice when something is missing. Keep heavy items like cast-iron pans on the lower half where the board’s support is strongest. Wipe the board monthly since kitchen dust settles on horizontal pegs. In a small kitchen, a single pegboard can absorb an entire junk drawer plus a tangle of hanging utensils.
5. Over-the-Sink Shelf
An over-the-sink shelf uses the airspace above your faucet that otherwise goes to waste. A tension-rod shelf or a wall-mounted rack spanning the window holds dish soap, sponges, small plants, and drying cups right where you use them. Over-sink organizers at Amazon cost $25 to $50 and clamp or screw in without blocking the window. Measure the span between cabinets first, and choose rust-proof stainless or coated metal since this zone stays damp. Keep only lightweight daily items here so the shelf stays stable and your window light still streams through.

Layer the shelf by height: tall bottles at the back, small jars and soap dispensers in front, and a trailing plant at one end for softness. Wipe the shelf weekly because splashes and steam leave spots. Avoid stacking heavy dishware here; this is a convenience zone, not a cabinet replacement. If you have a window above the sink, a clear acrylic shelf keeps the view open while doubling your landing space. This one small addition can clear the entire back edge of your sink and make dish duty noticeably faster.
6. Cabinet Door Organizers
Cabinet door organizers unlock storage on the hidden side of doors you open every day. Slim racks, spice holders, and lid caddies mount inside cabinet doors with screws or adhesive, turning dead space into homes for cutting boards, wraps, and measuring tools. Organizers at Target or Amazon run $10 to $25 each and install in minutes. Measure the gap between the door and the shelves inside before buying so the rack clears everything when the door closes. Start with the doors under the sink and beside the stove, where small-item chaos is worst.

Match the organizer depth to your cabinet: shallow racks suit spice packets and lids, deeper ones hold cutting boards and baking sheets. Distribute weight evenly and keep the heaviest items low so hinges are not strained. Wipe organizers monthly since crumbs migrate behind doors. In a rental, use adhesive-mounted versions rated for the load, and remove them with heat before moving out. A few well-chosen door organizers can absorb the contents of an entire junk drawer and make every cabinet feel custom.
7. Pull-Out Pantry
A pull-out pantry brings deep, dark cabinet shelves out into the light where you can actually see and reach everything. Narrow pull-out units that fit a 6- to 12-inch gap between cabinets or appliances cost $60 to $150 and roll on smooth glides. Measure the gap, depth, and height carefully, then anchor the unit to the cabinet or wall so it cannot tip when fully extended. Line the shelves with non-slip liner so jars stay put. This is the single best fix for the dead zone beside a fridge or range where items go to disappear.

Organize pull-out shelves by category: oils and vinegars on one tier, canned goods on another, snacks on the lowest. Label the front edge of each shelf so family members put things back in the right spot. Pull the unit out fully once a month to check expirations and wipe spills. Because everything is visible at a glance, you stop buying duplicates and waste less food. Even a single 6-inch pull-out can hold a week’s worth of cooking staples in a kitchen with almost no pantry.
8. Lazy Susan in Corners
A lazy Susan turns the dead corner of a cabinet into the easiest spot to reach in the whole kitchen. Two-tier turntables at Target or Amazon cost $20 to $40 and drop into corner cabinets or deep pantry shelves. Measure your cabinet’s interior width and depth, then choose a turntable that leaves at least an inch of clearance on all sides. Use them for oils, vinegars, spices, and canned goods — anything you currently have to dig past other items to reach. A single spin brings the back of the cabinet to the front.
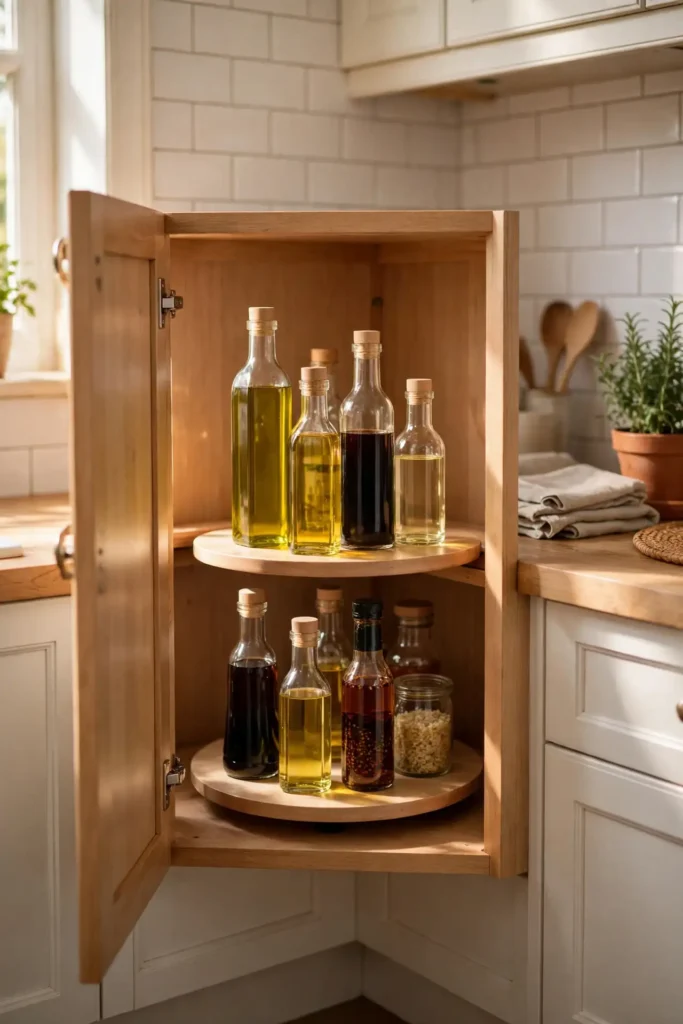
Keep turntables from becoming clutter magnets by assigning each tier one category and decanting bulky packaging into uniform containers. Wipe the surface monthly since drips collect around the edges. For upper corner cabinets, a single-tier turntable with a raised lip keeps items from sliding off. In blind corners, a kidney-shaped lazy Susan fitted to the cabinet maximizes every inch. This simple spinner can double the usable space in your most awkward cabinet.
9. Drawer Dividers
Drawer dividers end the daily excavation of junk drawers and utensil drawers alike. Adjustable bamboo or plastic dividers at IKEA or Amazon cost $10 to $25 per set and expand to fit standard drawers. Measure your drawer’s interior, then arrange dividers into zones: one for daily utensils, one for gadgets, one for batteries and tape. Cut-to-fit options work for odd sizes. The goal is that every item has a visible slot, so you never have to dig and the drawer closes without a shove.
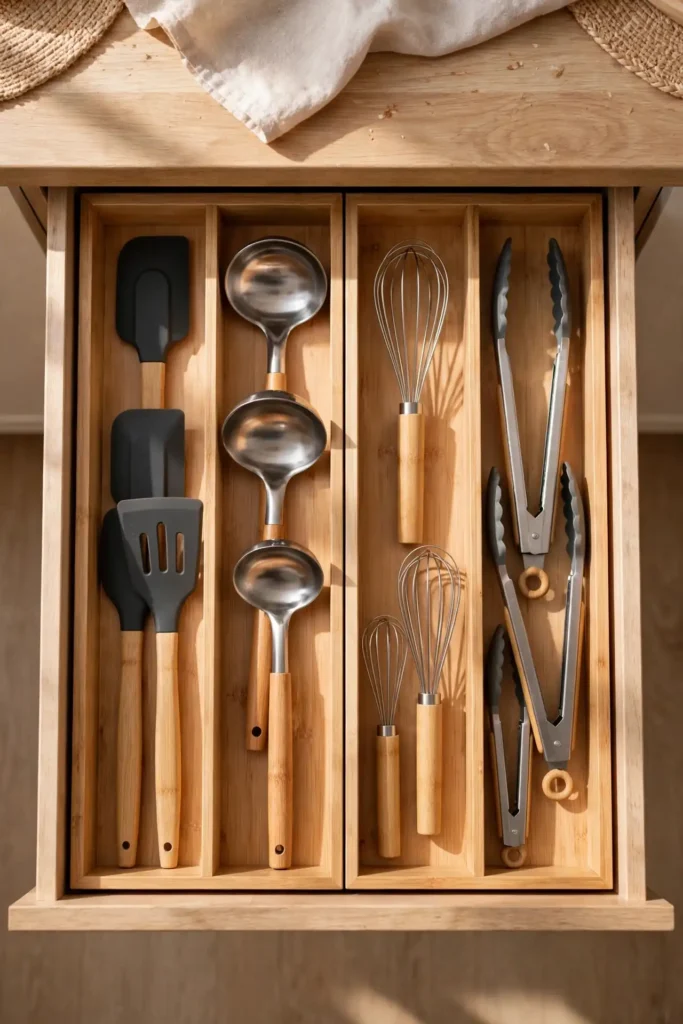
Revisit dividers seasonally: remove anything you have not used in six months and reassign the space to daily tools. Line the drawer bottom with non-slip liner first so dividers stay put. In deep drawers, add a second shallow tray on top for flat items like lids and wraps. Label zones if you share the kitchen so everyone returns things to the right place. Fifteen minutes with dividers can permanently fix the most annoying drawer in your house.
10. Stackable Containers
Stackable containers turn a chaotic cabinet into a tidy, visible pantry wall. Matching square or rectangular containers use about 25 percent less space than round ones and stack securely without sliding. Sets at Target, IKEA, or Amazon run $25 to $50 for a dozen pieces; choose BPA-free, airtight versions with clear bodies so you can see contents at a glance. Decant flour, sugar, rice, pasta, and snacks, then label each lid and front with the contents and date. Uniform containers make even a small cabinet feel like a professional pantry.

Buy one coordinated set rather than accumulating mismatched pieces over time, and measure your shelf height before choosing container sizes. Keep a funnel handy for easy refills, and store backup supplies in a bin on a high shelf. Wash and fully dry containers before refilling to keep staples fresh. Once everything is visible and labeled, grocery lists practically write themselves and you stop rebuying what you already have. This is the fastest visual upgrade for any small kitchen.
11. Under-Shelf Baskets
Under-shelf baskets clip onto existing shelves to create a second layer of storage in the air below them. Wire baskets at Target or Amazon cost $8 to $15 each and slide onto standard cabinet shelves without tools. Use them for mugs, small plates, wraps, or snack bags — anything lightweight that currently eats prime shelf space. Measure your shelf thickness first so the basket arms grip securely. This is the easiest no-drill upgrade for renters who cannot add shelves.
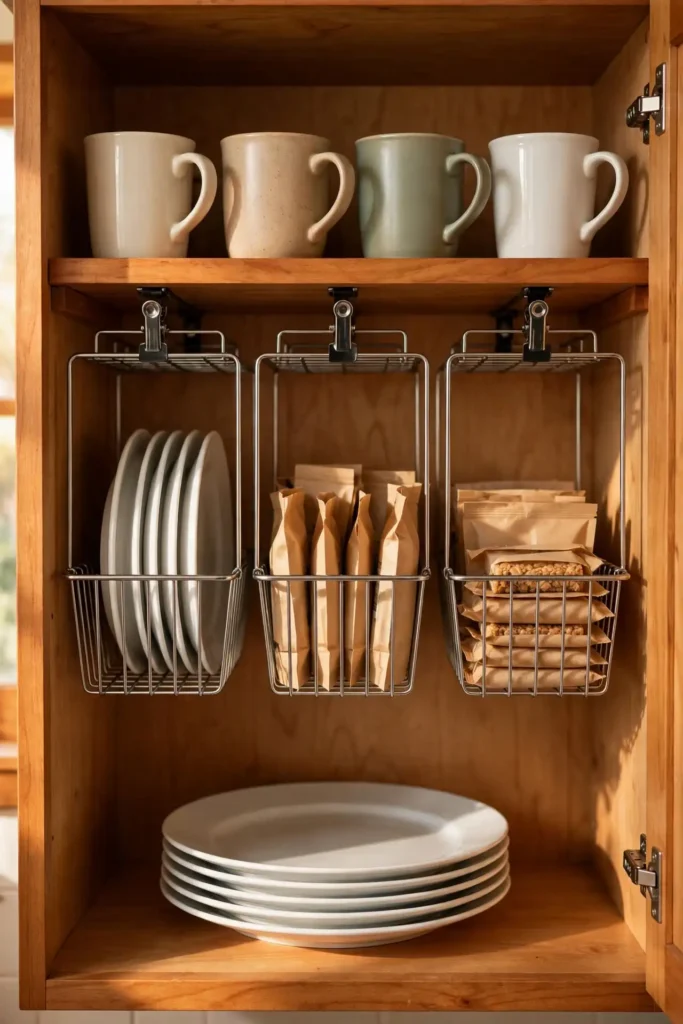
Reserve under-shelf baskets for items you grab daily so the convenience pays off. Keep weight light; these are for mugs and packets, not cast iron. Space two or three across a wide shelf rather than cramming one corner. Wipe the wires monthly since dust settles on horizontal surfaces. In a small kitchen, three baskets can free an entire shelf for bulkier items while keeping daily goods at your fingertips.
12. Rolling Cart
A rolling cart is a portable pantry, prep station, and coffee bar in one. Three-tier metal carts at IKEA (the classic RASKOG) or Target cost $30 to $60 and roll wherever you need extra surface or storage. Park it beside the stove as a cooking station, use it as a coffee bar, or roll it into a closet when guests come. Lock the casters when stationary. Top the cart with a cutting board to double it as extra prep space in a kitchen with almost no counter.
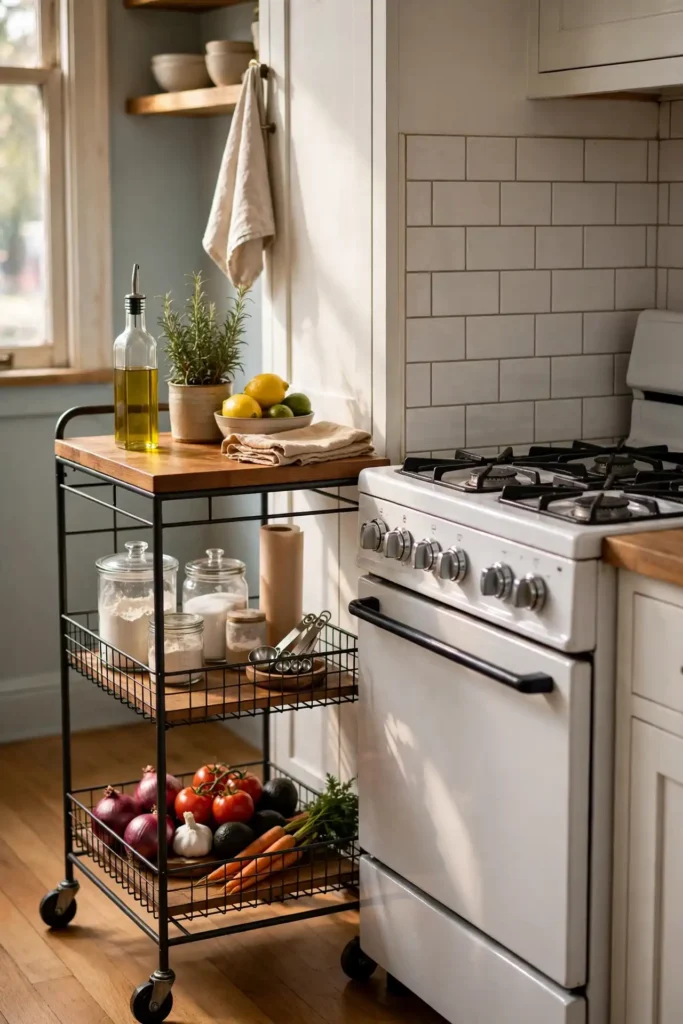
Assign each tier a job: top for daily items, middle for supplies, bottom for bulky backups. Use small bins on each tier so items do not roll around when you move the cart. Wipe the trays weekly and check caster locks monthly. When choosing a cart, measure your doorways and the parking spot so it fits both. A single rolling cart can add the equivalent of a full cabinet of storage that moves wherever the work is.
13. Tension Rods Under the Sink
Tension rods under the sink create instant vertical storage in a cabinet that is usually a jumbled mess. A $5 to $10 spring-loaded rod wedged across the cabinet interior holds spray bottles by their triggers, freeing the floor for bins and caddies below. Measure the interior width and choose a rod that extends a few inches beyond it for a secure fit. Add a small stackable bin underneath for sponges, bags, and dishwasher pods. This five-minute fix doubles the usable space under most sinks.

Keep the rod near the front so bottles hang within easy reach, and leave the plumbing area clear at the back. Wipe the rod monthly since the under-sink zone stays humid. If your cabinet is very wide, use two rods at different heights for dish soap and smaller sprays. Store a leak tray or absorbent mat on the cabinet floor beneath everything as cheap insurance. Under-sink chaos is one of the fastest wins in a small kitchen.
14. Pot Rack
A pot rack moves bulky cookware off the stove and out of deep cabinets onto the wall or ceiling. Wall-mounted or hanging racks at Amazon or IKEA cost $30 to $80 and hold pots, pans, lids, and colanders on sturdy hooks. Mount into ceiling joists or wall studs — never drywall alone — since a loaded rack is heavy. Hang daily-use pieces at the front and lighter items up high. This single rack can empty an entire lower cabinet and keep your most-used pans within one grab of the stove.

Arrange the rack by weight: heavy Dutch ovens lowest and closest to supports, lighter skillets and lids higher. Wipe hooks and the rack monthly since kitchen grease drifts upward. Keep a step stool nearby if the rack hangs high. If ceiling mounting is not possible, a wall-mounted rail with heavy-duty hooks achieves the same effect on a smaller scale. A pot rack also keeps cookware aired out, which protects nonstick coatings and cast-iron seasoning.
15. Tiered Shelf Risers
Tiered shelf risers turn one deep shelf into stadium seating for cans, spices, and jars. Expandable bamboo or metal risers at Amazon cost $12 to $25 and create two or three visible rows where there was one hidden one. Measure shelf depth and height first, then set the riser toward the back so front items stay easy to grab. Use them in pantries, upper cabinets, and even the fridge. Suddenly every can is visible, and nothing expires in the dark back row again.
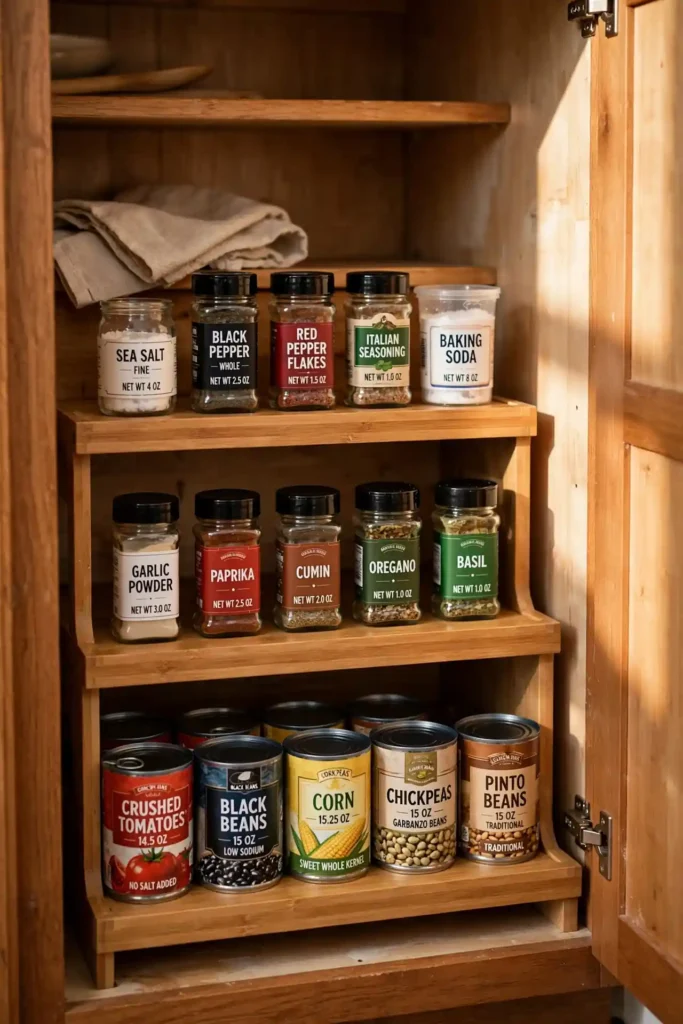
Group like items on each tier and face all labels forward for a store-shelf look. Keep the tallest items on the top tier and shortest in front so nothing blocks the view. Wipe risers when you reorganize monthly. For very deep shelves, pair a riser with a small basket in front for packets and pouches. This cheap insert can double the capacity of your worst cabinet in about two minutes.
16. Spice Drawer Inserts
Spice drawer inserts lay your collection flat in a single drawer where every label is readable at a glance. Tiered bamboo inserts at Amazon cost $12 to $20 and angle jars so you can read lids without lifting each one. Transfer spices to uniform small jars, label the lids, and arrange alphabetically or by cuisine. This frees an entire cabinet shelf and ends the ritual of knocking over three jars to reach the cumin. One drawer comfortably holds 20 to 30 spices.

Decant spices in small batches and note the purchase date on the bottom of each jar, since ground spices fade after six to twelve months. Keep the drawer near your main prep zone. Wipe the insert when refilling, and replace any jar whose lid no longer seals tightly. If you have more spices than fit, keep everyday ones in the drawer and move baking or specialty spices to a labeled bin on a high shelf. An organized spice drawer makes cooking noticeably faster and more fun.
17. Top-of-Fridge Storage
The top of the fridge is prime real estate in a small kitchen if you use it deliberately. A sturdy basket or bin up there holds infrequently used items like holiday platters, extra paper towels, or backup pantry goods. Choose a basket with handles that fits the fridge’s footprint, and keep a step stool nearby since this zone is high. Avoid storing anything heat-sensitive on top because the fridge’s compressor warms the area. Line the basket so items do not slide when the door slams.
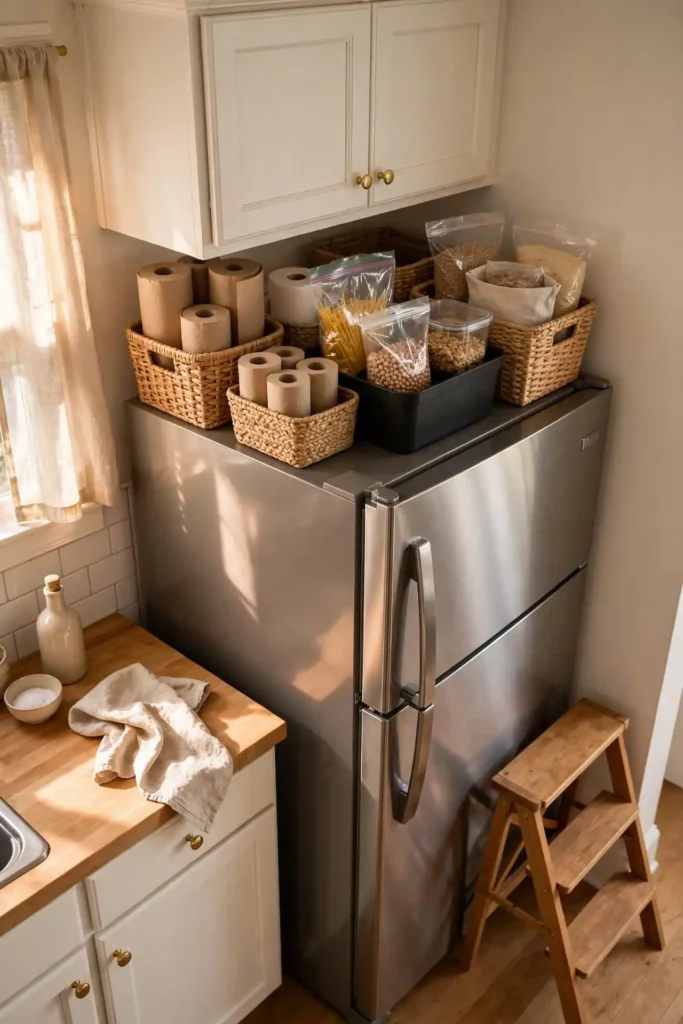
Limit top-of-fridge storage to lightweight, non-fragile items you need a few times a month at most. Label the basket’s front so you remember what is up there. Wipe the top monthly since dust and grease collect out of sight. Never store heavy appliances here; they can fall and the weight strains the fridge. Used wisely, this forgotten surface adds the equivalent of half a shelf of storage with zero installation.
18. Toe-Kick Drawers
Toe-kick drawers reclaim the hidden 3 to 4 inches of space beneath your base cabinets. Retrofit kits at Amazon or cabinet suppliers cost $40 to $80 per drawer and install in the recessed kick plate with basic tools. These shallow drawers are perfect for baking sheets, placemats, table linens, and other flat items that never fit anywhere else. Measure the kick height and width before ordering, and choose soft-close glides so the drawers shut quietly. It is storage you already own but never knew you had.
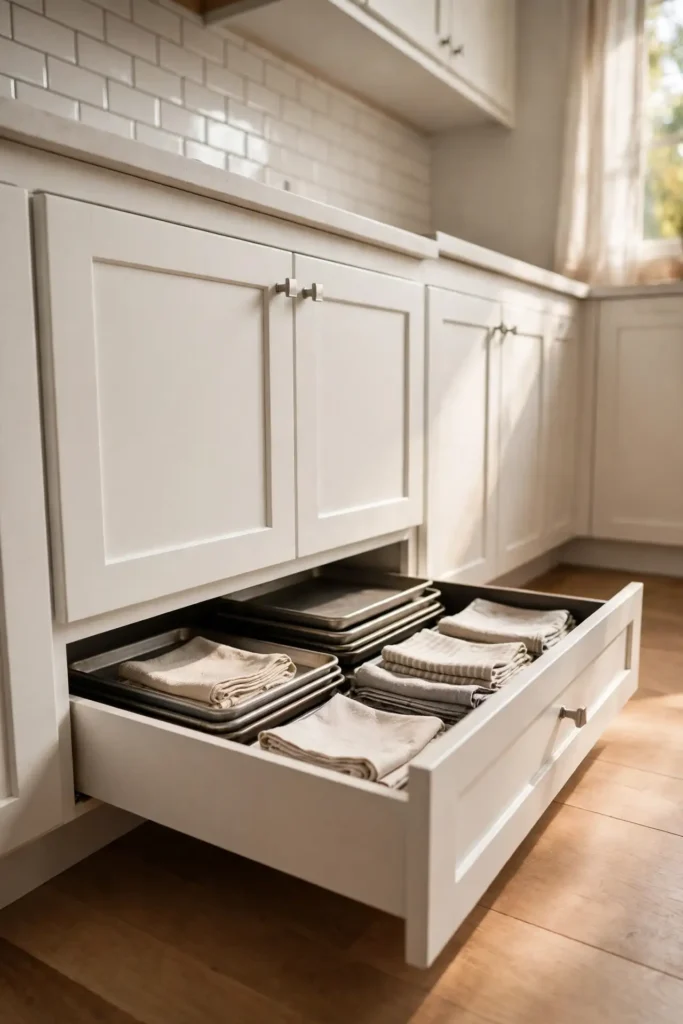
Keep toe-kick drawers for flat, lightweight items only; the shallow depth and low position are not suited to heavy pots. Line them with non-slip mat so contents stay put. Wipe them out seasonally since floor-level dust creeps in. If you are remodeling, ask the cabinet maker to include toe-kick drawers from the start — it costs far less than adding them later. Three toe-kick drawers can swallow a whole stack of baking sheets and free an entire cabinet.
19. Fold-Down Table
A fold-down table gives a small kitchen an eat-in spot or extra prep surface that disappears when you need floor space. Wall-mounted drop-leaf tables at IKEA or Amazon cost $60 to $150 and mount to studs with sturdy brackets. Fold it down for chopping or a quick breakfast, then fold it up to reclaim the walkway. Mount at standard table height (about 30 inches) and choose a size that seats one or two. This is the best solution for kitchens too small for a permanent table.

Anchor the table to at least two studs and test the brackets with real weight before trusting them with a meal. Keep the underside clear so it folds flat. Pair it with stackable stools that tuck away when the table is up. Wipe the hinges occasionally so they keep moving smoothly. A fold-down table can turn a galley kitchen into a functional dining nook in about an hour of installation.
20. Appliance Garage
An appliance garage hides small appliances behind a roll-up or flip-up door, keeping counters clear without burying the toaster in a cabinet. Countertop garages at Amazon cost $50 to $120, or you can convert a deep upper cabinet with a tambour door kit. Measure your tallest appliance plus a few inches of clearance before choosing. Keep daily appliances like the coffee maker and toaster inside, plugged into an outlet in the back. Everything stays accessible but visually quiet.
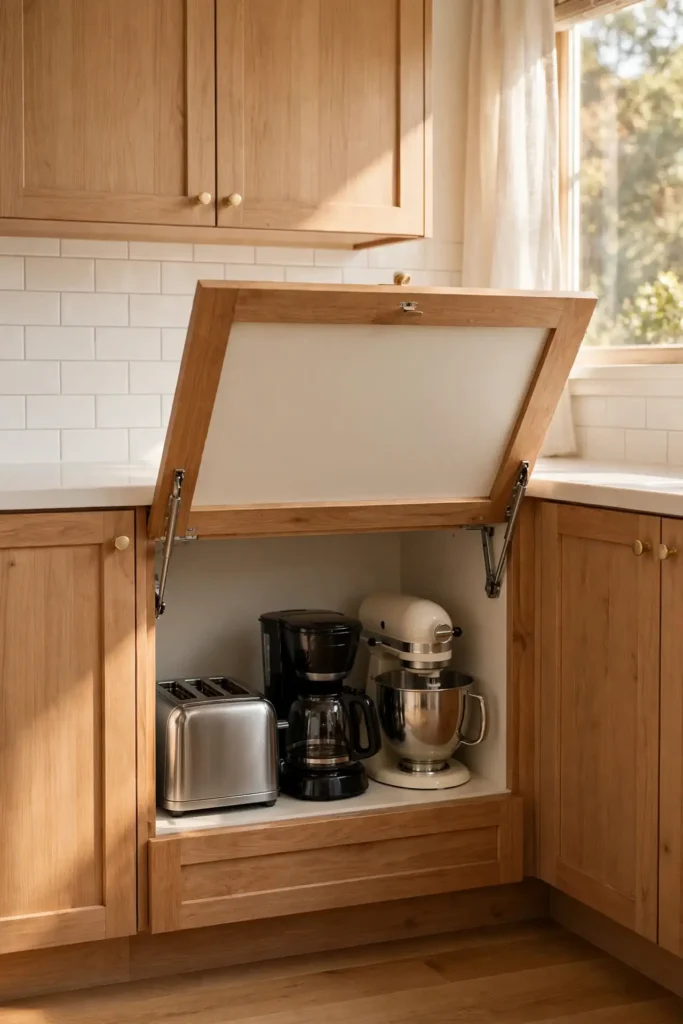
Ventilate the garage: leave the door open while appliances run hot, and choose a model with a heat-resistant interior. Wipe crumbs from the base weekly. If you go the DIY route, a simple flip-up cabinet door with soft-close hinges works beautifully. Store less-used appliances like the stand mixer on a lower shelf inside. An appliance garage can clear two to three square feet of prime counter in one move.
21. Hooks Under Cabinets
Hooks under cabinets turn the shadowed underside of upper cabinets into storage for mugs, utensils, and small tools. Screw-in cup hooks cost a few dollars for a pack, or adhesive hooks work for renters. Mount a row under the cabinet above the coffee station for mugs, and another near the prep area for measuring cups and small strainers. Keep items toward the back so they do not bump your head. This uses space that was literally doing nothing.

Choose hooks rated for the weight: ceramic mugs need sturdier hooks than plastic measuring cups. Space hooks so items do not clink together. Wipe the cabinet underside when you add hooks, then monthly, since grease drifts upward. For a cleaner look, mount a slim rail under the cabinet instead of individual hooks. A dozen well-placed hooks can empty a crowded mug shelf and free real cabinet space.
22. Declutter Regularly
Regular decluttering is the storage upgrade that costs nothing and multiplies every other fix. Once a season, pull everything from one zone — a drawer, a cabinet, the pantry — and sort into keep, donate, and toss. Be honest about duplicates: you do not need three vegetable peelers or five water bottles. Wipe the empty space before putting keepers back, and immediately bag donations so they leave the house. A kitchen with less stuff needs less storage, and every organizer you own works better.

Schedule decluttering like maintenance: set a quarterly reminder on your phone and tackle one zone per session so it never becomes an all-day ordeal. Apply the one-in-one-out rule going forward — every new gadget means an old one leaves. Keep a small donation box in a closet so cast-offs do not drift back into drawers. The payoff compounds: each round gets faster, and your kitchen stays at a baseline where finding anything takes seconds.
Decluttering Before Organizing
Declutter before you organize, because no container can fix owning too much. Empty the zone completely, wipe it down, and sort every item into keep, relocate, donate, or trash. Keep only what you use at least a few times a year and love enough to maintain. Measure the keepers, then buy organizers to fit them — never the reverse. This order of operations is why professional organizers always start with an empty shelf: the right storage follows the right stuff, not the other way around.

Work in small zones so the project finishes in one sitting; a single drawer or shelf is a perfect first win. Photograph the empty, clean space before refilling — the before-and-after keeps you motivated. Immediately remove donate and trash bags from the house so they cannot creep back. Once the zone is right-sized, maintaining it takes minutes a month. Decluttering first makes every dollar you spend on organizers go twice as far.
Group items by use: baking, cooking, coffee and cleaning. Store each group near where it is used, so daily routines flow smoothly.
Renter-Friendly Small Kitchen Storage Ideas
Renters can still transform a small kitchen without drilling a single hole. Tension rods, adhesive hooks, over-the-door racks, magnetic strips with adhesive backing, and freestanding shelf risers all add serious storage with zero damage. Command strips rated for the load hold rails and small shelves on tile and painted walls. A rolling cart and stackable bins need no installation at all. Before buying anything, photograph your lease’s damage clause so you know exactly what is allowed, and save all original hardware you temporarily remove.
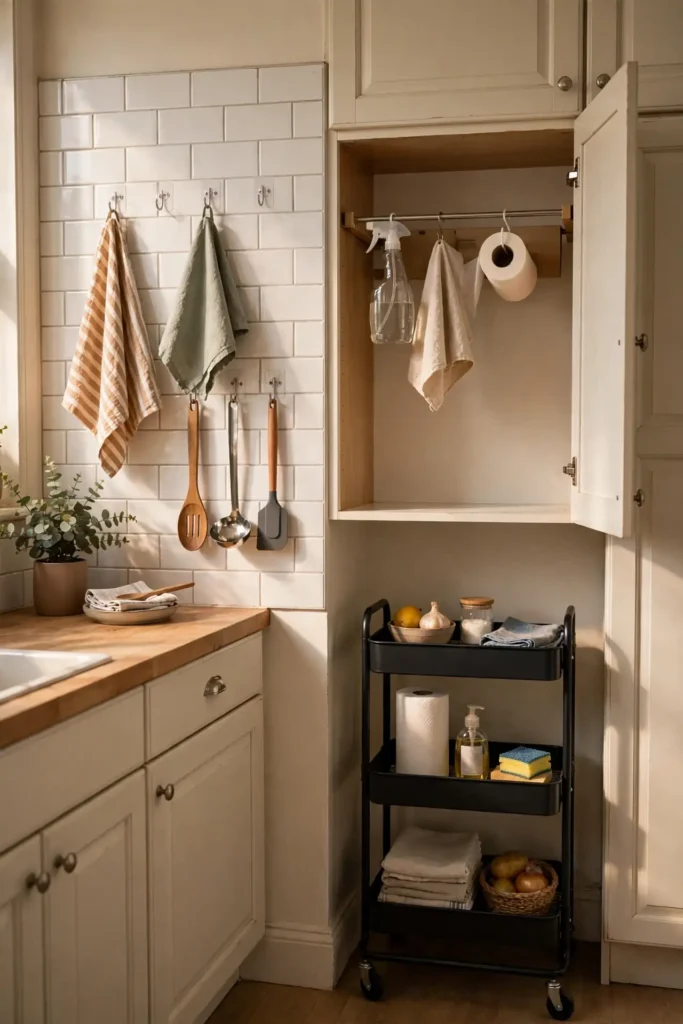
Choose removable products rated well above your actual load, and test adhesives in a hidden spot first. Remove everything with heat (a hair dryer softens most adhesives) and touch up paint before move-out. Focus on freestanding wins first: carts, risers, and baskets cannot damage anything. Document the kitchen’s original condition with photos on move-in day. With the right no-drill toolkit, a rental kitchen can feel just as organized as an owned one — and you take it all with you.
Keeping Counters Clear
Clear counters are the whole point of small-kitchen storage, so treat counter space as prime real estate with strict zoning. Allow only daily-use items — coffee maker, knife strip, one cutting board — and relocate everything else to its new home. Corral the keepers on a single tray so the zone looks intentional and wipes clean in seconds. Each evening, do a two-minute reset: everything back in its spot, counters wiped. A clear counter makes even a tiny kitchen feel calm and twice as big.

Enforce the rule with the one-touch principle: when you finish with an item, it goes straight back to its home instead of landing on the counter. Keep a small lidded bin for the inevitable in-between items so they do not sprawl. Reassess monthly: if something has lived on the counter for weeks without daily use, it does not belong there. Clear counters also make cooking faster and cleanup easier, which is the real reward for all this organizing.
When it comes to small kitchen storage ideas, the best results come from balancing style, comfort and everyday function. Use this list as your go-to guide for small kitchen storage ideas, and start with the ideas that fit your space best.
How to Plan Small Kitchen Storage Ideas Step by Step
Plan your small-kitchen storage in five steps. First, measure every cabinet, drawer, and wall span, and note what currently lives where. Second, declutter ruthlessly — no organizer fixes too much stuff. Third, zone the kitchen by task: prep, cooking, baking, coffee, cleaning. Fourth, match storage to zones: rails and hooks by the stove, dividers in the prep drawer, door organizers under the sink. Fifth, buy organizers to fit your measured keepers, install them one zone at a time, and label everything. Work zone by zone over a weekend rather than tearing the whole kitchen apart at once.

Budget before you buy: most small kitchens transform for $150 to $300 in organizers, with the biggest wins coming from the cheapest fixes like tension rods and hooks. Photograph each zone when done so you can restore order quickly after a busy week. Revisit the plan seasonally and adjust zones as your cooking changes. A written plan keeps you from buying random organizers that do not fit, and working step by step means the kitchen stays usable throughout the project.
- Declutter and group items by use.
- Measure cabinets, drawers and wall space.
- Add vertical storage like rails and shelves.
- Install organizers in cabinets and drawers.
- Keep counters clear with daily-use items only.
Final Thoughts on Small Kitchen Storage Ideas
Small kitchens reward creativity more than square footage. Every idea here — from a $5 tension rod to a pull-out pantry — proves that the right storage in the right spot matters more than a bigger room. Start with the cheapest wins: declutter, add hooks, and zone your counters. Then invest in the fixes that target your personal pain points, whether that is a spice avalanche or a pot-lid jumble. Measure twice, buy once, and let each zone earn its keep. A well-organized small kitchen can genuinely outperform a sprawling, chaotic one.

Keep the momentum going with tiny habits: the two-minute evening reset, the one-in-one-out rule, and a quarterly declutter of one zone. These habits protect every organizer you install. Remember that storage is a system, not a shopping spree — the best kitchens stay organized because everything has a visible home, not because they own the most bins. Your small kitchen is not a limitation; with the right plan, it is an advantage that keeps cooking efficient, calm, and fun.
Save these ideas and follow along for more kitchen organization inspiration.
Frequently Asked Questions About Small Kitchen Storage Ideas
What is the cheapest way to add storage to a small kitchen? Start with decluttering, which is free, then add tension rods ($5–$10), adhesive hooks, and under-shelf baskets ($8–$15 each). These three fixes alone can free an entire cabinet of space. Can renters add kitchen storage without drilling? Yes — tension rods, adhesive hooks and strips, over-the-door racks, rolling carts, and freestanding shelf risers all work with zero damage. How do I keep small kitchen counters clear? Zone the counter for daily-use items only, corral them on a tray, and do a two-minute evening reset. Where should I start organizing? Start with the zone that annoys you most, usually a drawer or the under-sink cabinet, and work outward one zone at a time.

How much does it cost to organize a small kitchen? Most kitchens transform for $150 to $300 in organizers, with decluttering free. Do I need a pull-out pantry? Only if you have a narrow dead gap beside the fridge or range; otherwise risers, turntables, and door organizers cover most needs. What is the best storage for spices? A drawer insert with uniform labeled jars, kept near the prep zone. How often should I declutter? Quarterly, one zone per session, plus the one-in-one-out rule for new items. With these answers in hand, you can plan your storage project with confidence and keep your counters clear for good.
How can I get more storage in a small kitchen?
Use vertical space, cabinet door racks, rolling carts and drawer organizers.
How do I store pots and pans in a small kitchen?
Hang them on a rail or pot rack, or use vertical lid organizers.
What should stay on kitchen counters?
Only daily-use items, like a coffee maker and utensil crock.
What are renter-friendly kitchen storage ideas?
Adhesive hooks, tension rods, rolling carts and freestanding shelves.
How do I organize corner cabinets?
Use lazy Susans or pull-out corner organizers.






Leave a comment