



If your closet doors barely close, you are not alone, and you do not need a bigger house to fix it. The smartest closet ideas work with the space you already have, using vertical height, smarter rods, and storage that fits the way you actually dress. Most closets waste nearly half their usable volume on empty air above a single rod and dead corners nobody reaches. This guide walks you through 22 practical changes, from ten-minute fixes to weekend upgrades, that can genuinely double what your closet holds without knocking down a single wall.
Before you buy anything, take fifteen minutes to measure your closet from wall to wall, floor to ceiling, and door swing to back wall. Write down the rod length, shelf depth, and the awkward gaps where shoes and bags pile up. Those numbers decide which ideas below will work hardest for you. You will also want a donation bag handy, because every system works better once the never-worn pieces are gone. A honest edit usually frees up twenty percent of the space before you spend a single dollar on organizers.
You do not have to tackle all 22 closet ideas in one weekend. Start with the two or three that solve your biggest daily frustration, whether that is a shoe avalanche, shirts crushed on one rod, or sweaters buried on a high shelf. Small wins build momentum, and a closet that works feels calmer every single morning. By the end of this list you will have a plan for rods, shelves, drawers, lighting, doors, and the forgotten corners, plus a simple routine that keeps the whole system working long after the makeover glow fades.
1. Install Two-Tier Hanging Rods
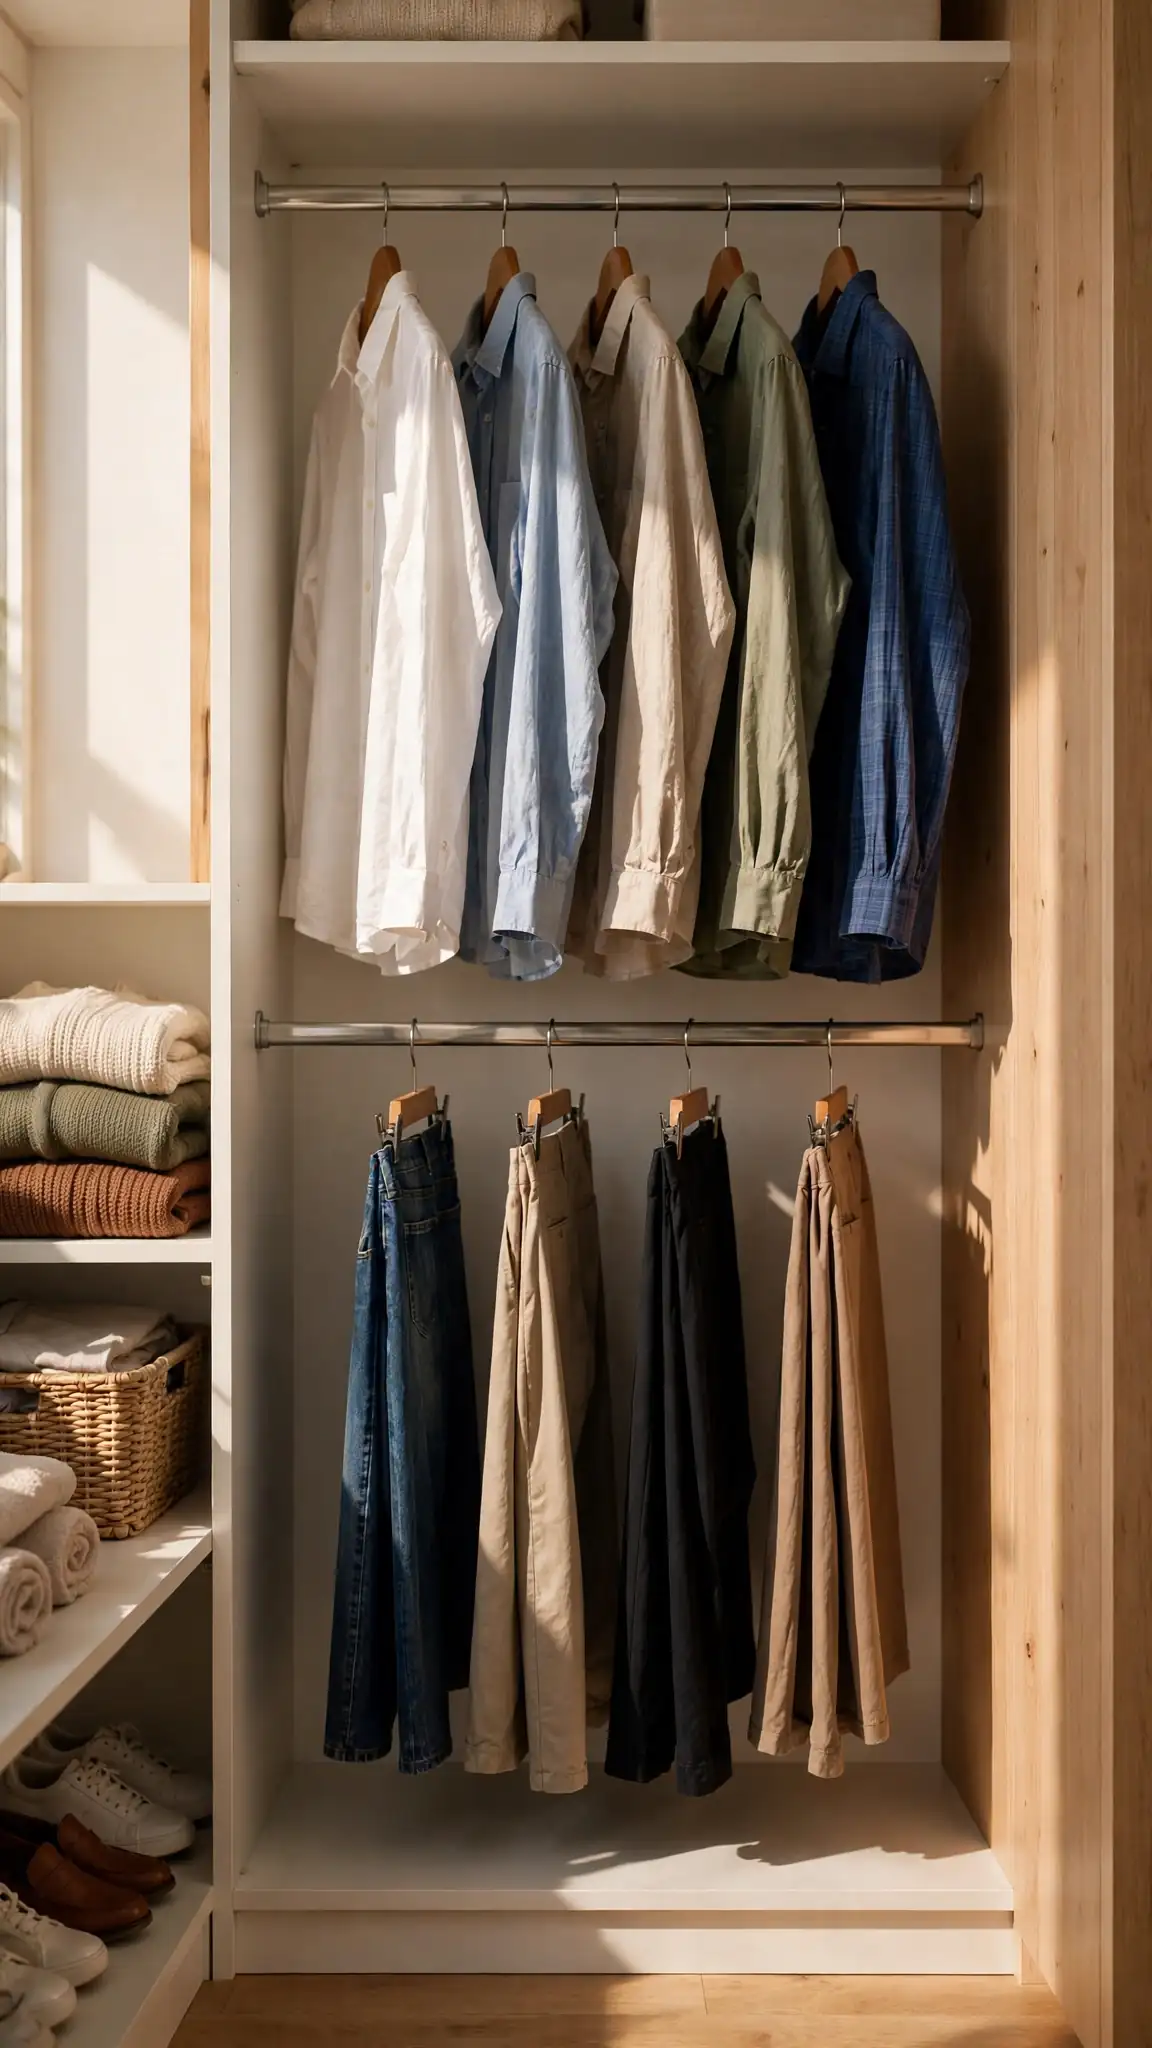
A single hanging rod wastes the entire lower half of most closets, because shirts and blouses only need about forty inches of drop. Splitting that run into two stacked rods instantly doubles your hanging capacity for tops, pants folded over hangers, skirts, and kids’ clothes. The top rod handles shirts and jackets while the bottom rod takes pants and shorter pieces, and suddenly the same four feet of wall holds twice the wardrobe. It is the single highest-impact change you can make in a reach-in closet, and it works in rentals too when you choose a tension-mounted second rod that leaves no holes behind.
Plan on 84 inches of total height for two comfortable tiers: mount the top rod at 80 to 82 inches and the lower rod at 40 to 42 inches. A standard 24-inch-deep reach-in closet handles this easily. Adjustable double-hang sections from IKEA’s PAX line or ClosetMaid kits at Home Depot run $25 to $60 per section, while a simple tension rod costs under $15. Measure garment lengths first, since long dresses need one full-height section left open. The common mistake is placing the lower rod too high, so pants puddle on the floor and wrinkle. Pro tip: hang the lower rod two inches lower than you think, because hangers add hidden height.
2. Add Adjustable Closet Shelves That Grow With You
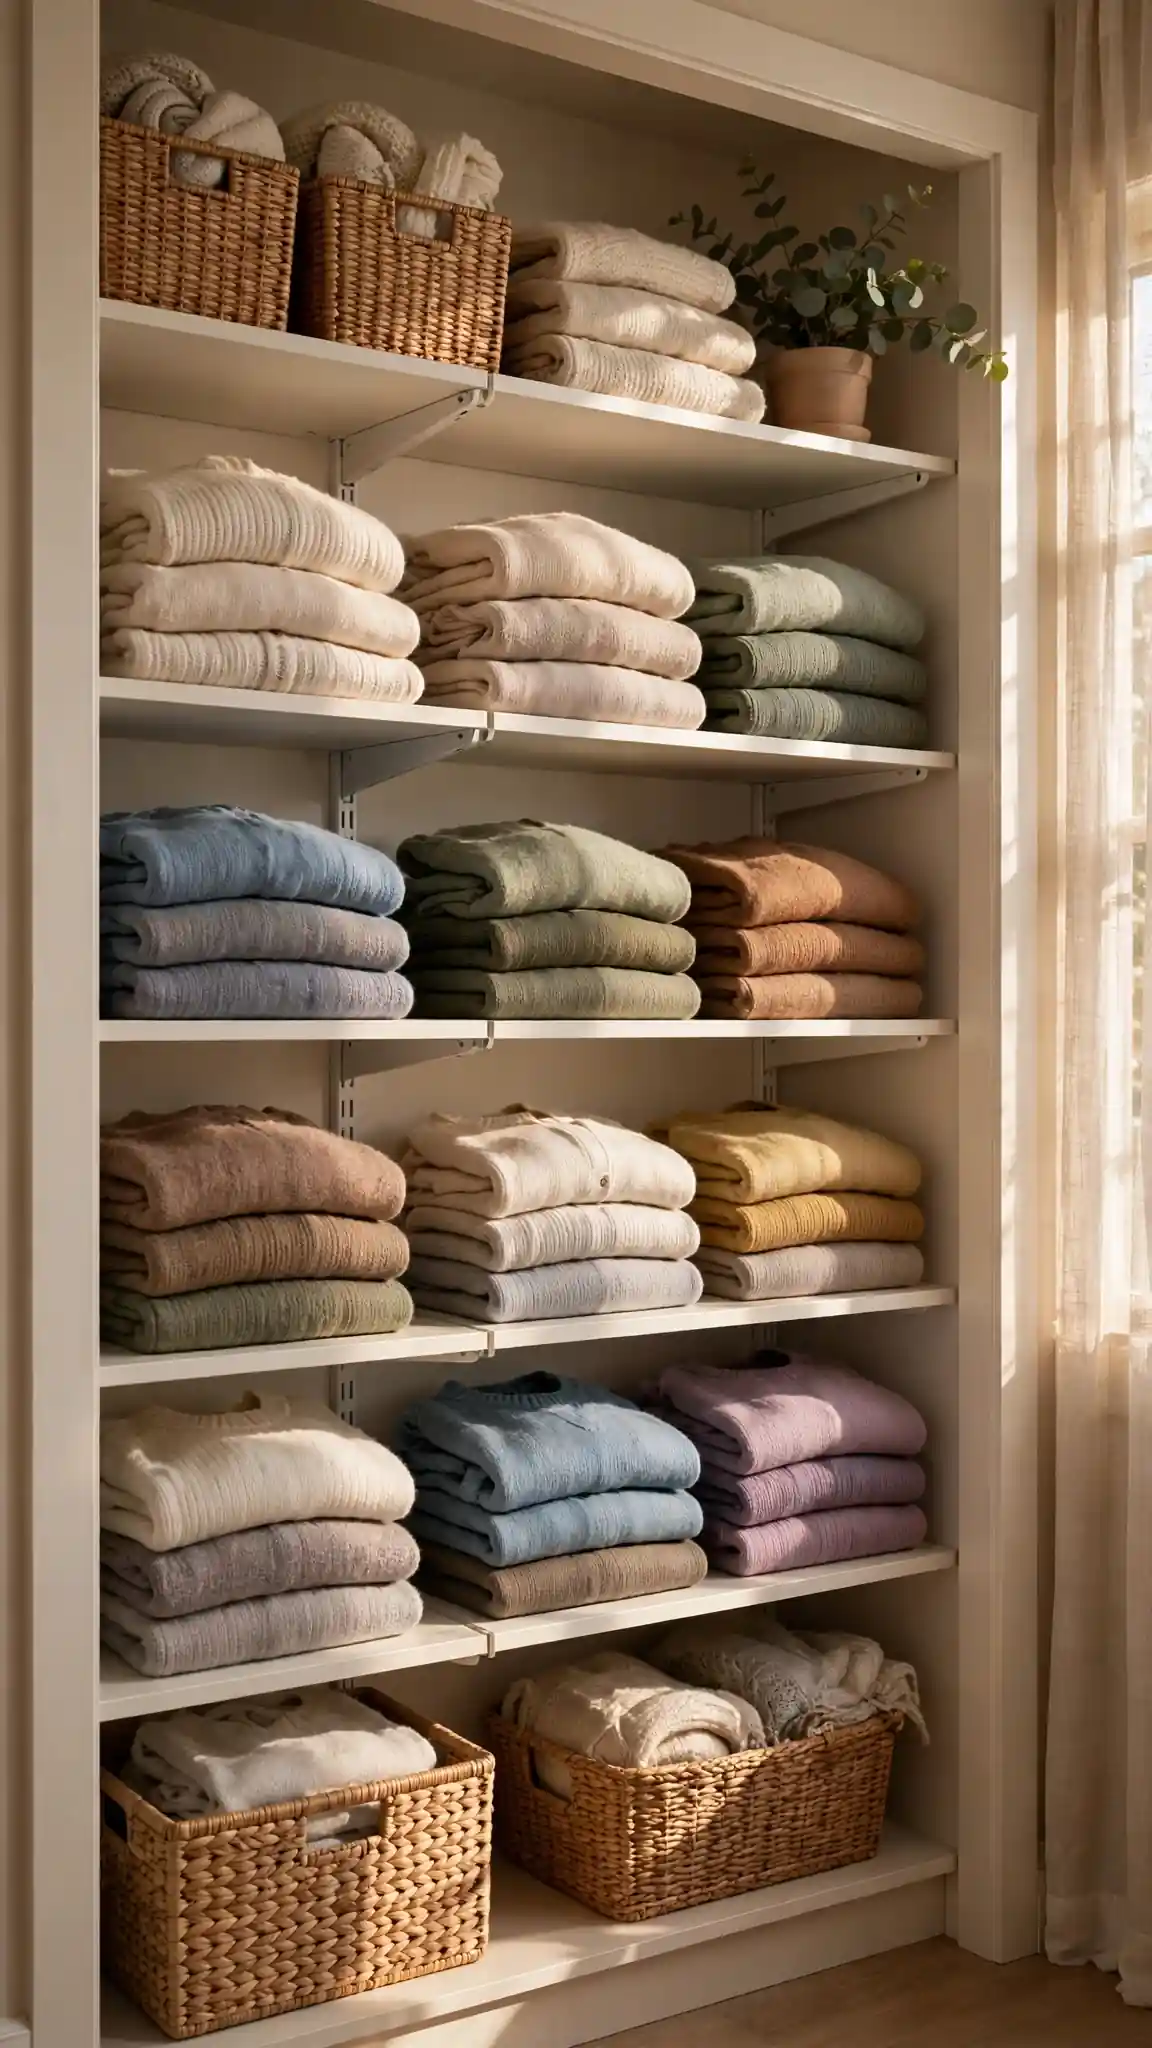
Fixed shelves force your storage to fit someone else’s plan, but adjustable shelving bends to your real life. Track-and-bracket systems let you slide shelves up or down in one-inch increments, so tall boots fit this winter and stacked shoe boxes fit next summer. Closets rarely need more shelves; they need shelves at the right heights. A tower of adjustable shelves down the center of a reach-in closet turns wasted rod space into folded storage for sweaters, jeans, and tees. Because nothing is permanent, the layout can evolve as wardrobes, seasons, and family members change.
Steel track systems from Rubbermaid Configurations or IKEA ALGOT successors cost $60 to $150 for a full closet wall and install with basic screws into studs. Space shelves 12 inches apart for folded stacks, 16 inches for bulky bins, and 7 inches for shoes. Keep stacks to five or six items so piles do not topple when you pull one piece out. Avoid particleboard shelves longer than 36 inches without a center support, since they sag under sweater weight within a year. Anchor every upright into studs, not just drywall anchors, for safety. Pro tip: leave one shelf deliberately half-empty so new purchases have a home instead of starting a floor pile.
3. Use Slim Velvet Hangers to Save Rod Space
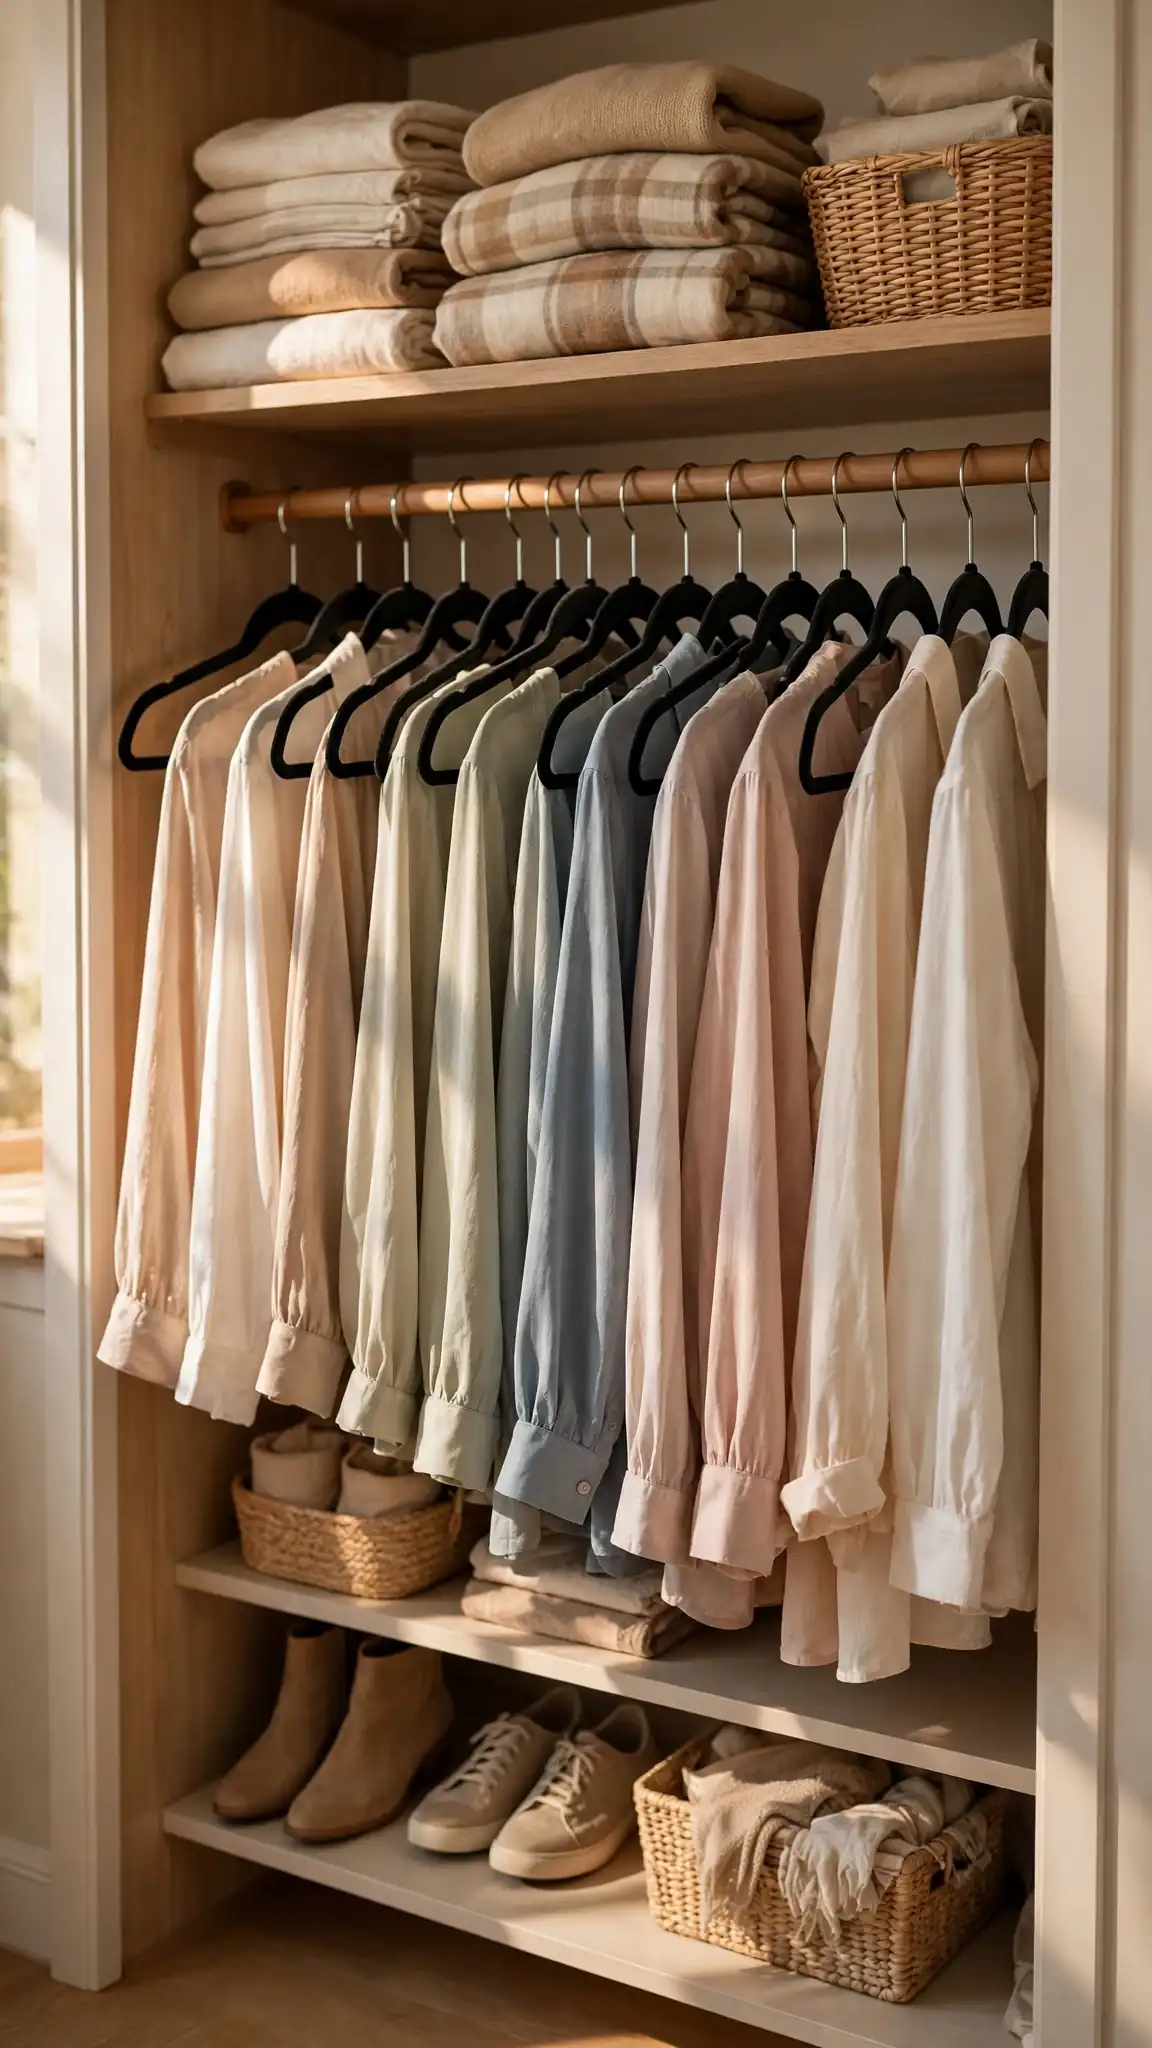
Bulky wooden and tubular plastic hangers quietly eat a third of your rod. Switching to slim velvet hangers, which are barely a quarter-inch thick, can fit ten to fifteen extra garments in the same two feet of rod. The flocked surface grips silky blouses and wide-neck tops that slide off plastic, so clothes stay hung instead of pooling on the floor. Uniform hangers also calm the visual chaos, making the closet feel bigger and more boutique-like. It is one of the cheapest closet ideas on this list, and the difference is visible the moment you slide the last shirt into place.
Buy hangers in bulk: a 50-pack of slim velvet hangers runs $18 to $25 at Target, Costco, or Amazon, far cheaper than boutique singles. Choose one color, usually black or ivory, for a clean look. Standard 17-inch hangers fit most adult clothes; size up to 17.7 inches for broad-shouldered jackets. Skip the clips versions for heavy pants, since the clips loosen over time. The biggest mistake is mixing old and new hangers, which recreates the uneven skyline you were trying to fix. Donate the old set the same day. Pro tip: turn every hanger backward, then flip it when you wear the item; after six months, donate whatever still faces backward.
4. Build In Drawer Dividers for Folded Clothes
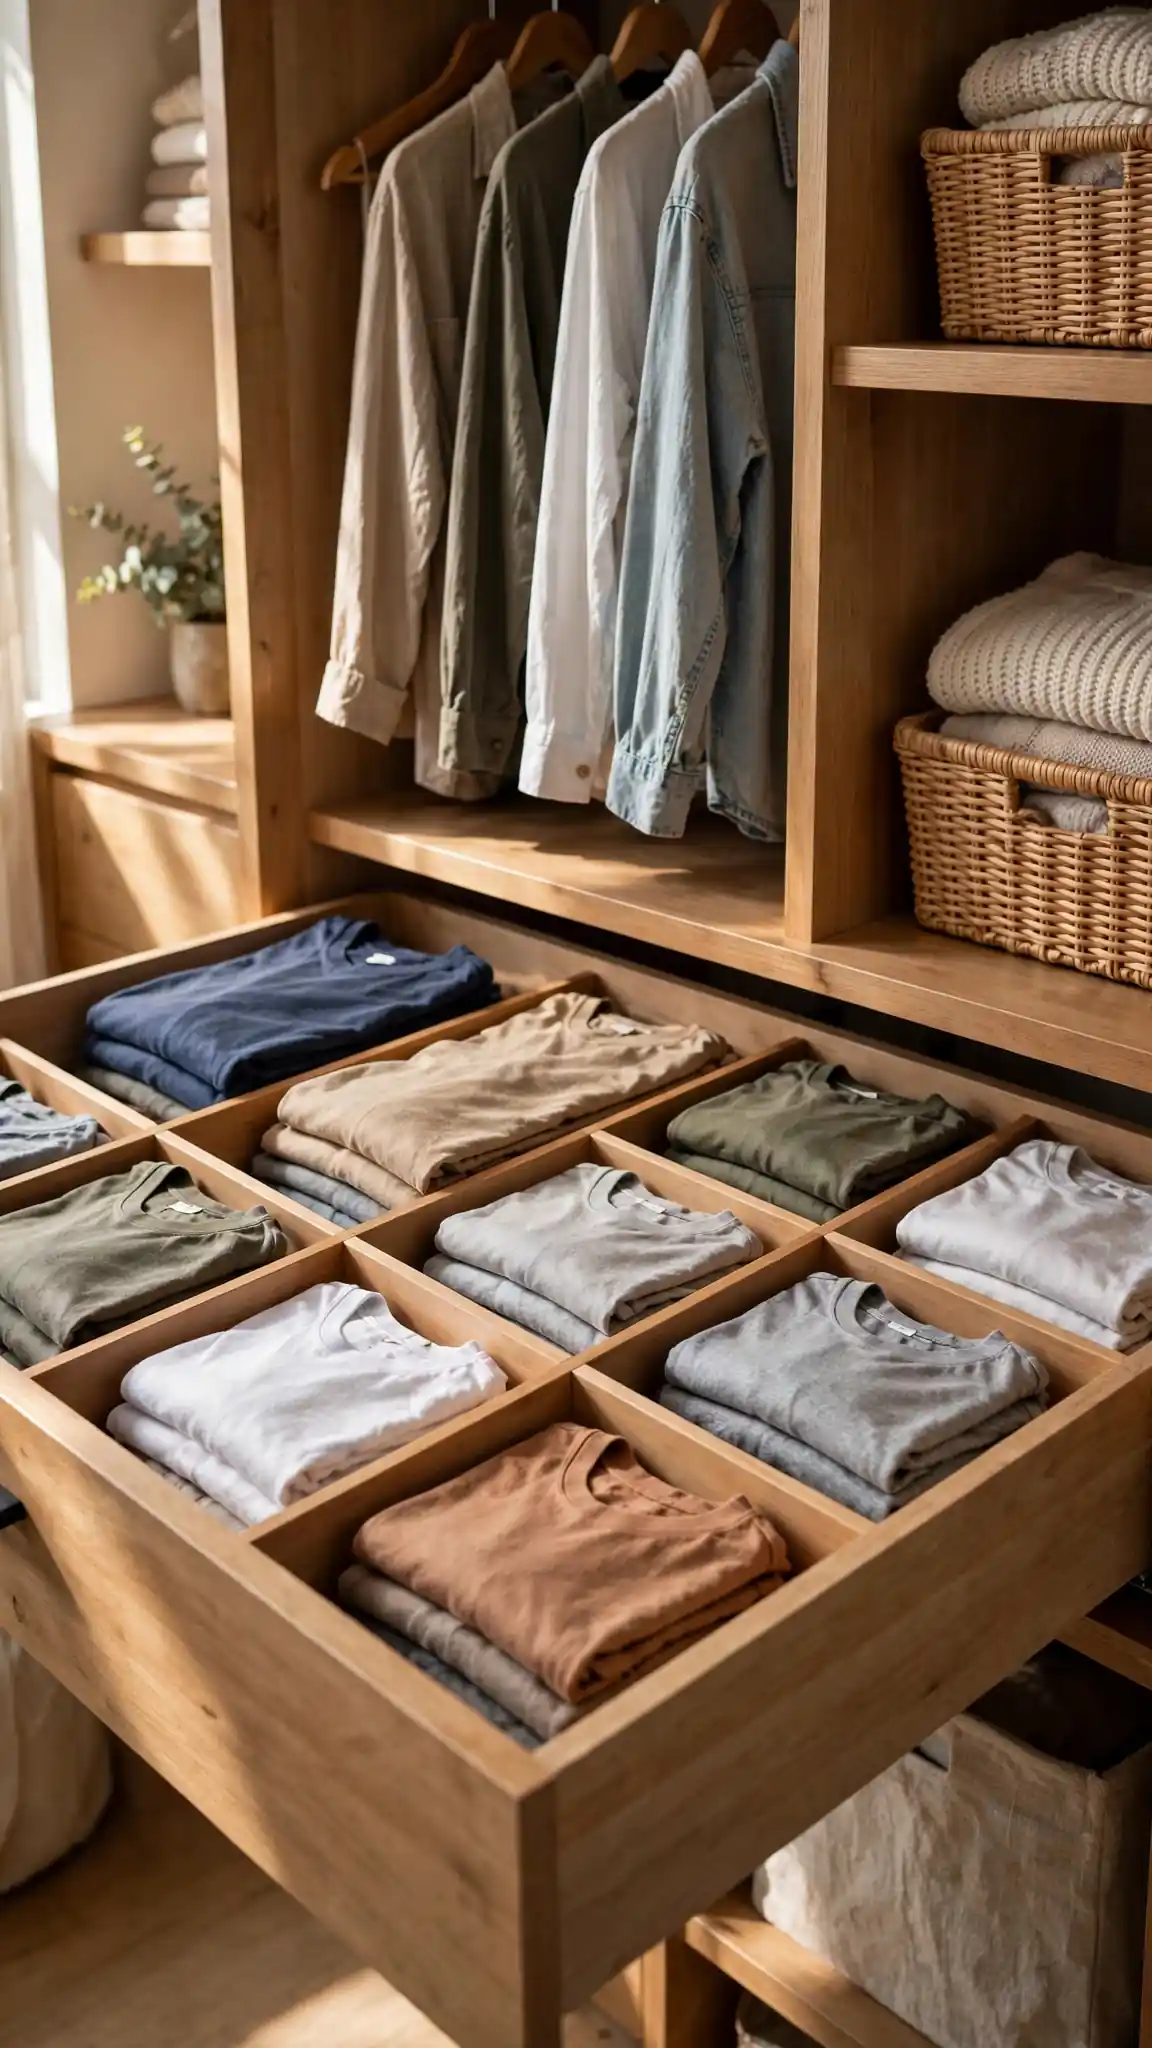
Drawers without dividers become fabric soup within a week, no matter how neatly you fold on laundry day. Simple dividers, whether spring-loaded bamboo, honeycomb inserts, or fabric boxes, give every category a fixed address: socks here, underwear there, tees in their own lane. When each item has a slot, you can see everything at a glance and grab one piece without disturbing the rest. Dividers also make file folding practical, because rows stay upright instead of slumping into a heap. Closet drawers, dresser drawers, and shelf baskets all benefit from the same five-dollar logic.
Measure drawer interiors before buying; most closet drawers are 14 to 22 inches wide and 4 to 6 inches deep. Honeycomb organizers ($12 to $20 at The Container Store or Amazon) suit socks and underwear, while adjustable bamboo dividers ($15 for four) work better for tees and gym clothes. File fold items so each row shows its edge, like books on a shelf. Avoid overstuffing cells; if a category overflows, it needs two slots or an edit, not more compression. Label-free systems work best when the layout stays consistent for a month. Pro tip: reserve the top drawer for daily essentials only, and move rarely worn items lower so mornings stay friction-free.
5. Stack Clear Shoe Boxes From Floor to Ceiling
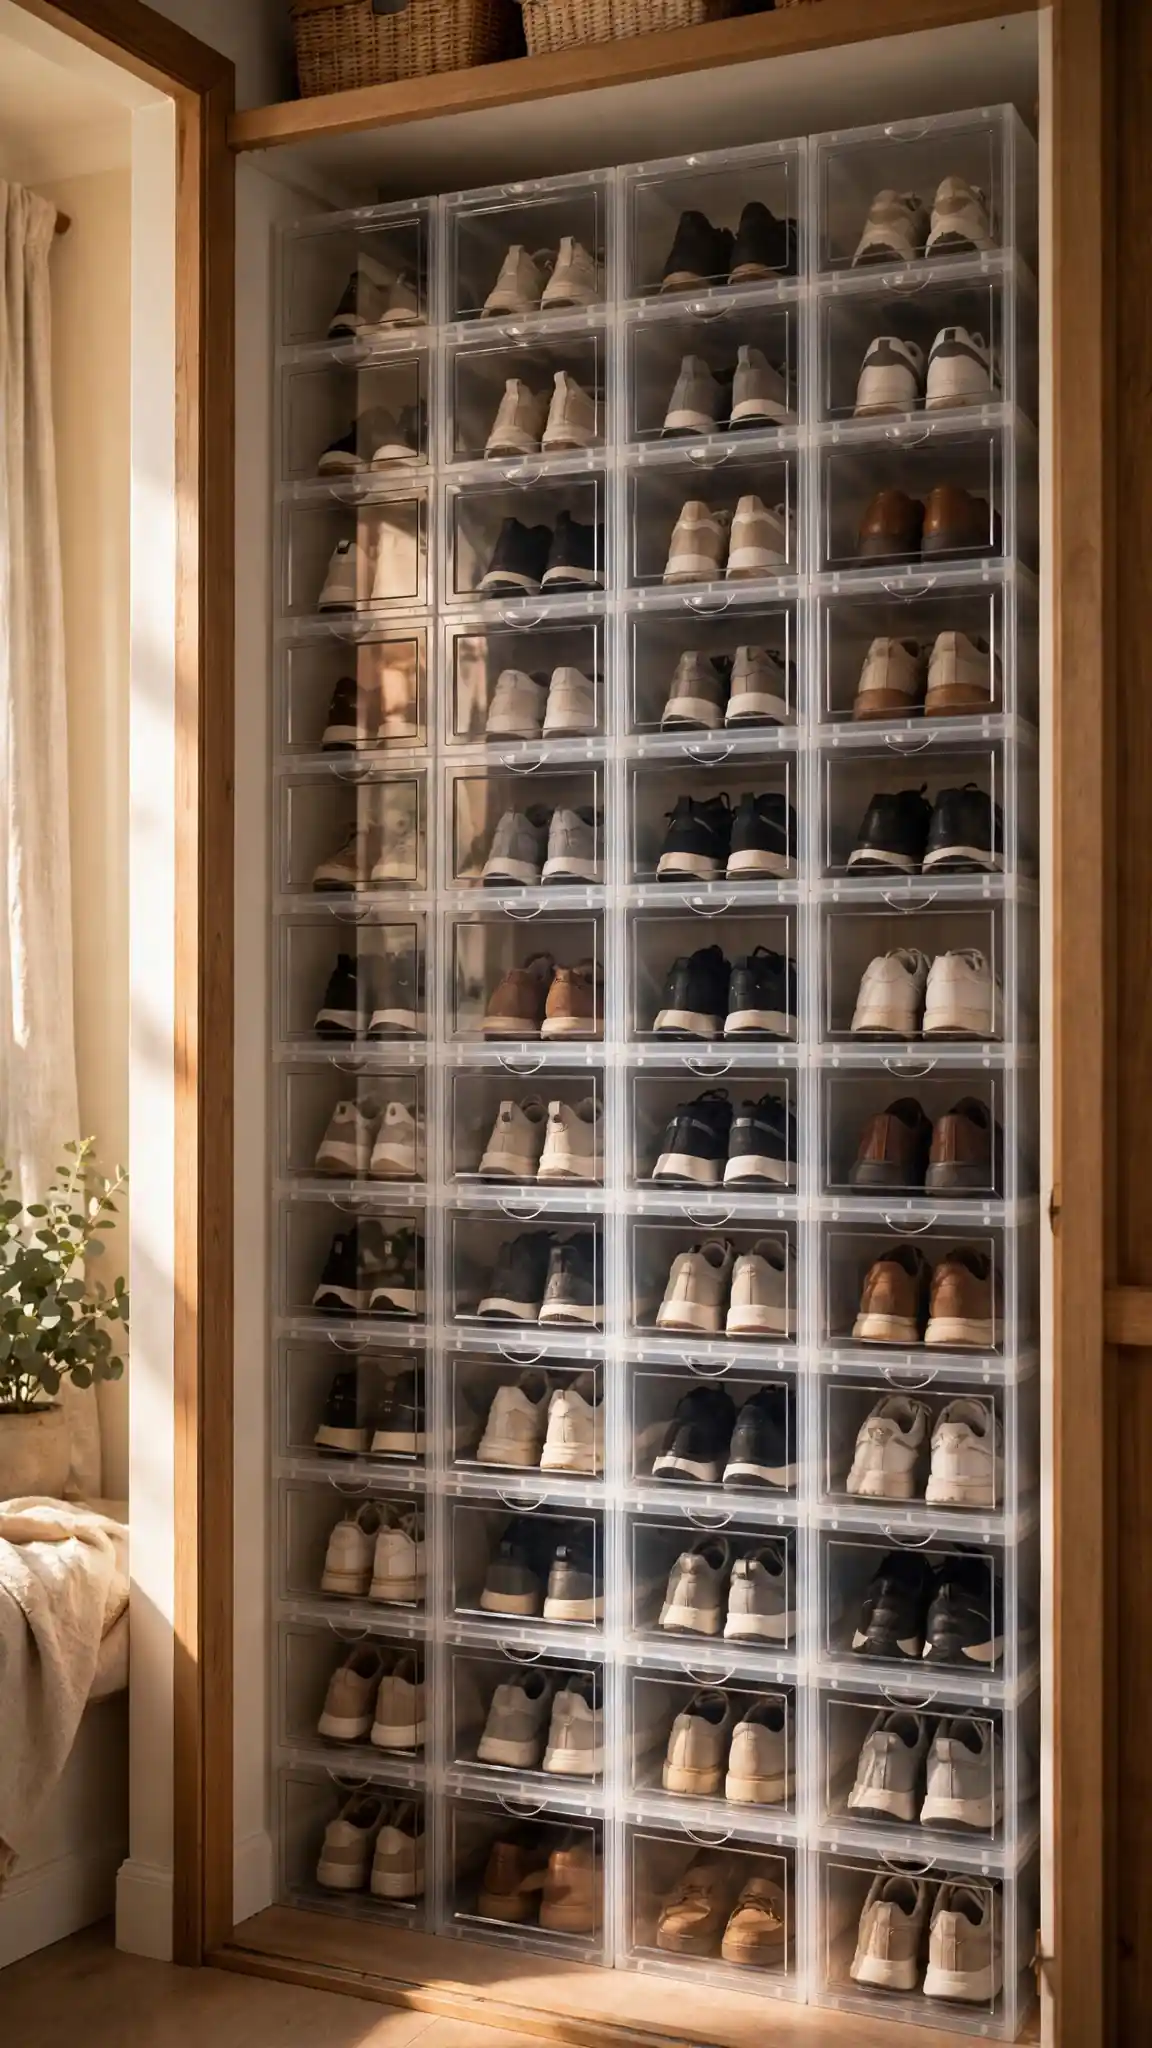
Shoe piles are where closet floors go to die. Clear, stackable shoe boxes turn that jumble into a tidy tower where every pair is visible, dust-free, and easy to grab. Unlike original cardboard boxes, transparent fronts mean no more opening six lids to find the black heels. Stacking uses the full height of a closet corner or the space beside a shelf tower, often fitting twenty pairs in two square feet of floor. Drop-front styles open like little drawers, so the bottom pair is as accessible as the top one, and nothing gets crushed.
Standard clear boxes run $2 to $4 each in multipacks at IKEA (SKUBB alternatives), Target, or Amazon; drop-front premium versions from The Container Store cost $8 to $10 but save daily hassle. Measure your largest pair first, including heels: most boxes fit up to men’s size 13, but tall heels need the XL size. Keep everyday pairs at waist height and special-occasion shoes up top. The classic mistake is stacking more than six high without a wall behind them, which leans like a tower in Pisa. Pro tip: label the end of each box with the shoe name anyway, because clear boxes still blur together under dim closet light.
6. Light Every Shelf With Motion-Sensor LED Strips
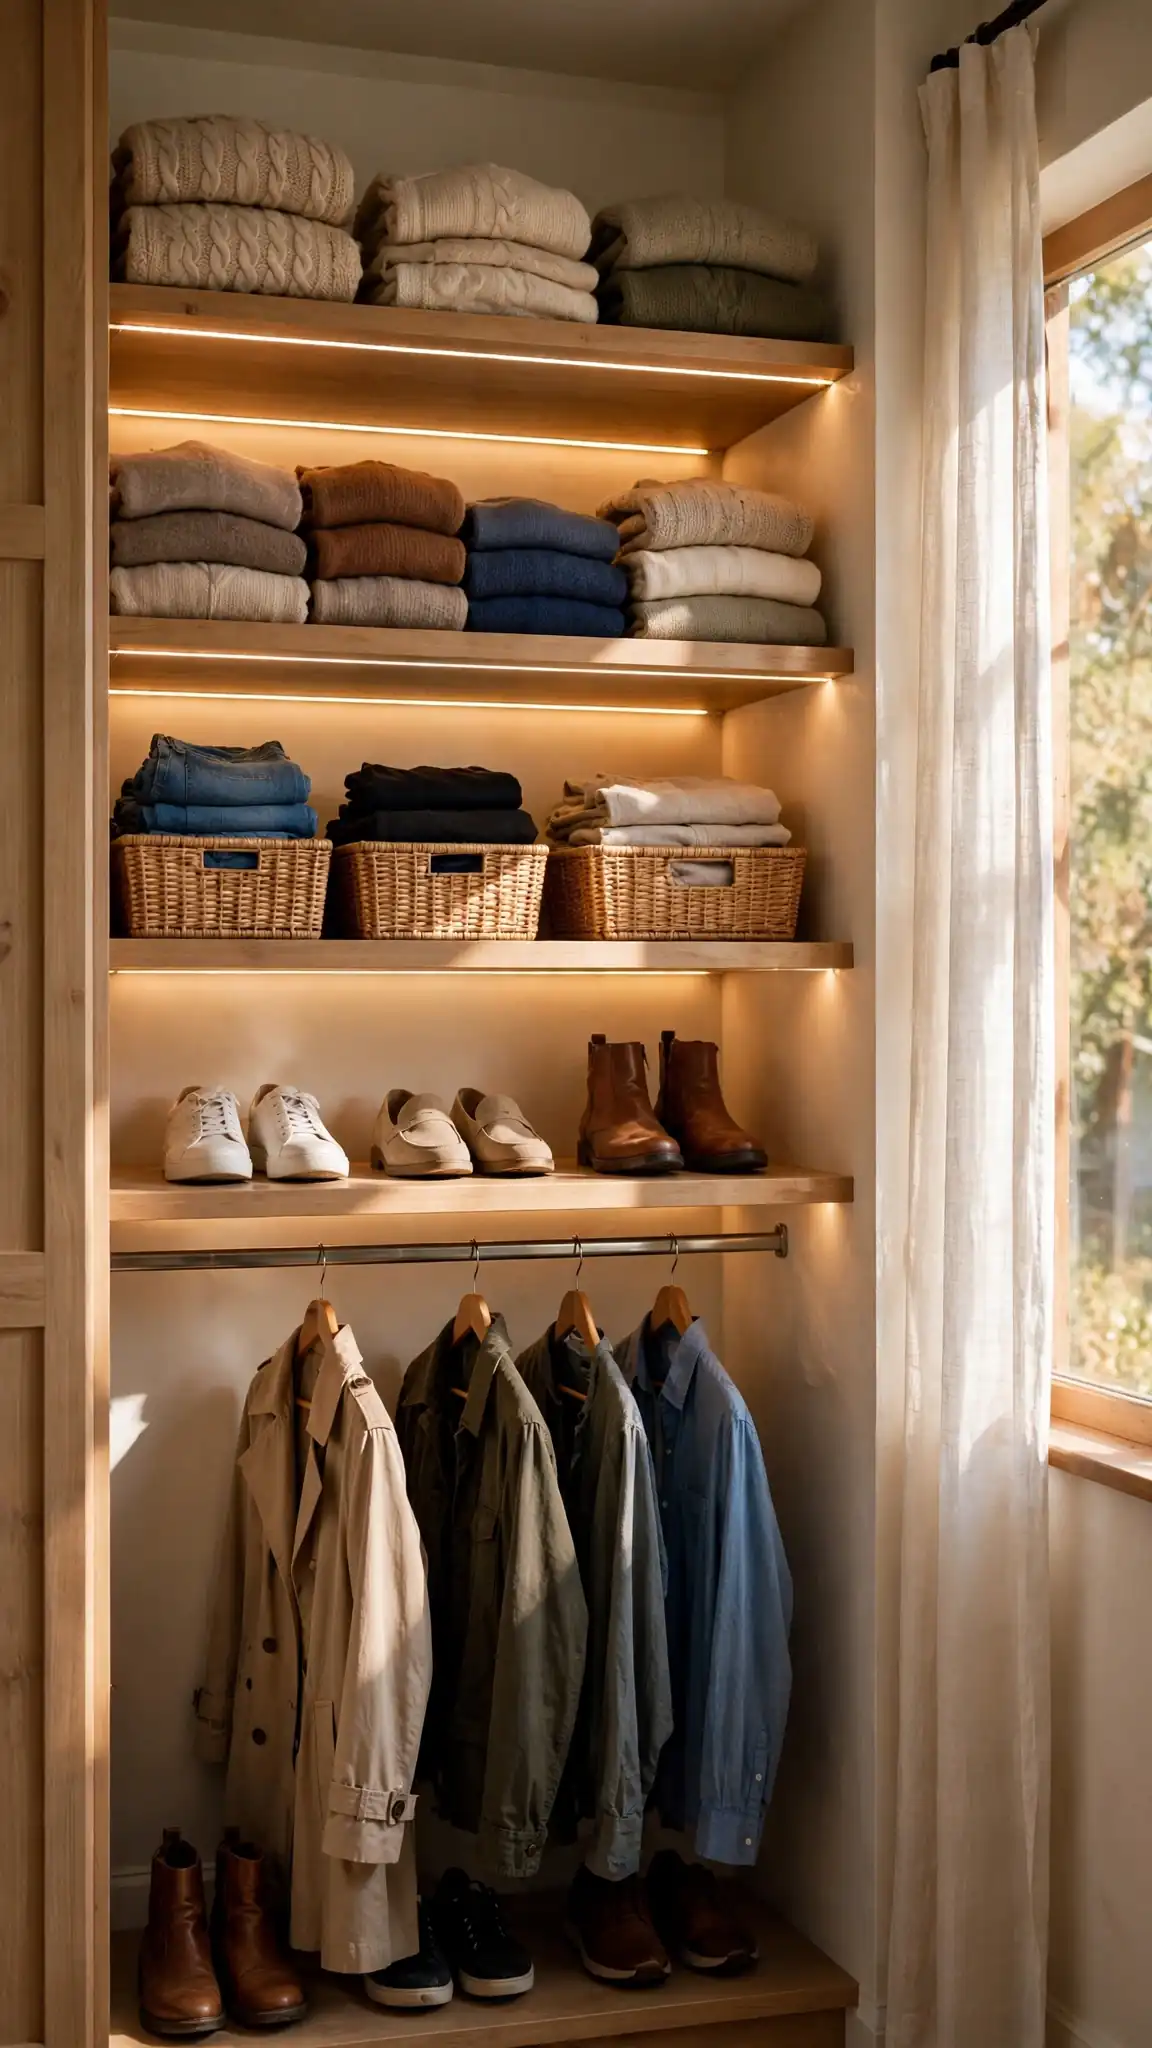
You cannot organize what you cannot see. Most closets rely on one dim ceiling bulb that leaves shelves and corners in shadow, so dark clothes vanish and piles form where the light does not reach. Peel-and-stick LED strips with motion sensors fix this in minutes: they wake when you open the door and light each shelf like a store display. Suddenly the navy-versus-black problem disappears, and every bin and stack is accountable. Good lighting also makes a small closet feel twice as large, because bright spaces read as bigger spaces to the human eye.
Rechargeable motion-sensor bars cost $10 to $20 for a three-pack on Amazon and mount with magnetic strips, no wiring or electrician needed. Choose warm white (2700K to 3000K) to match bedroom lighting and render colors honestly. Place strips under each shelf lip, angled slightly toward the back wall to avoid glare. USB-rechargeable models need a charge every two to three months with daily use; set a phone reminder. Avoid cheap strips with harsh blue light, which distort clothing colors and cause bad outfit choices. Pro tip: add one strip inside deep drawers or a dark corner cabinet, the two spots where lost items love to hide.
7. Swap Hinged Doors for Space-Saving Sliders
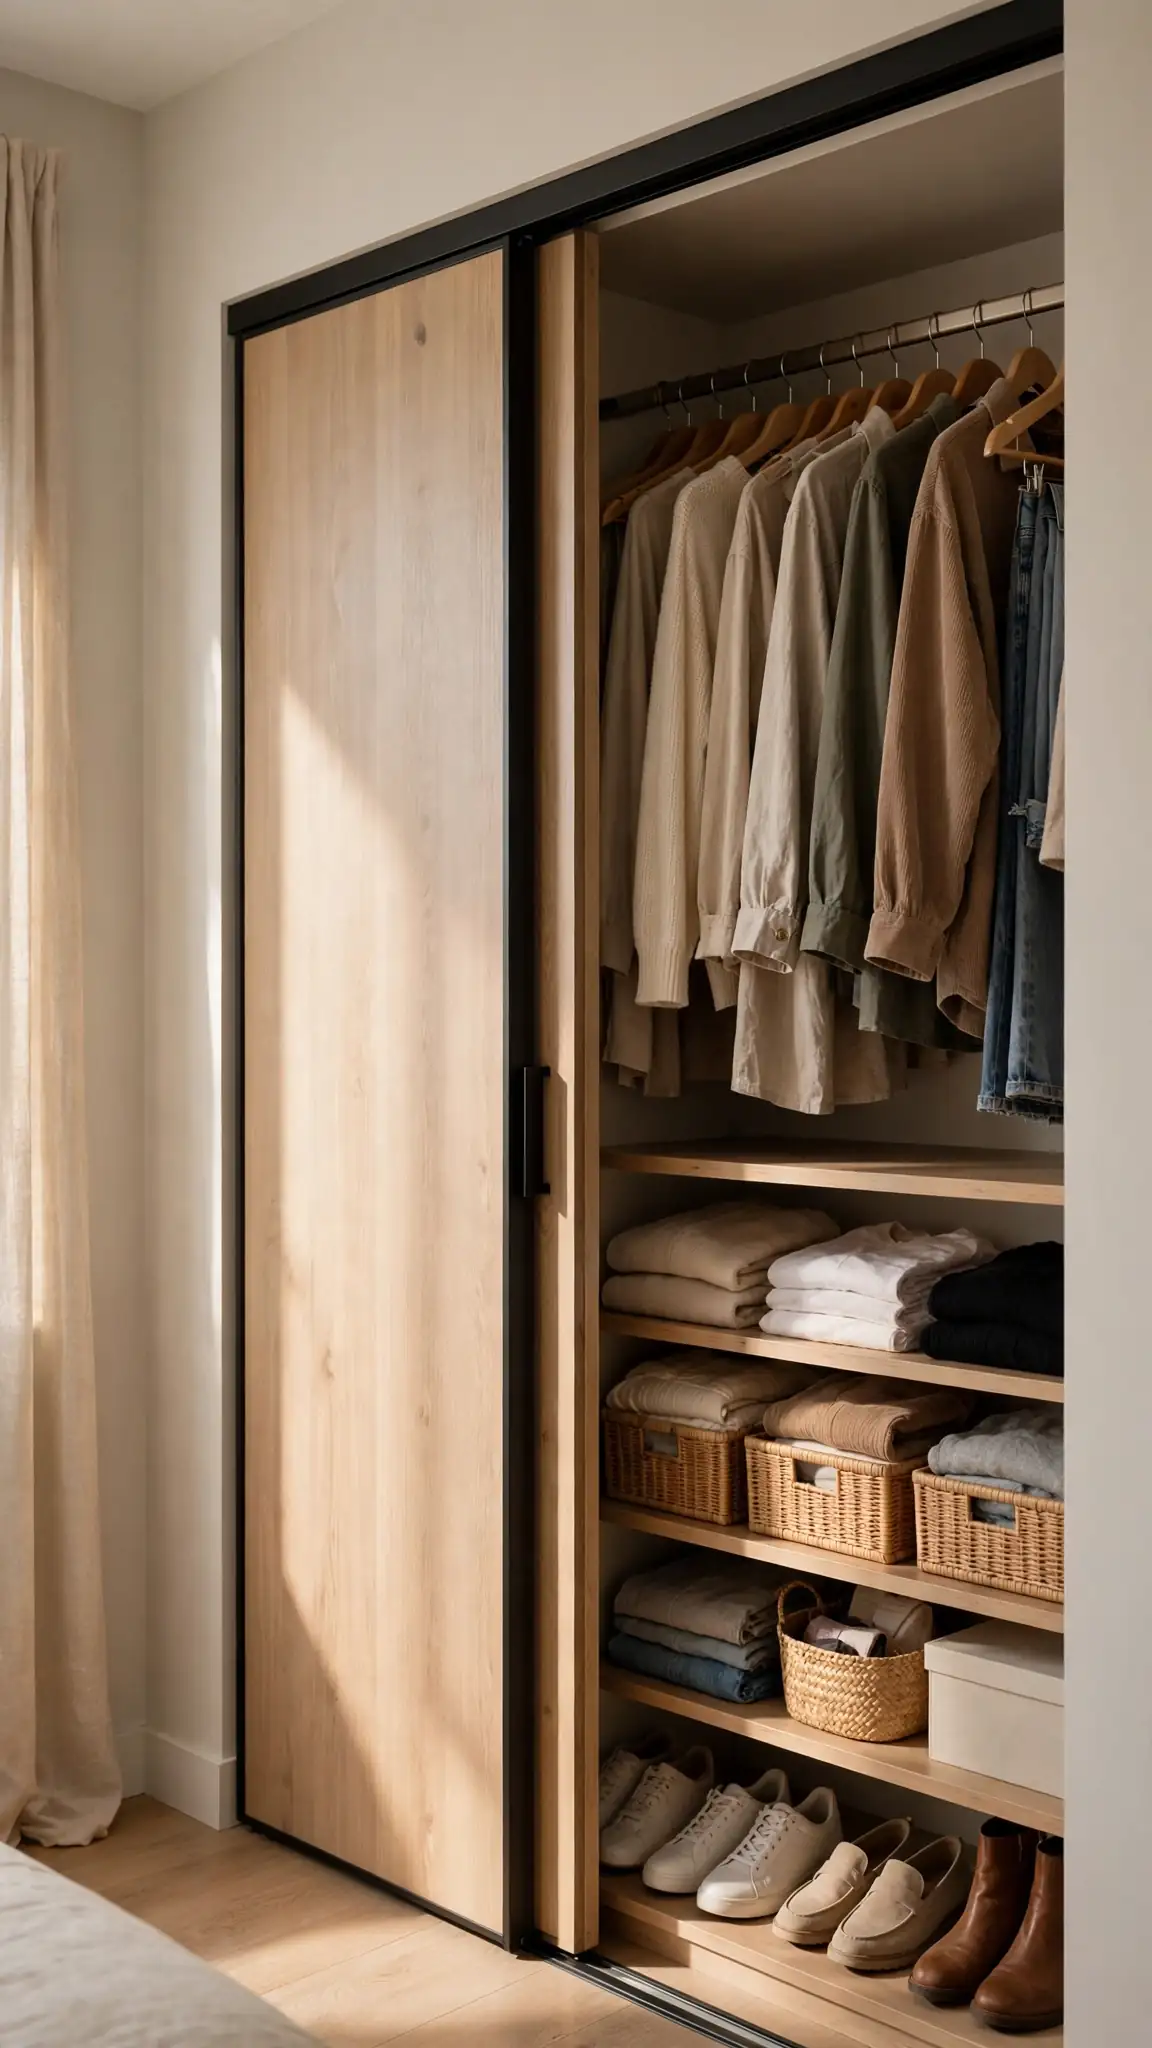
A swinging closet door steals up to ten square feet of bedroom floor and blocks half the closet when it is open. Sliding or bifold doors glide along the wall instead, freeing that swing zone for a dresser, a hamper, or simply breathing room. Sliders also let you open the exact section you need, which suits closets organized into zones. In small bedrooms and hallways, this one change can make the whole room function better. Modern track hardware runs quietly and smoothly, a world away from the rattling sliders of older apartments and dorm rooms.
A bifold door kit for a 48-inch opening costs $80 to $200 at Home Depot or Lowe’s, while quality sliding bypass hardware runs $60 to $120 plus the door slabs. Measure the opening height carefully; most tracks need 1.5 inches of clearance at the top. Installation takes a confident DIYer about two hours with a drill and level. Renters can achieve a similar feel with a ceiling-mounted curtain track and linen panels for under $50. The mistake to avoid is choosing doors too wide for the opening, which leaves a permanent blind spot behind the overlap. Pro tip: choose one mirrored slider panel and you gain a dressing mirror without using wall space.
8. Hang Baskets on the Inside of Closet Doors
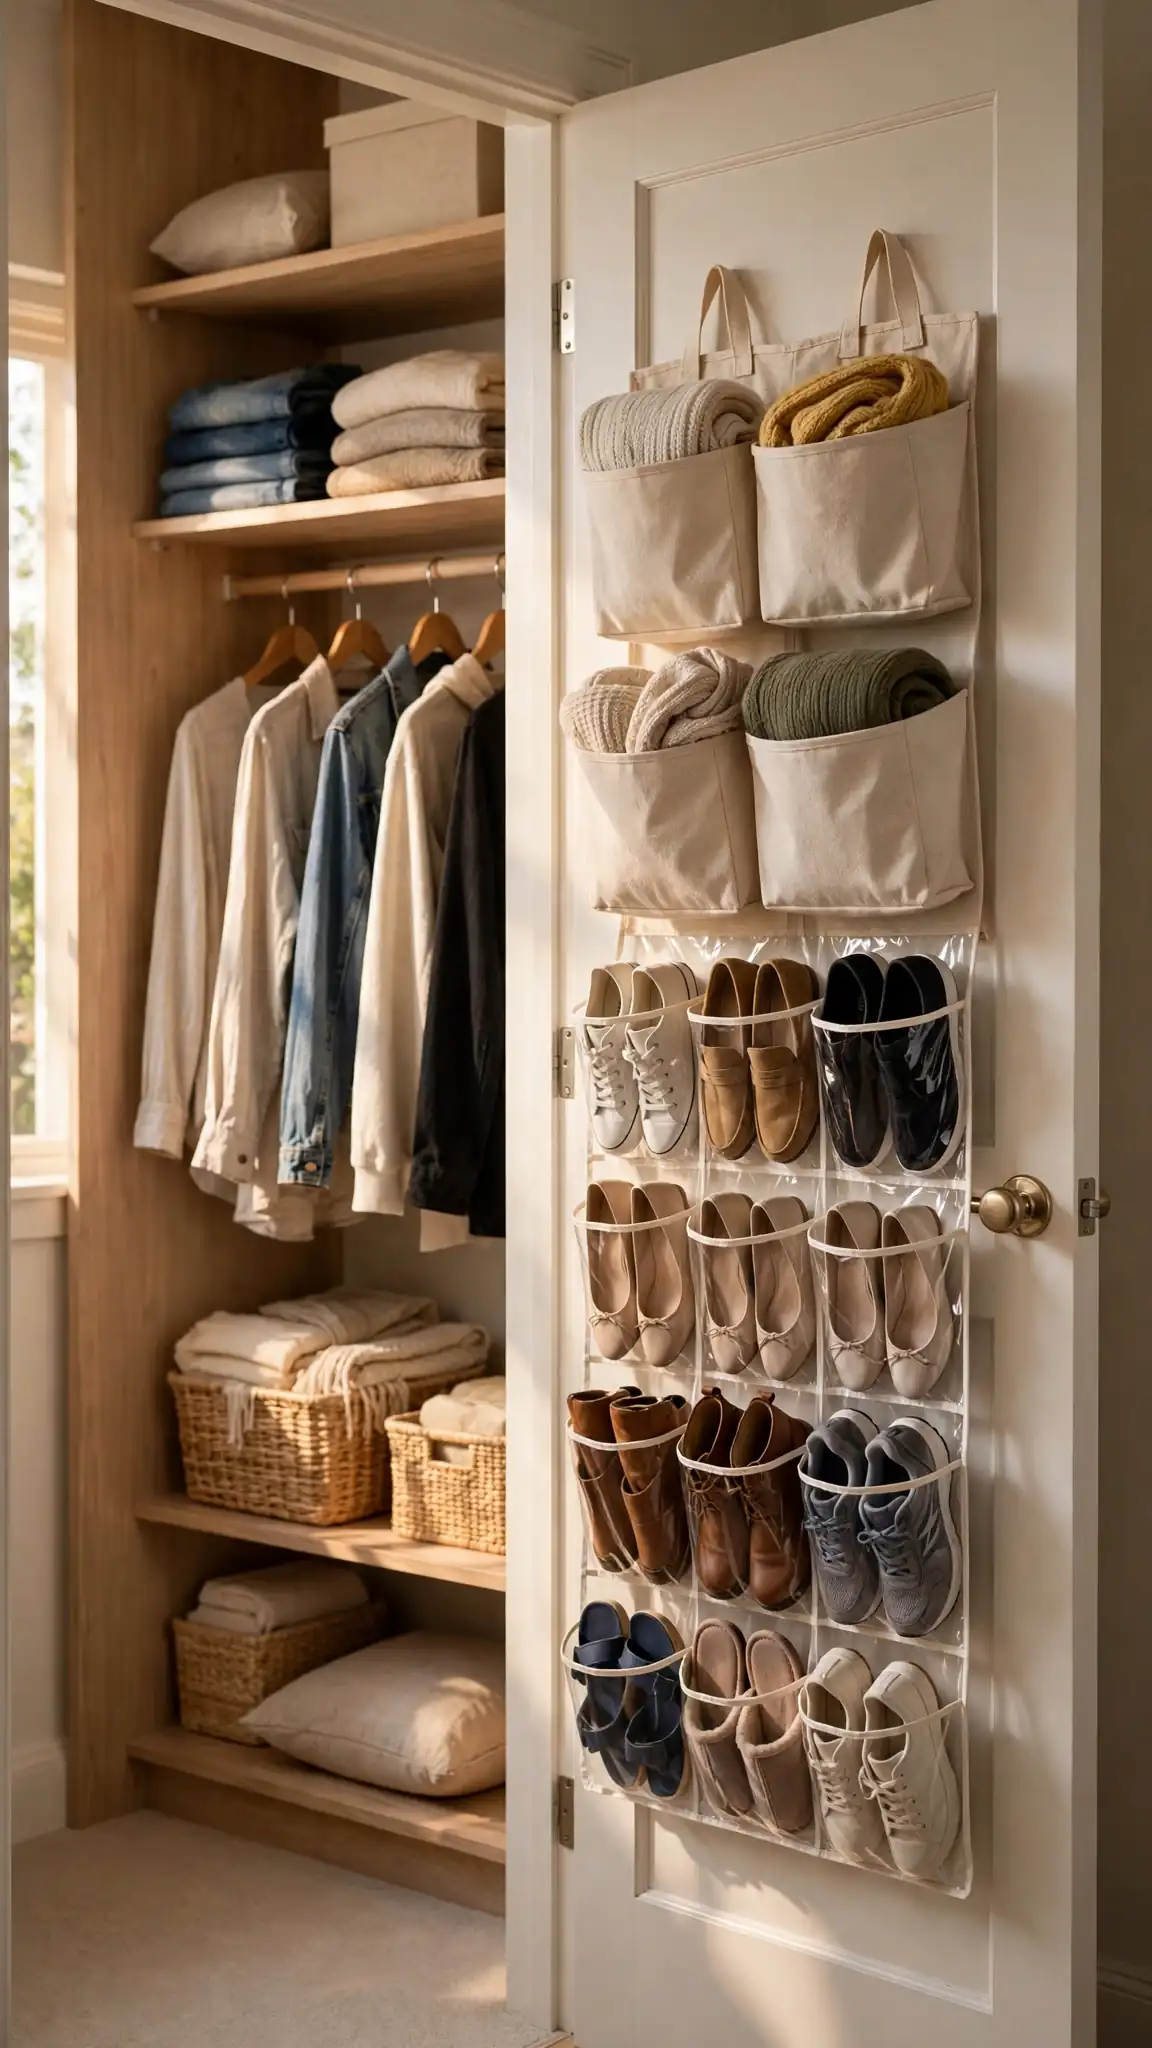
The inside of your closet door is prime real estate that usually holds nothing but air. Over-door racks and hanging baskets convert that flat surface into storage for shoes, scarves, belts, hats, cleaning supplies, or tomorrow’s gym clothes. In a small closet, the door can add the equivalent of two extra shelves without touching the interior layout. Clear-pocket organizers work for accessories you need to see, while woven baskets hide bulkier clutter and look prettier. Just confirm your door closes fully with the organizer loaded before committing to the biggest model.
Over-door basket racks cost $20 to $45 at Target and The Container Store; look for padded hooks that will not scratch paint or warp a hollow-core door. Standard interior doors are 1 3/8 inches thick, so check hook size before buying. Keep total weight under 20 pounds to protect hinges, and place heavy items in the lowest basket. Renters should pick designs that hang from hooks rather than screws. A common mistake is loading the door with shoes that bang against hanging clothes when it swings; test the swing with the door fully loaded. Pro tip: dedicate the top basket to a donation station, and when it fills, the bag goes straight to the thrift store.
9. Claim the Vertical Space Above the Top Rod
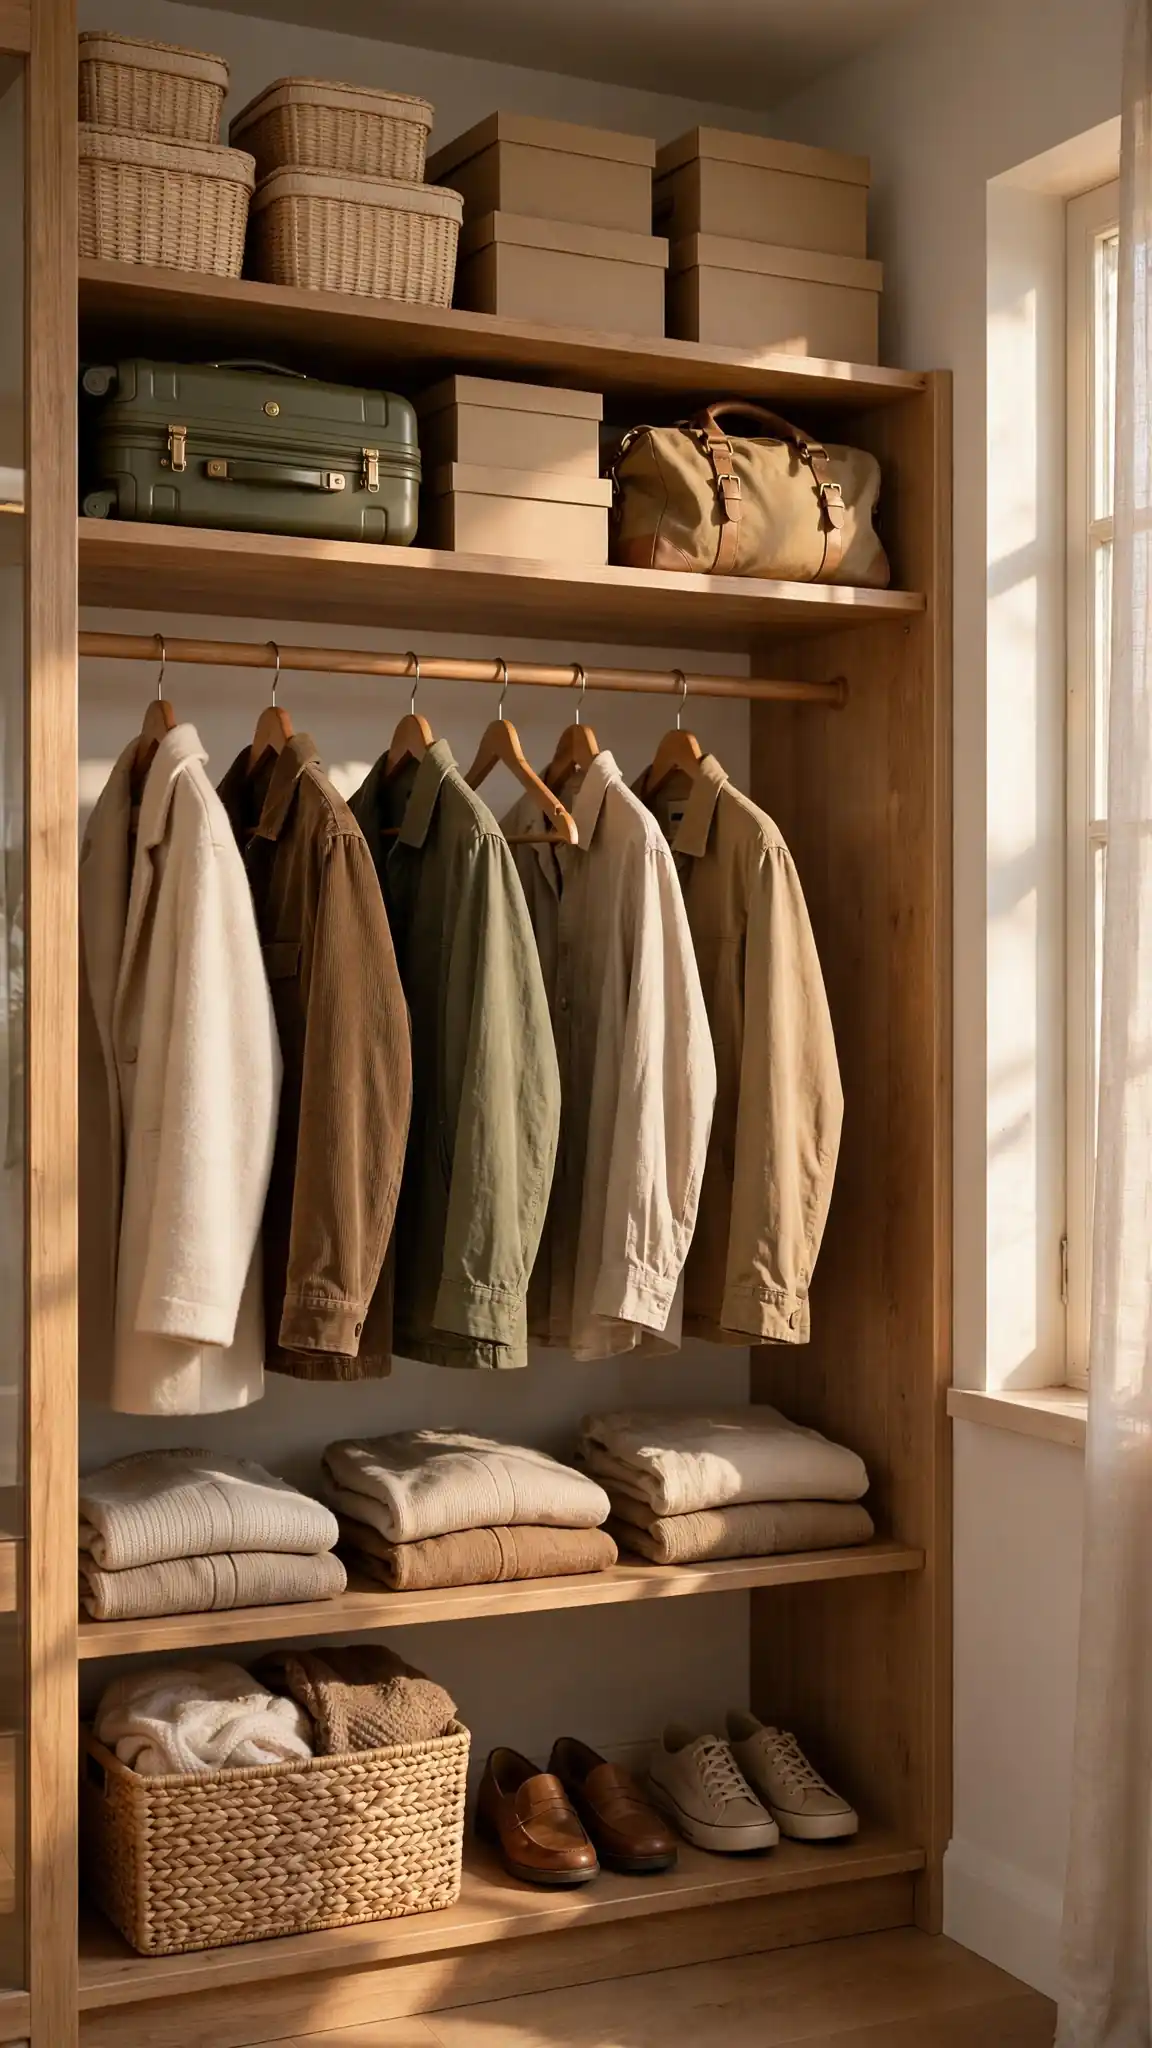
In most closets, the foot or more of space between the top shelf and the ceiling sits empty, even in homes with nine or ten-foot ceilings. That high zone is perfect for things you touch a few times a year: luggage, holiday sweaters, memory boxes, and off-season bedding. Adding one extra shelf up there, or stacking uniform bins on the existing shelf, quietly adds twenty to thirty percent more storage. Because the items are rarely needed, the height is no real inconvenience, especially with a sturdy folding step stool stored nearby for safe access.
A simple melamine shelf on cleats costs under $30 in materials from Home Depot and installs in an hour; wire shelving is even cheaper. Keep bins uniform in size, roughly 18 by 12 by 10 inches, so they stack without gaps, and keep the heaviest box at shoulder height for safe lifting. Label every bin on two sides, since you will be reading them from below at an angle. Avoid storing anything up high that you need monthly; the friction guarantees it will migrate down and clutter the good shelves. Pro tip: photograph the contents of each high bin and save the pictures in a phone album named Closet, so you never open three boxes hunting for one item.
10. Rotate Seasonal Clothes Into Labeled Bins
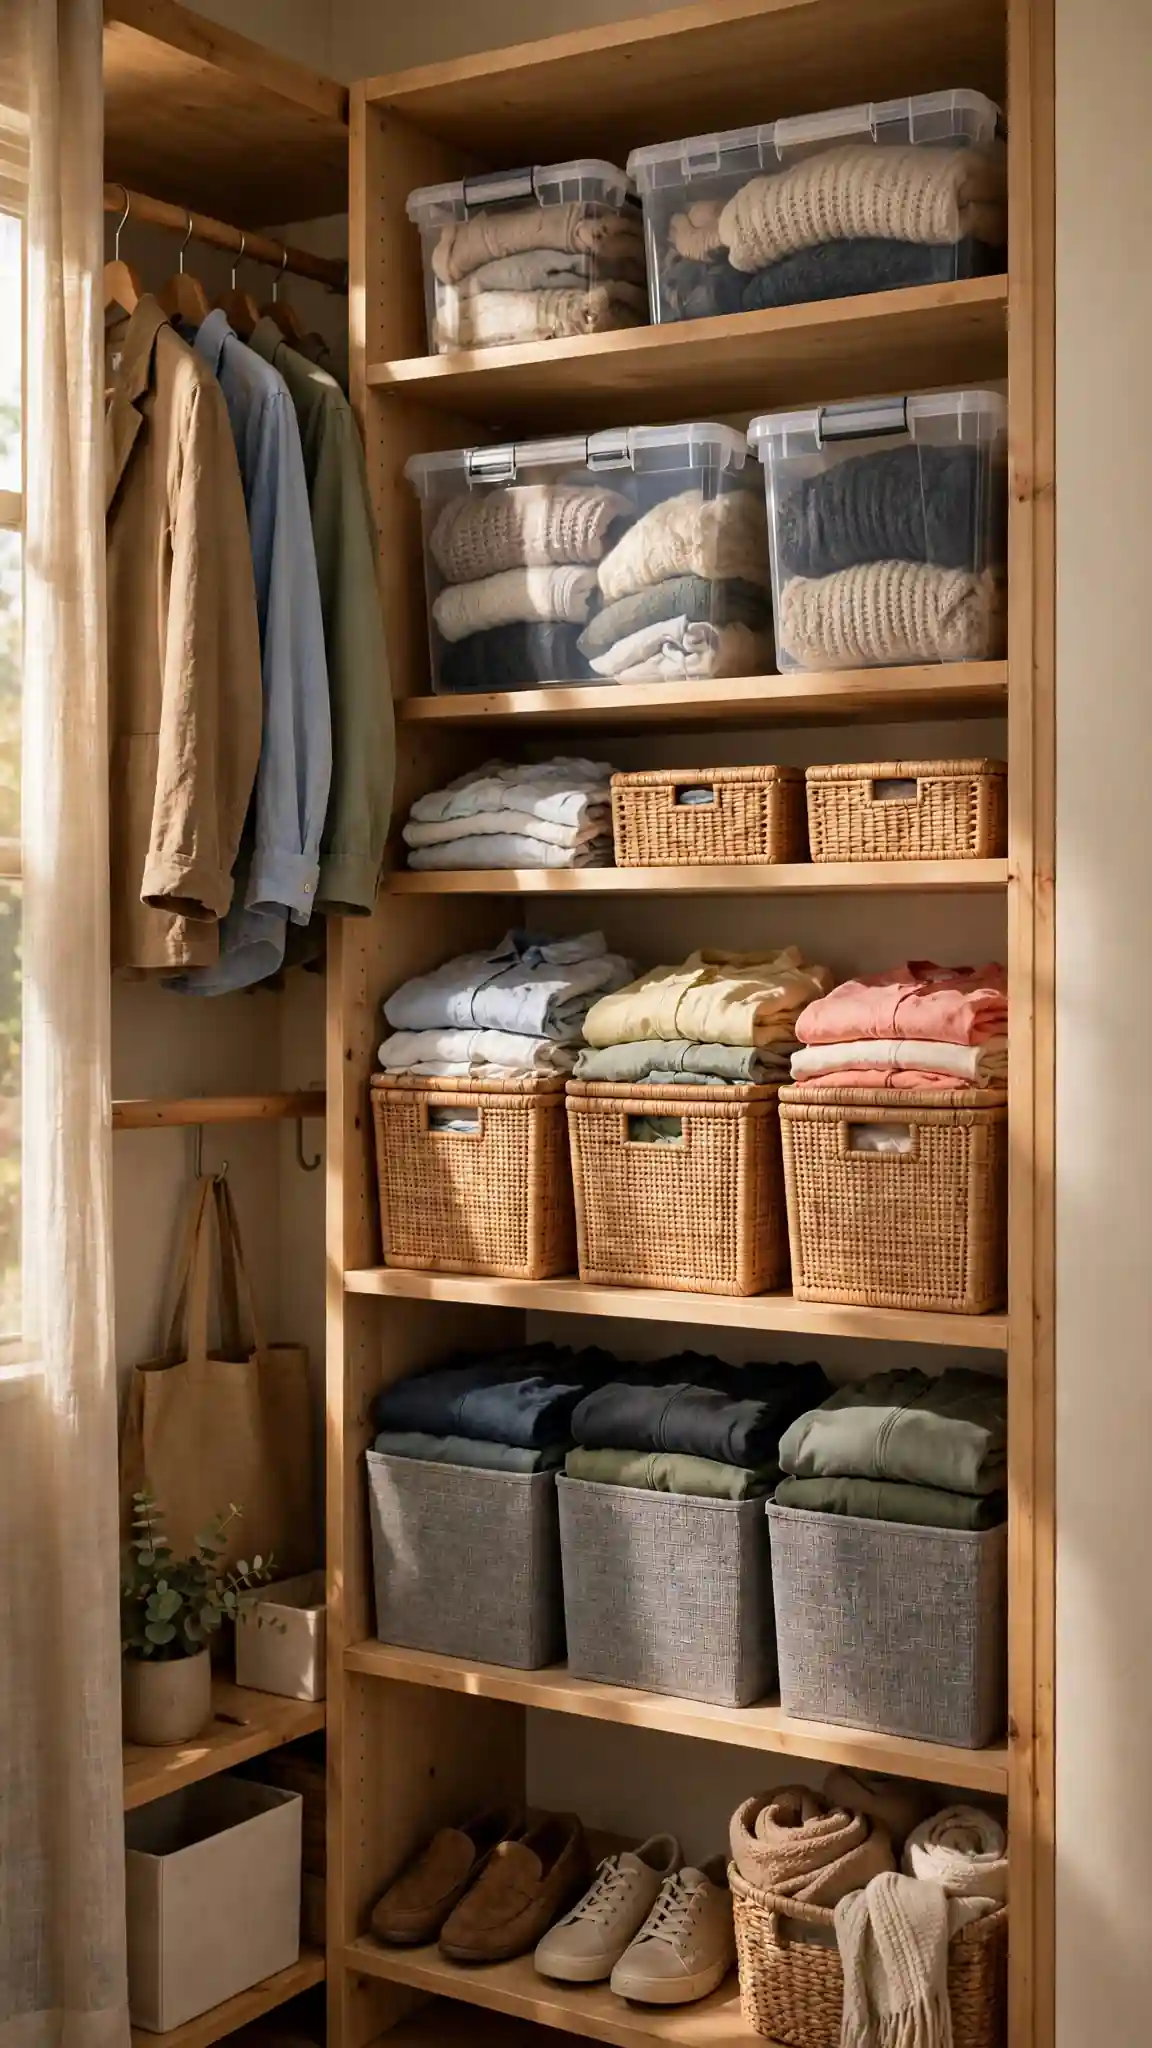
Your closet should only hold what you can wear this season. Bulky winter coats crushing your summer dresses helps neither wardrobe, and overcrowded rods wrinkle everything they touch. A twice-a-year rotation moves off-season clothes into labeled bins stored on the high shelf, under the bed, or in a guest closet, leaving the main closet airy and shoppable. The swap also forces a quick edit twice a year, so worn-out pieces leave before they fossilize. Many people find they wear more of what they own simply because they can finally see all of it.
Use clear bins with latching lids, about $7 to $12 each at Target or Walmart; four bins handle most wardrobes. Wash everything before storing, since invisible stains set over months and attract pests. Cedar blocks or lavender sachets ($8 a pack) protect wool far better than mothballs and smell better too. Label bins by season and category, like Winter Sweaters, not just Winter, so retrieval takes seconds. Keep a small transition basket for unpredictable weather weeks. The mistake is storing clothes in cardboard or trash bags, which invite moisture and bugs. Pro tip: put a calendar reminder for the first cool weekend of fall so the swap happens before the morning scramble does.
11. Reach-In Closet Ideas That Make a Tiny Space Work Twice as Hard
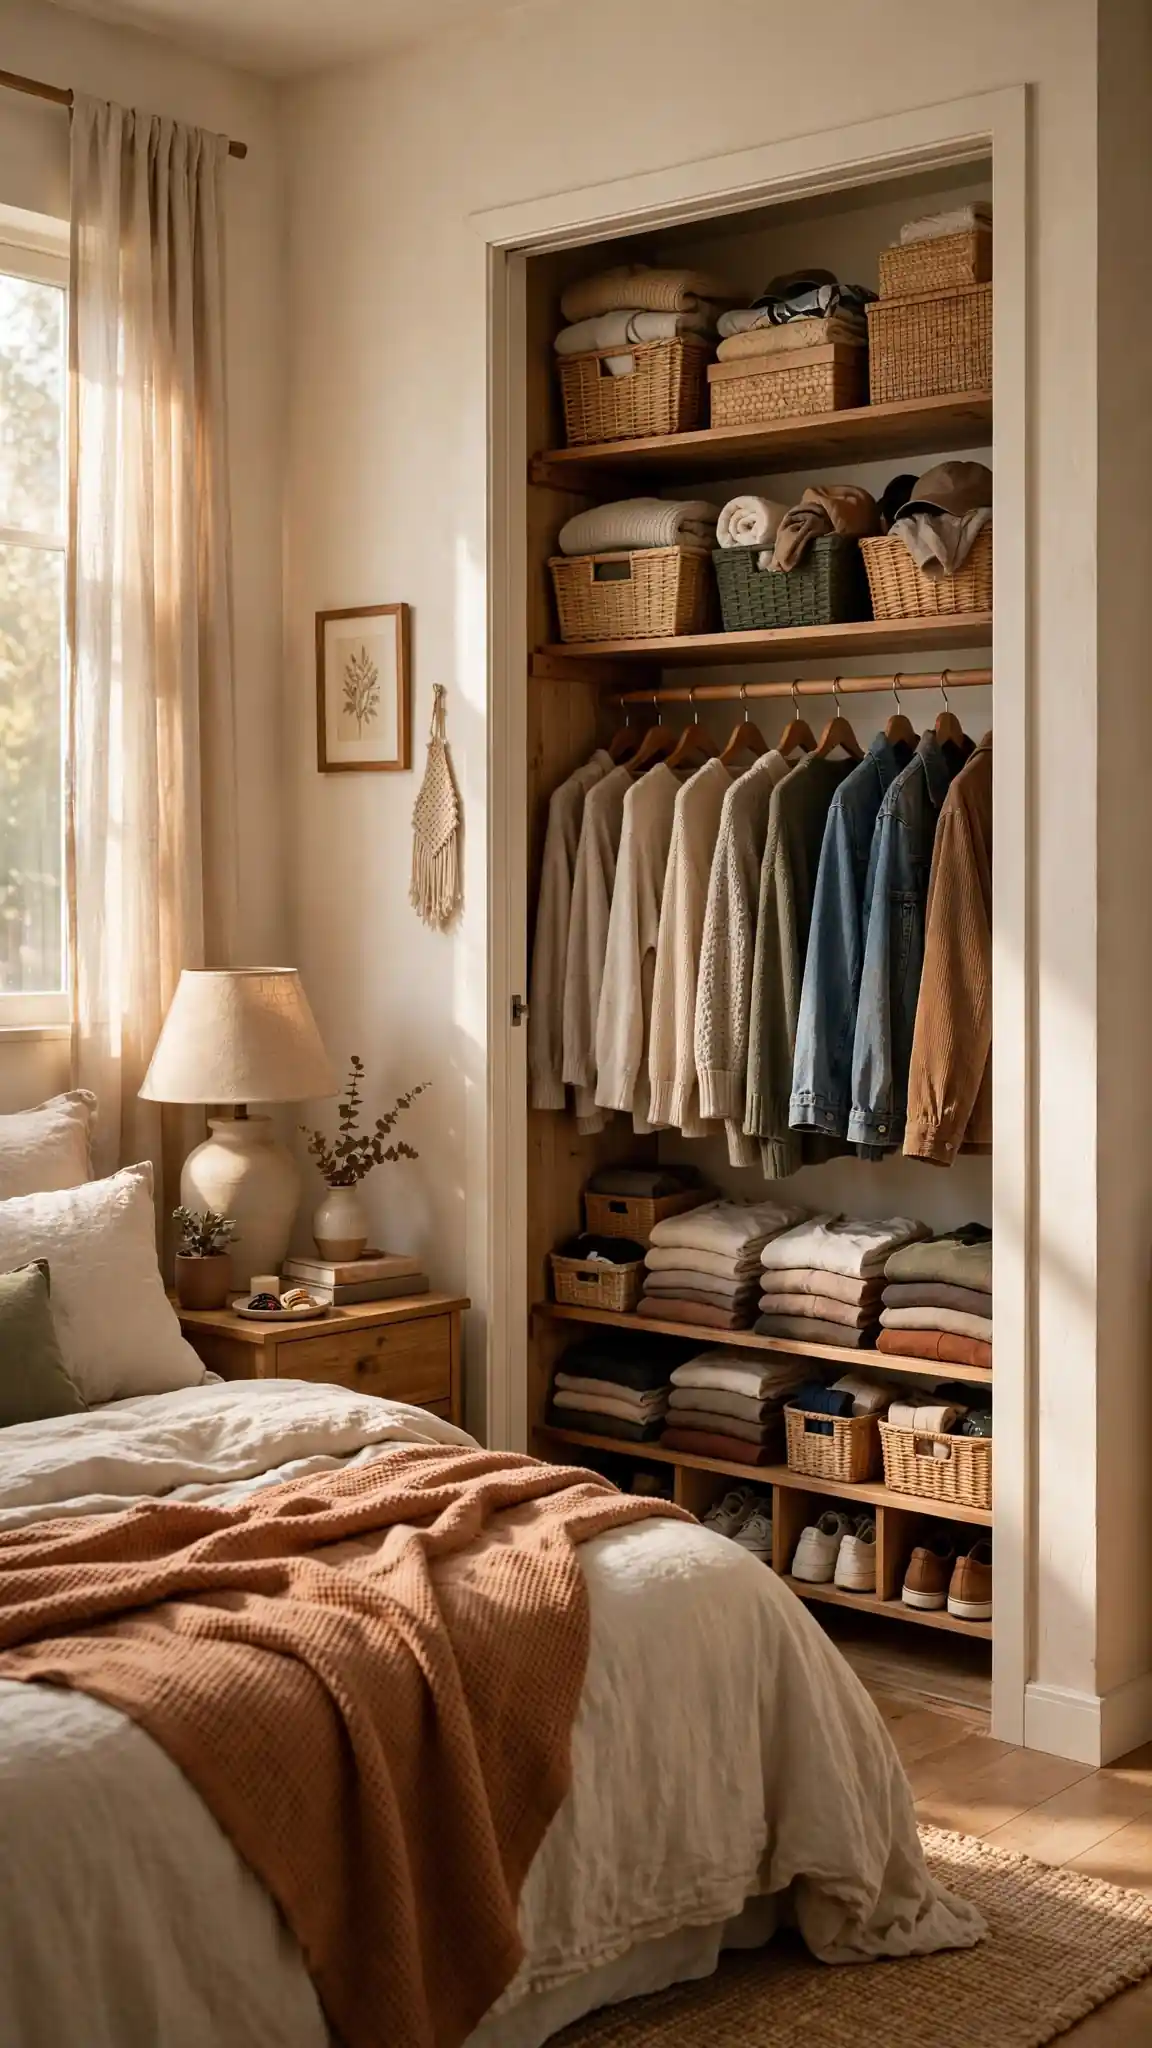
A standard reach-in closet is only about two feet deep and five to six feet wide, yet it can hold a surprising amount when every inch has a job. The formula is simple: double-hang one side, add a slim shelf tower in the middle, and reserve one short section for long dresses or coats. Vertical shoe storage and a door organizer finish the job. Small closets punish clutter more than big ones, but they also reward smart systems faster, because a single afternoon of work can transform the entire space from frustrating to genuinely efficient.
Budget $100 to $250 for a complete small-closet kit: ClosetMaid ShelfTrack and IKEA components mix well at this scale. Keep shelf depth at 12 to 14 inches so folded clothes do not disappear into a dark cave. Use every inch of width; a 68-inch rod section plus a 16-inch tower beats one long rod in a 72-inch closet. Install at 5-foot-8 eye level downward first, since that is your daily reach zone. Avoid deep bins that hide items behind each other; shallow and visible wins in tight spaces. Pro tip: paint the closet interior a bright white before installing anything, because the reflected light makes a tiny space feel and function noticeably larger.
12. Zone a Walk-In Closet Like a Boutique
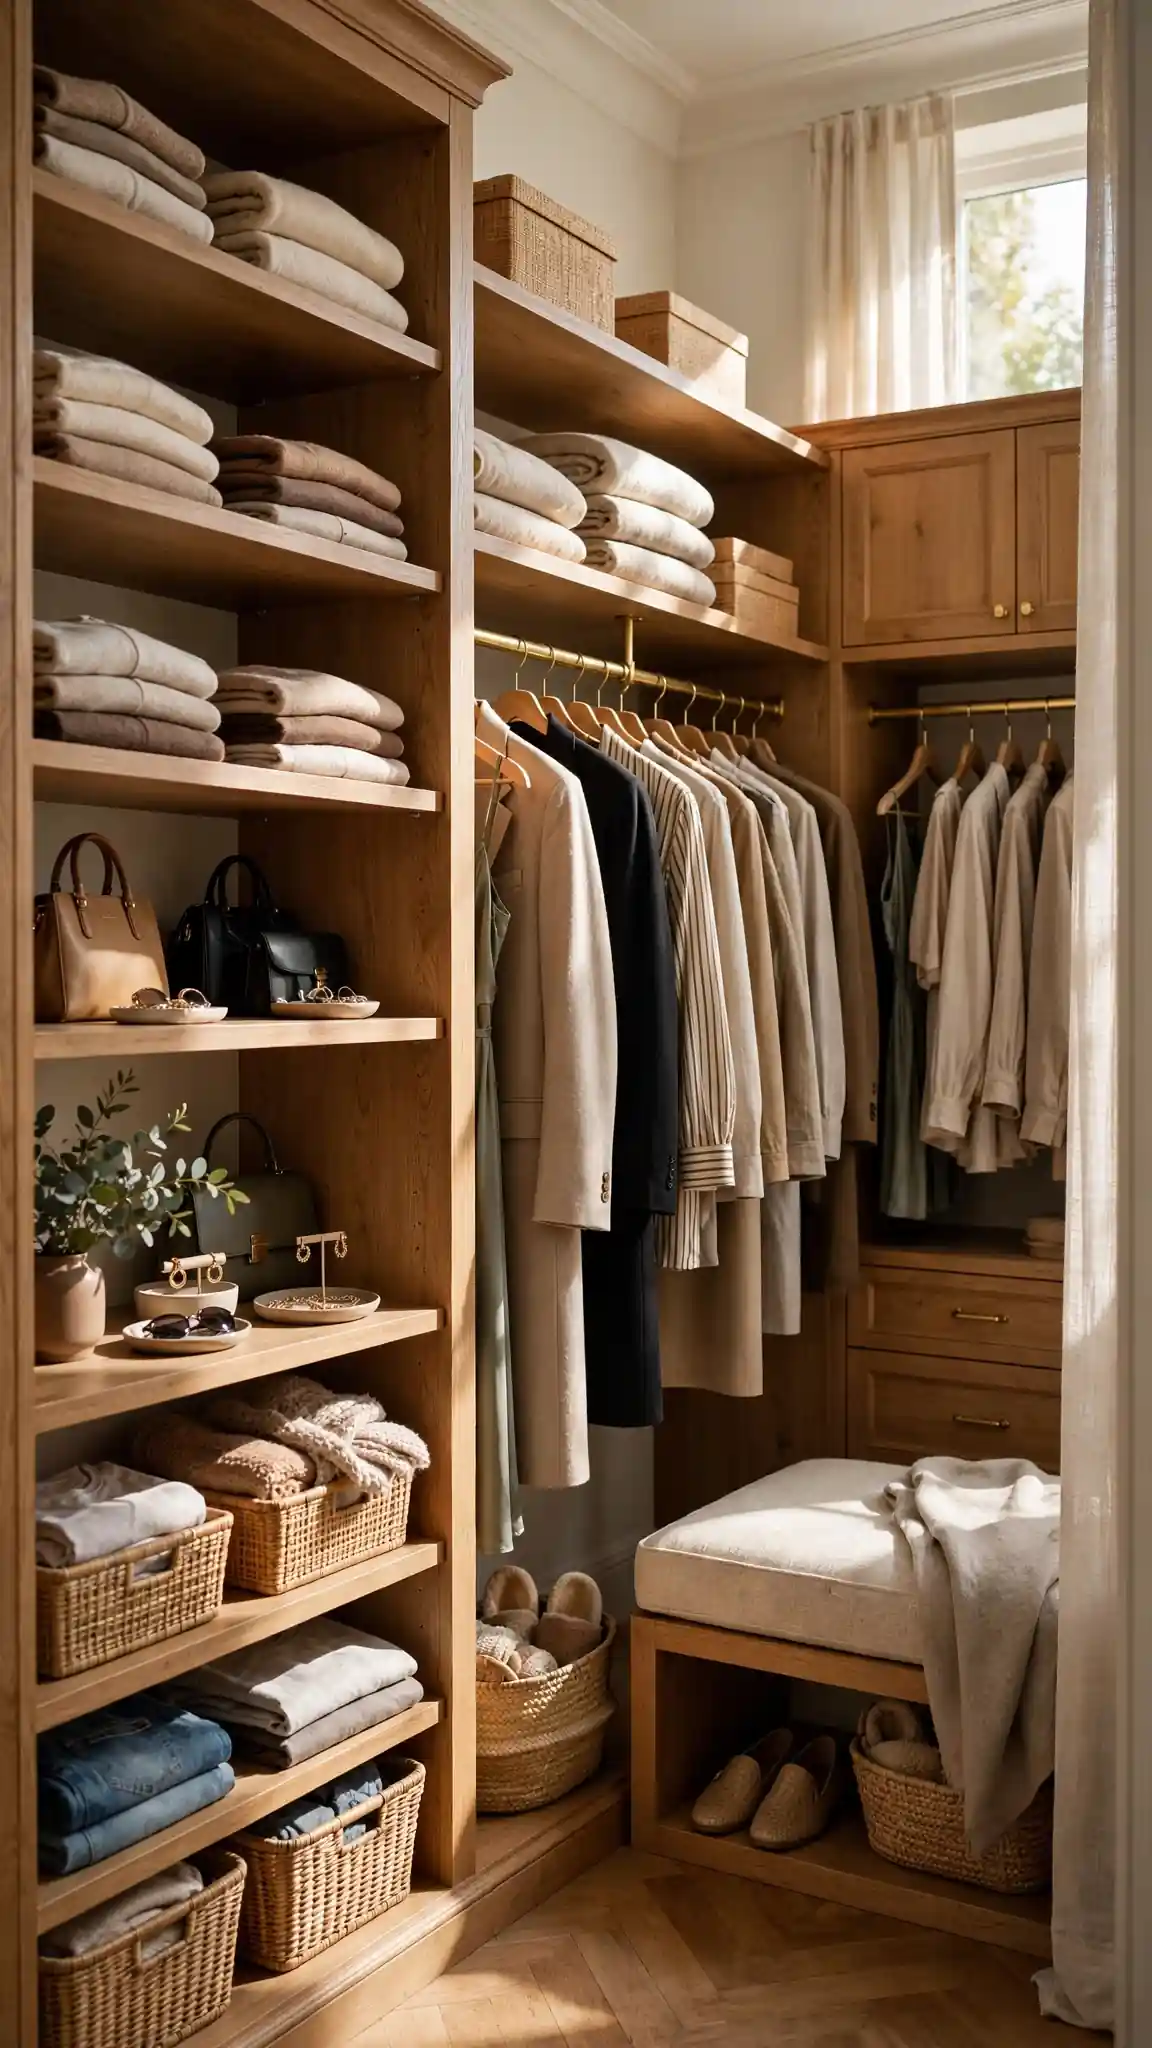
Walk-in closets fail when everything is stored wherever it landed first. Boutiques stay shoppable because every category has a zone: dresses together, work clothes together, shoes displayed in one run. Steal that logic by grouping your walk-in into clear neighborhoods, with daily wear at the front near the door and occasional pieces in the back corners. Add one display moment, like a shelf of favorite bags or a row of color-ordered shirts, and the space starts to feel like a shop you enjoy visiting. Zoning also shortens morning routines, because your eyes learn the map within a week.
Sketch the layout before moving anything: long hang gets the longest wall, double hang fits the medium wall, and the short wall takes shelves or drawers. Keep at least 24 inches of clear walkway between facing units. A boutique-style system like IKEA PAX frames costs $400 to $1,200 depending on size, while California Closets design services start higher but include planning help. Put a small rug and a padded bench in the center if space allows; both encourage you to keep the floor clear. The mistake is spreading one category across three zones, which guarantees forgotten duplicates. Pro tip: arrange each zone by color, light to dark, so gaps and favorites are obvious at a glance.
13. Give Kids Low Rods They Can Reach Themselves
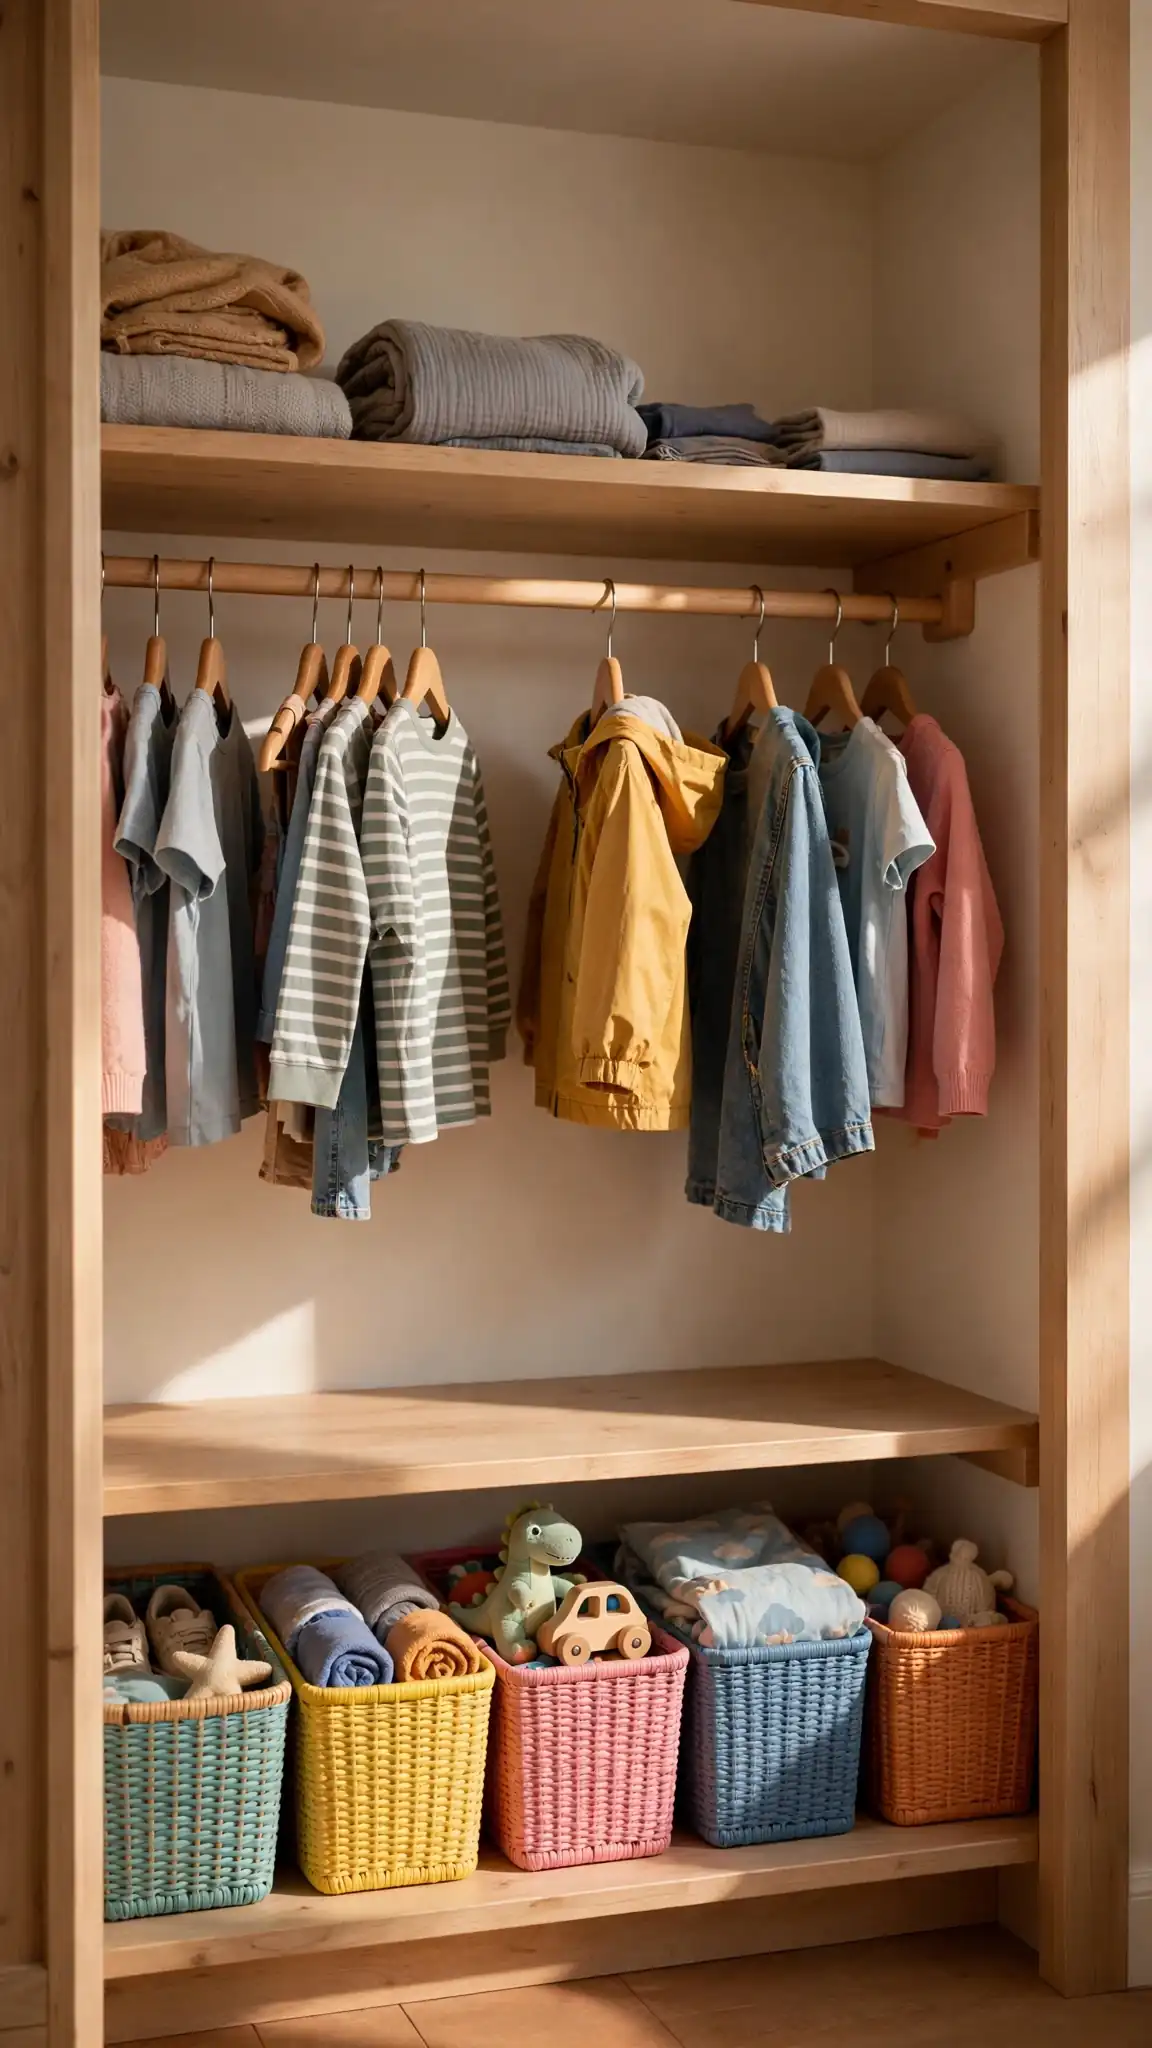
Kids’ closets fail at adult height. If children cannot reach the rod, every outfit starts with a parent and ends with clothes on the floor. Dropping one rod to their level, adding low open bins for shoes and pajamas, and keeping school clothes in the easy zone teaches independence surprisingly fast. A tension rod mounted at 30 inches lets a five-year-old pick tomorrow’s shirt tonight, and the setup adjusts upward as they grow. Keep special-occasion outfits on the high rod where only adults reach, and the daily system stays cheerfully self-serve.
A spring tension rod costs under $12 and installs in minutes with no tools, making this the friendliest project on the list. Pair it with open-front bins ($5 to $8 at IKEA’s TROFAST line) labeled with pictures for pre-readers. Limit the low rod to seven outfits, one per day plus spares, so choices stay manageable and laundry rotation is obvious. Anchor any shelf tower to the wall studs; kids pull on furniture, and safety beats style here. Avoid tiny hangers that bend under winter coats; sturdy child-size velvet hangers cost about $10 for twenty. Pro tip: put a small laundry basket inside the closet door so worn clothes land there instead of on the bedroom floor.
14. Split a Shared Closet With a Center Tower
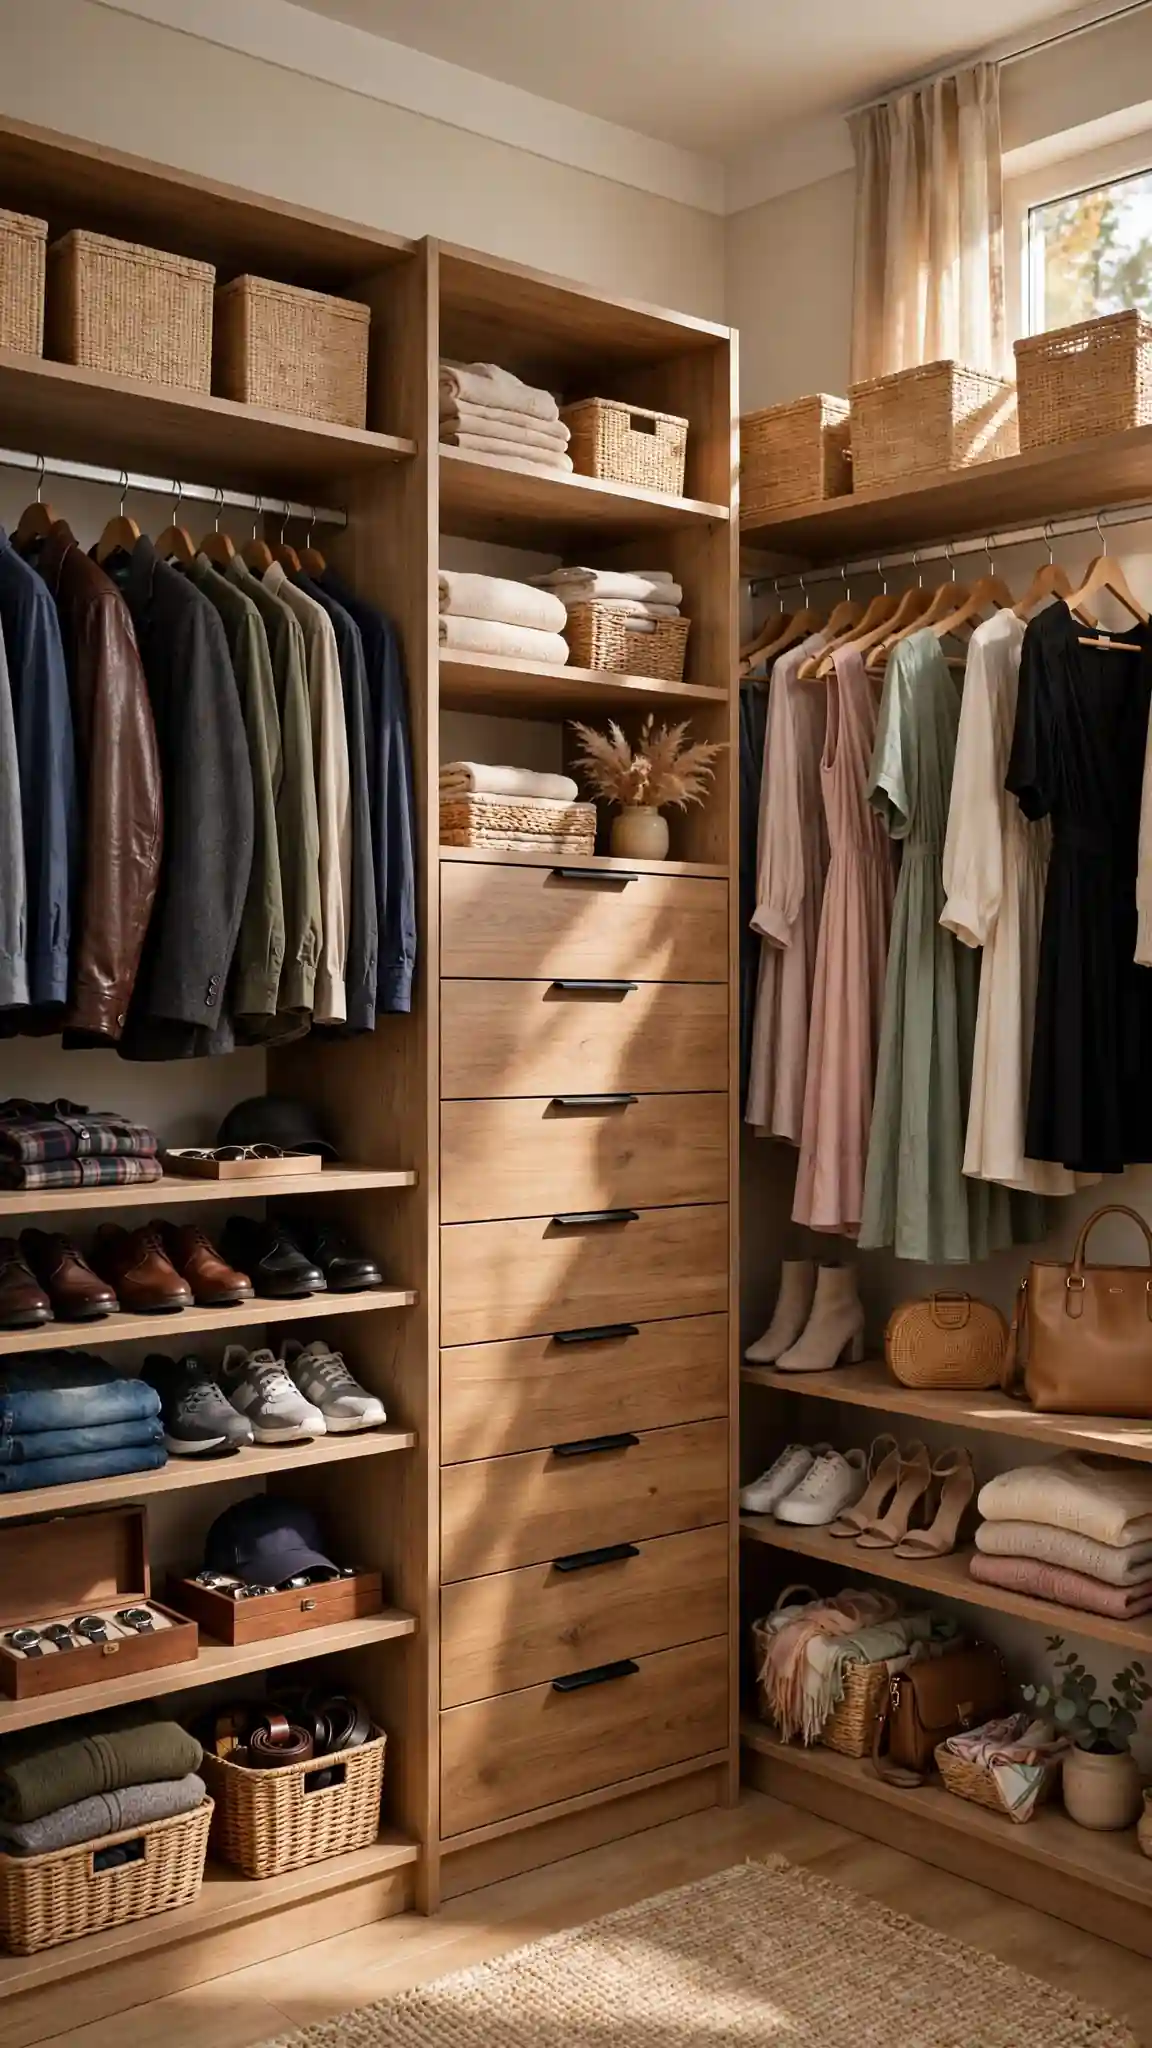
Sharing a closet works until one person’s wardrobe annexes the other’s rod by slow, silent creep. A center tower of shelves or drawers draws a fair, visible border down the middle: your side, my side, shared storage in between. The tower itself is useful, holding folded items, watches, and shared linens, while the boundary ends the weekly territory negotiation. Each partner gets equal hanging height and shelf count, and because the divider is furniture rather than a rule, it enforces itself. It is the most peaceful upgrade two people can split the cost of.
A 24-inch-wide drawer tower from IKEA PAX or a ClosetMaid kit runs $120 to $300 and anchors to the back wall for stability. Measure both wardrobes honestly before assigning sides; the partner with long dresses may fairly trade shelf space for full-height hanging. Keep shared items, like travel bags and the steamer, in the tower’s top cubbies. Install identical lighting and hangers on both sides to keep the peace and the look. The classic mistake is skipping the conversation about overflow: agree that new purchases live only on your own side. Pro tip: give the tower’s top surface to a shared valet tray for keys, wallets, and sunglasses, and the bedroom dresser stays clutter-free.
15. Budget Closet Ideas That Organize a Whole Closet for Under $100
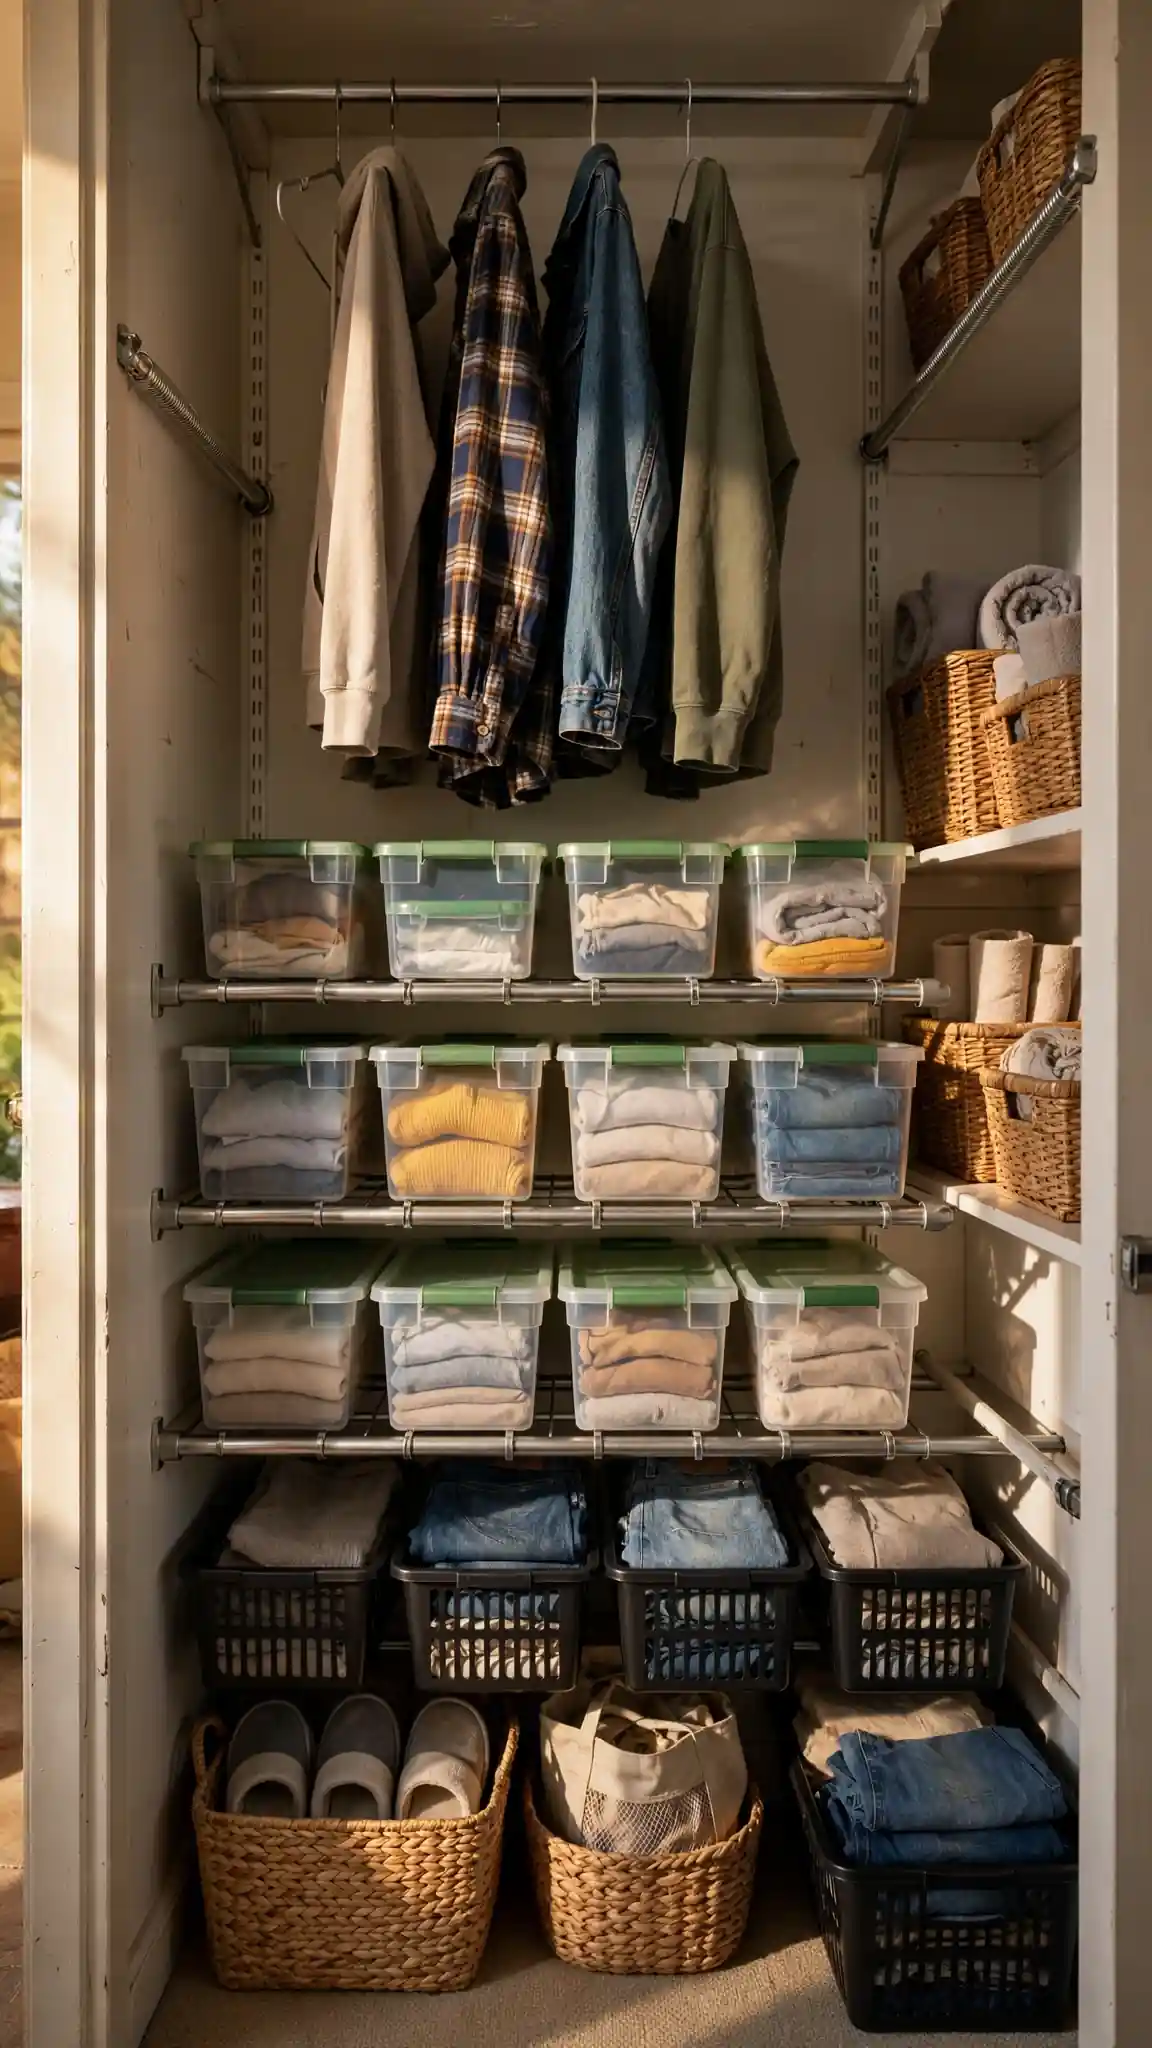
A tight budget is no excuse for a chaotic closet, because the highest-impact fixes are the cheapest ones. A tension rod for double hanging, a pack of slim hangers, four dollar-store bins, a hanging shoe organizer, and a strip of LED light together cost less than one fancy drawer unit, yet they solve most everyday problems. The secret is spending on capacity, not decoration: every dollar should add a home for something that currently lives in a pile. Thrift stores and Facebook Marketplace also sell shelf units and baskets for a fraction of retail prices.
Here is a sample $100 cart: slim hangers 50-pack $20, tension rod $12, four fabric bins $16 at Target, over-door shoe pockets $12, LED strip $14, shelf risers $10, labels $6, with tax taking you to roughly $95. Shop Dollar Tree for bins and hooks, and check IKEA’s clearance corner for shelf boards. Skip matching designer sets; function first, beauty follows order. The mistake is buying organizers before measuring and editing, which stocks your closet with containers that fit nothing. Edit first, measure twice, then shop once with a list. Pro tip: spend the last $10 on a second hamper for dry cleaning and returns, the two categories that otherwise colonize a chair.
16. Add a Touch of Luxury With a Closet Island
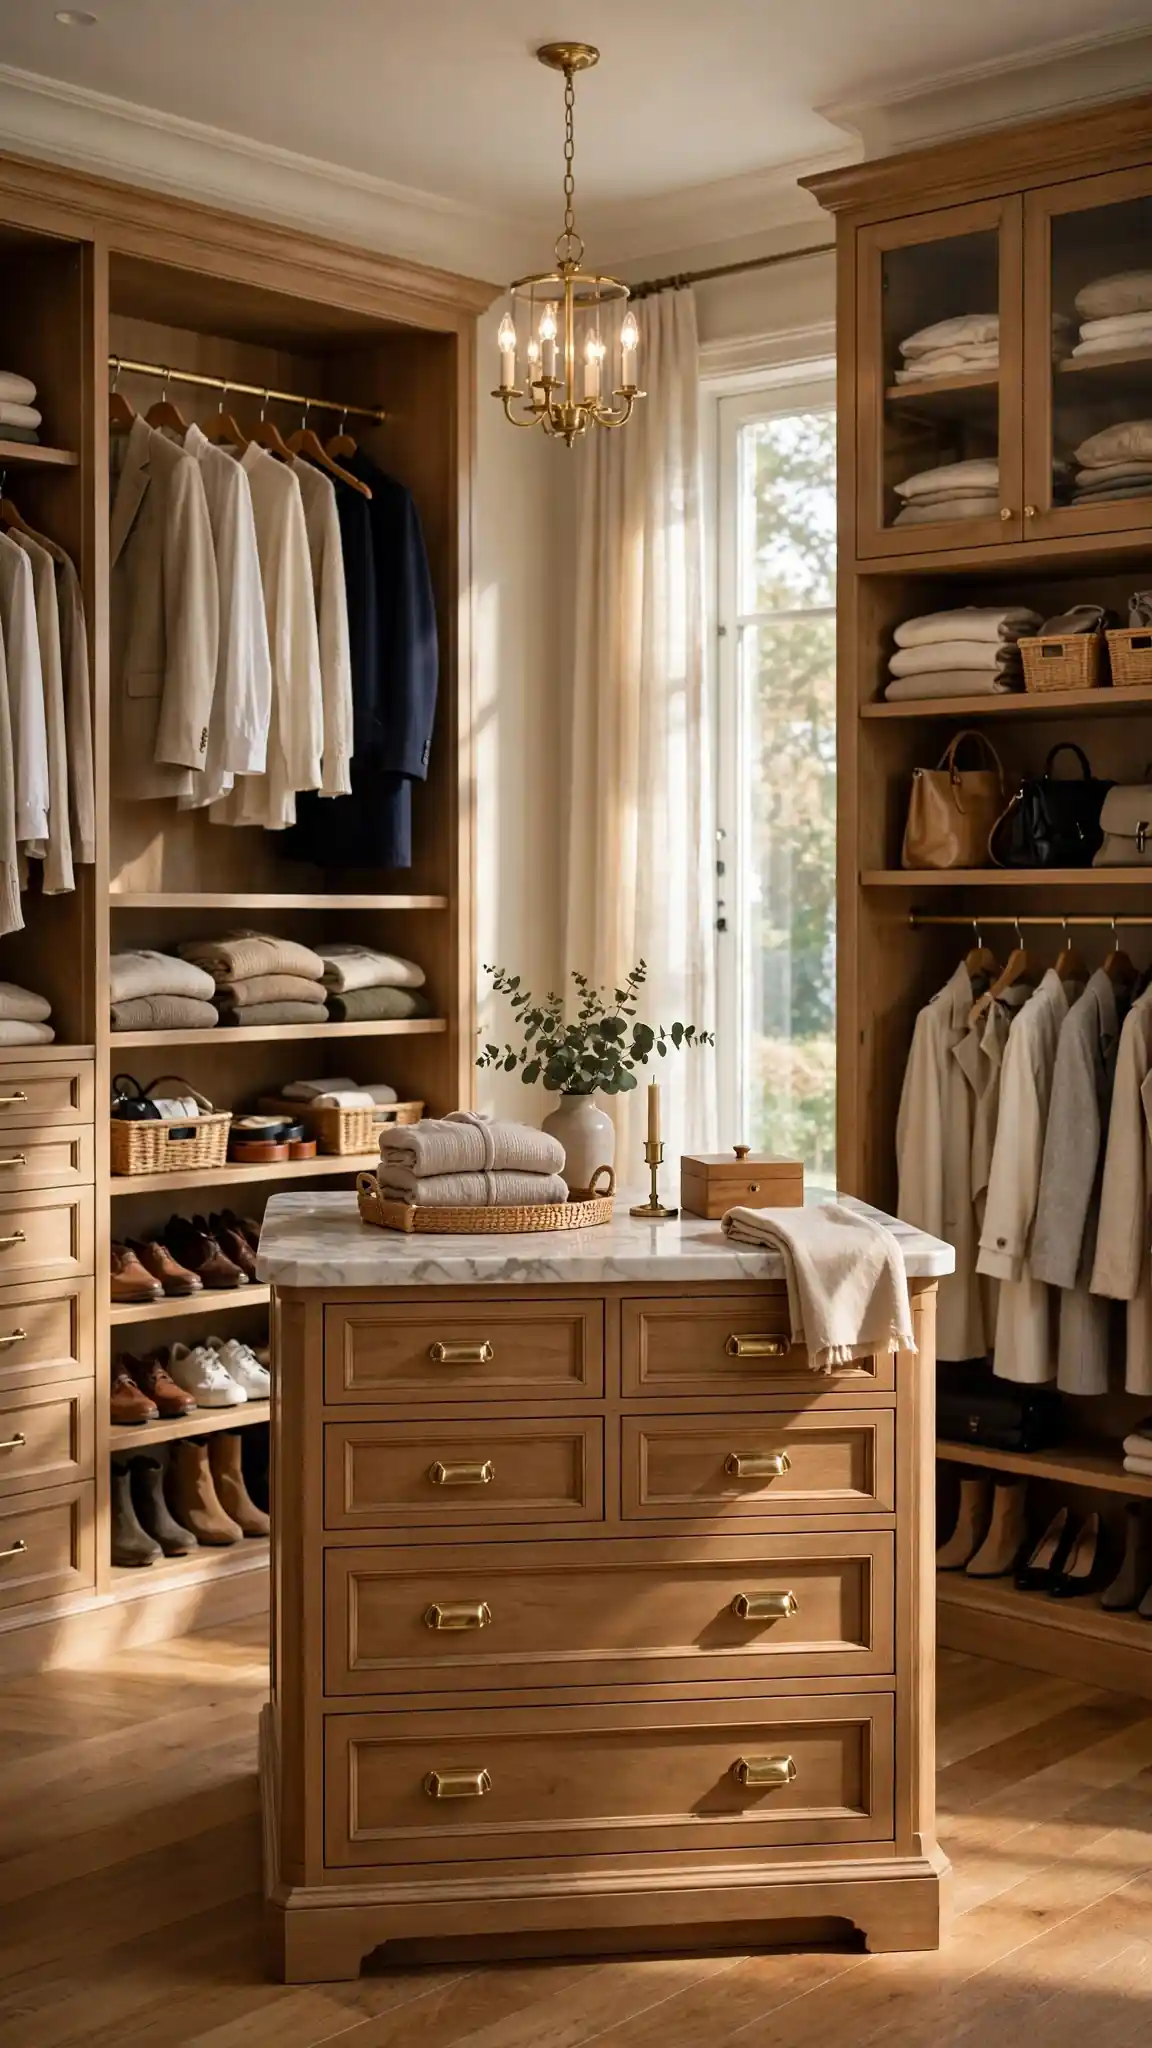
In a spacious walk-in, a center island is the upgrade that turns storage into an experience. The flat top becomes a folding and outfit-planning station, while drawers below hold jewelry, watches, lingerie, and accessories that otherwise scatter across the bedroom. A glass top over a divided drawer lets you see your collection like a boutique display. Islands also anchor the room’s design, giving you a place for a small vase, a tray, or a favorite framed photo. If you have the floor space, no single addition feels more custom or more grown-up.
You need at least 36 inches of clearance on all sides, so islands suit walk-ins roughly 7 by 10 feet or larger. A repurposed dresser makes a budget island for $100 to $300 secondhand; custom built-ins run $1,500 and up. Standard counter height of 36 inches keeps folding comfortable, and drawers 4 to 6 inches deep suit accessories best. Add a power outlet on the side for a steamer or charging station if an electrician is already visiting. Avoid islands in narrow closets; a cramped island is worse than none. Pro tip: line the top drawer with velvet or felt inserts so jewelry stays silent, sorted, and scratch-free.
17. Label Every Bin, Basket, and Shelf Edge
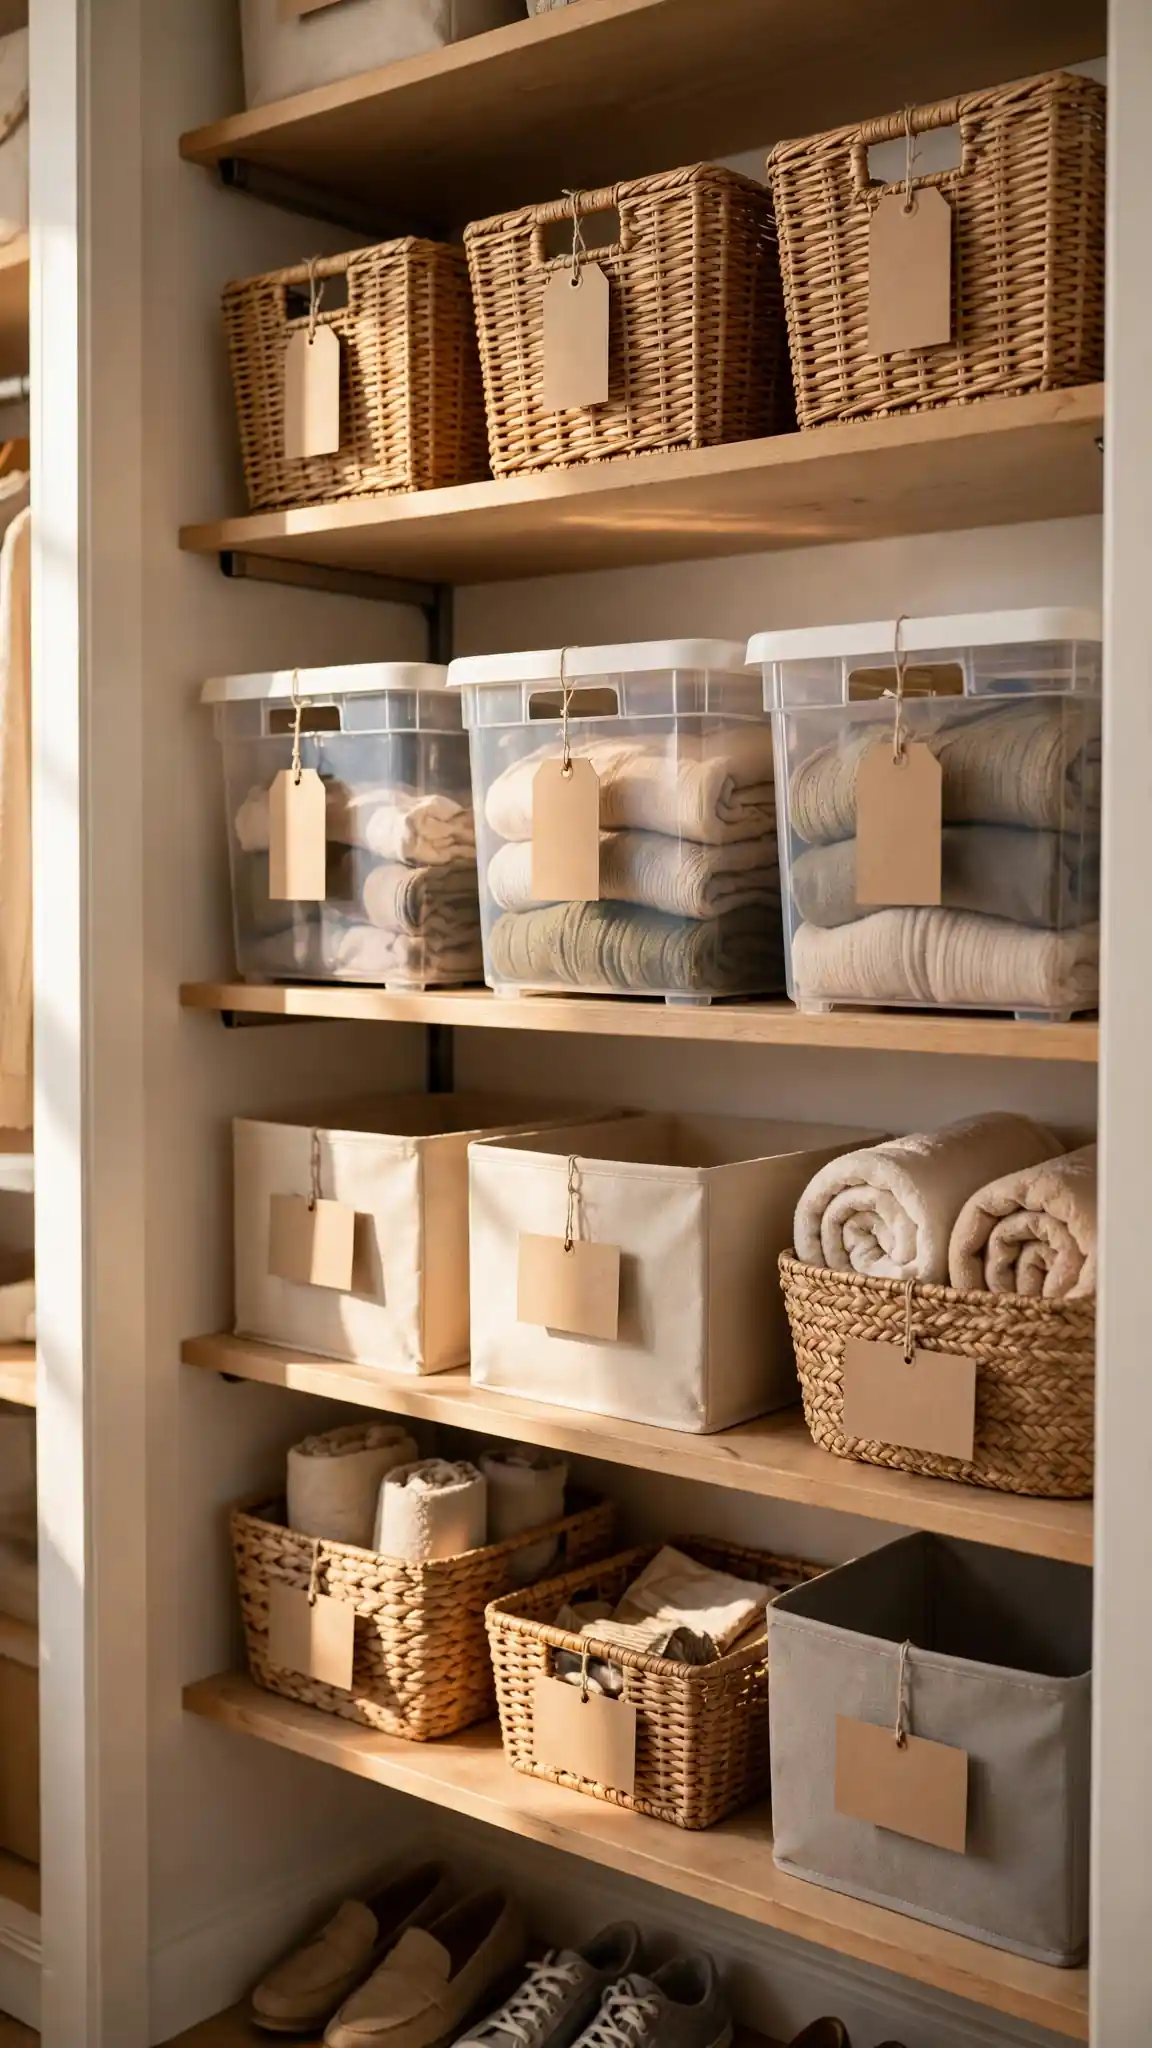
Labels are the difference between a system and a suggestion. Unlabeled bins become mystery boxes within a month, and mystery boxes become dumping grounds. A simple label on every bin, basket, and shelf edge tells everyone in the household exactly where things belong, which means you stop being the only person who can tidy the closet. Labels also expose category creep early: when the scarf bin overflows its label’s promise, it is time to edit. Whether you use a label maker, chalk tags, or printed cards, consistency matters more than the tool.
A handheld label maker costs $25 to $40 (Brother P-Touch is the classic) and pays for itself in saved arguments. For bins, clip-on chalk tags from Target ($6 for a set) can be rewritten as contents change. Label by contents and owner in shared spaces, like Maya Shoes, to end mix-ups. Place labels at eye level on shelf edges and on the front face of bins, never on lids that get swapped. Keep wording short: two words beat a sentence nobody reads. The mistake is labeling aspirational categories you do not own yet, which wastes prime space. Pro tip: add the purchase date under seasonal bin labels so stale storage gets reviewed every year.
18. Install a Full-Length Mirror Inside the Door
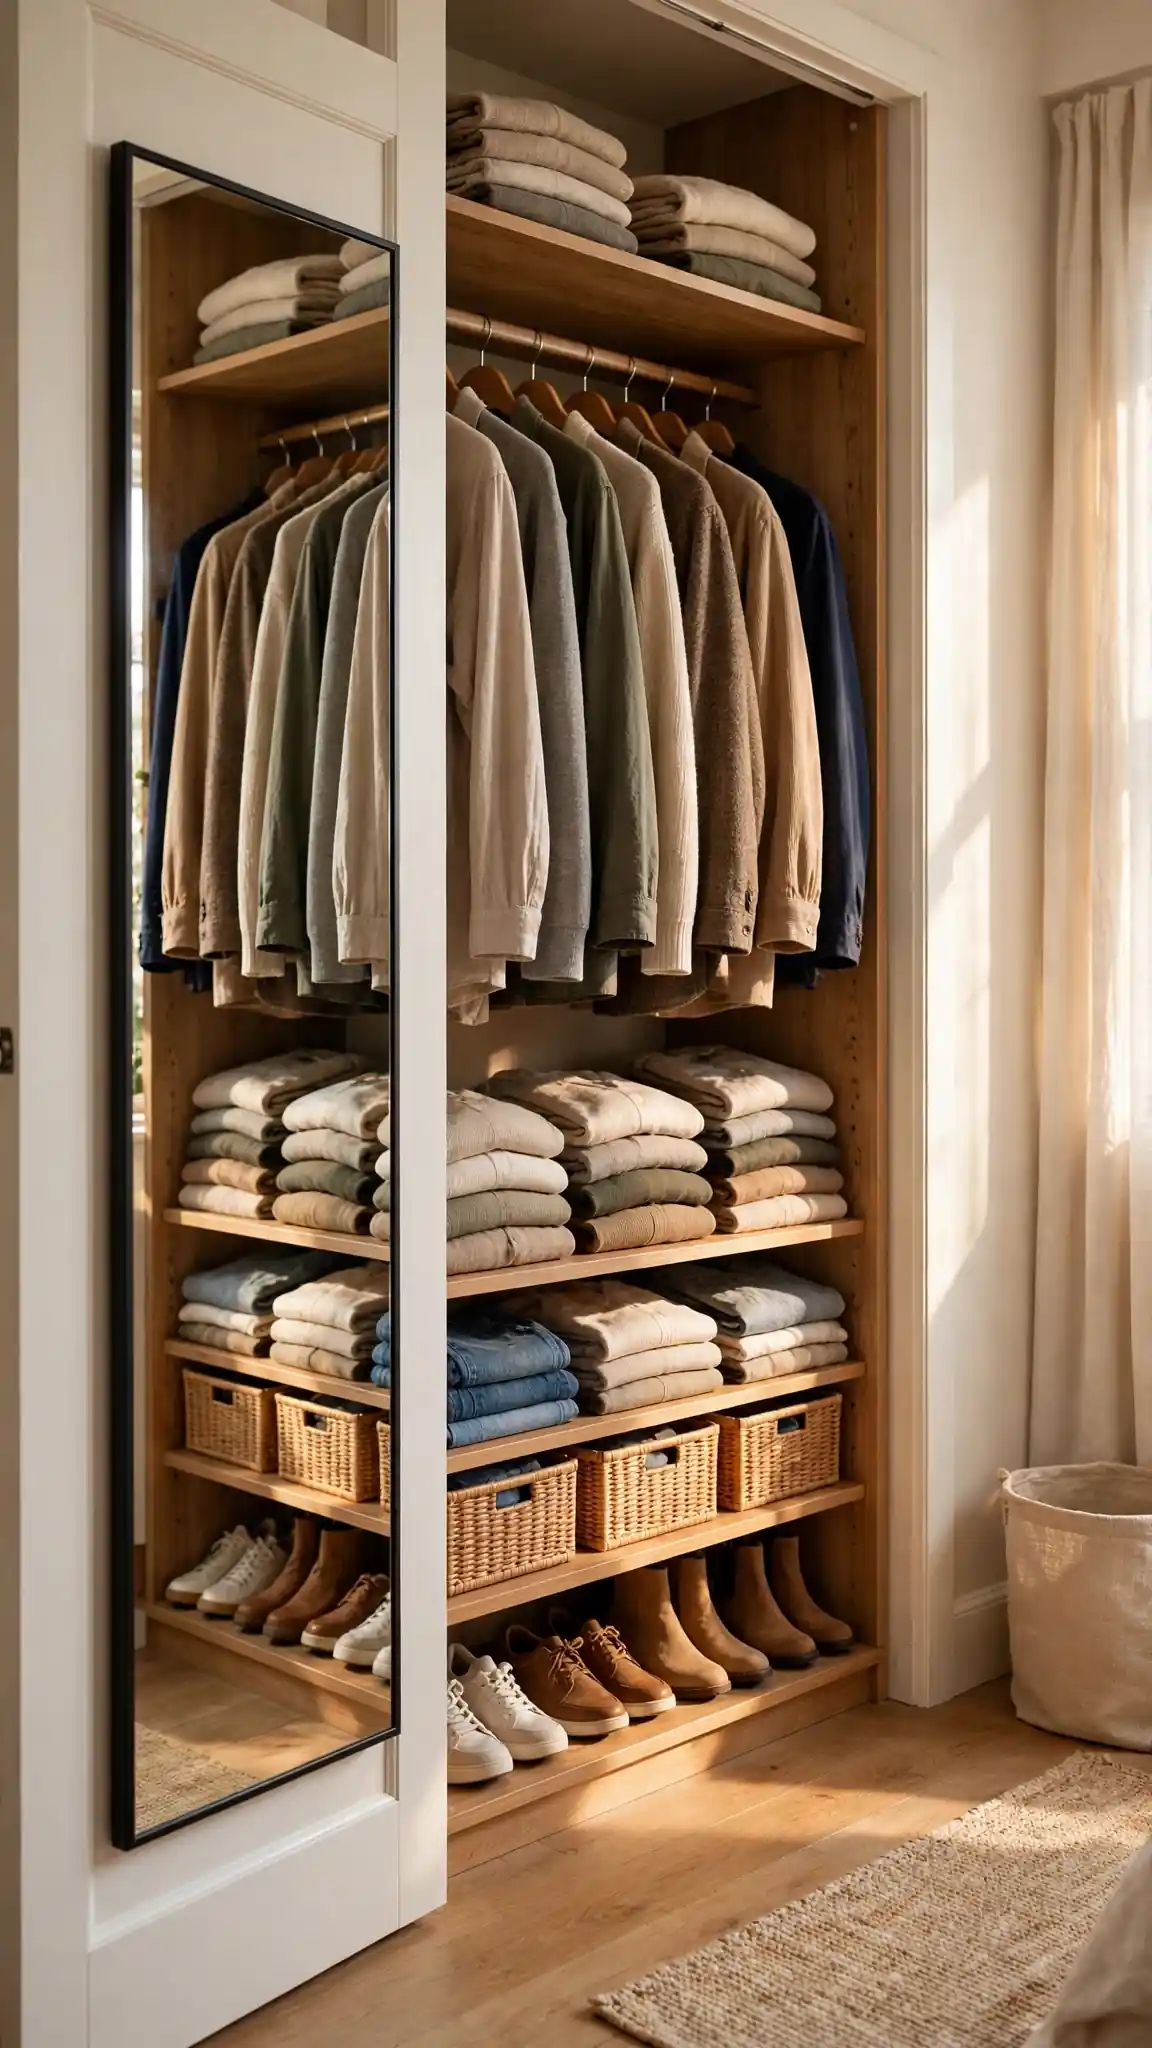
A mirror inside the closet door earns its place every morning. It lets you check an outfit where the clothes actually live, so swapping a top or adding a belt takes seconds instead of a trip to the bathroom. Mounting it inside the door keeps the bedroom walls free and hides the mirror when the closet is closed, which suits calm, uncluttered rooms. Full-length mirrors also bounce light into the closet interior, brightening dark corners where colors hide. In a small apartment, this one panel can replace a freestanding mirror and free up precious floor space.
Over-door full-length mirrors cost $25 to $60 at Target and IKEA; look for shatter-resistant acrylic or safety-backed glass, especially in kids’ rooms. The mirror should span roughly 12 to 48 inches wide and at least 48 inches tall to show a full outfit. If you mount with adhesive strips, use the heavy-duty versions rated well above the mirror’s weight and clean the door with alcohol first. Screw-mounted brackets are safer for heavy glass. Avoid placing the mirror where direct sun hits it, since glare ruins its usefulness at exactly the wrong hour. Pro tip: angle a small LED strip above the mirror and outfit checks get honest, store-quality light.
19. Turn Awkward Corners Into Angled Shelving
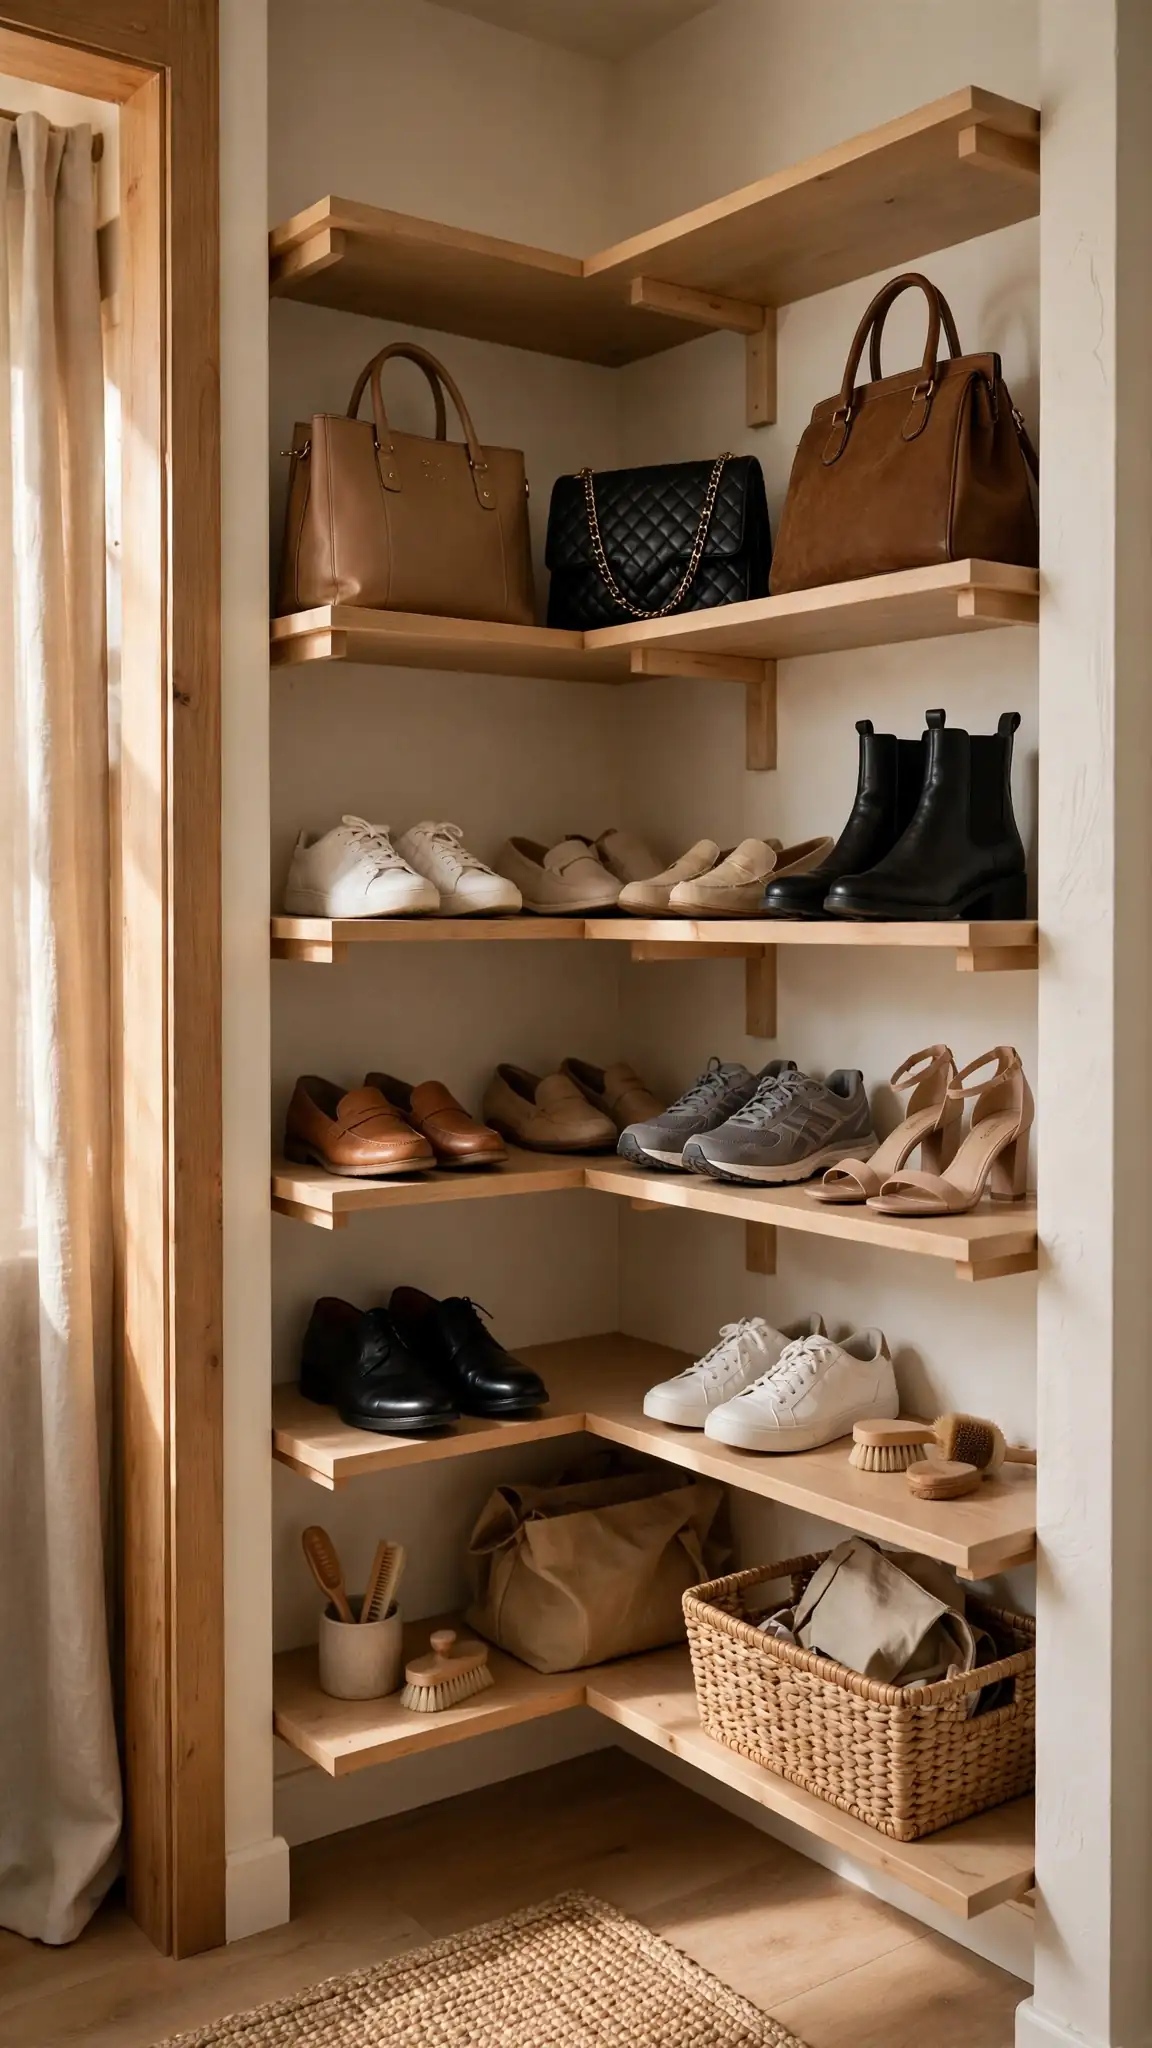
Every closet has one corner where two hanging sections collide and clothes disappear into a dark overlap. Angled or curved corner shelving rescues that dead triangle, creating display space for shoes, bags, and folded stacks that is easy to see and reach. Corner shelves work because they face you instead of hiding behind hanging shirts. In walk-ins, a corner tower can become the visual centerpiece; in reach-ins, even two small corner shelves reclaim surprising volume. The fix is mostly carpentry-simple: triangular boards on cleats, or a ready-made corner unit slotted into place.
Pre-made corner shelf units cost $40 to $120 at Home Depot and Amazon; custom-cut melamine triangles run about $15 in materials each. Keep corner shelves 12 to 14 inches deep so items stay reachable; deeper corners recreate the black hole you are fixing. Reserve corners for items with shape, like handbags stuffed with tissue to hold their form, rather than soft piles that slump. Add a small battery puck light above the corner if the main light does not reach. The mistake is hanging rods into the corner from both sides, which guarantees a crushed, forgotten zone. Pro tip: store out-of-season handbags in the highest corner shelf and everyday bags at waist level for a boutique-style rotation.
20. Rescue the Dead Space Under Hanging Clothes
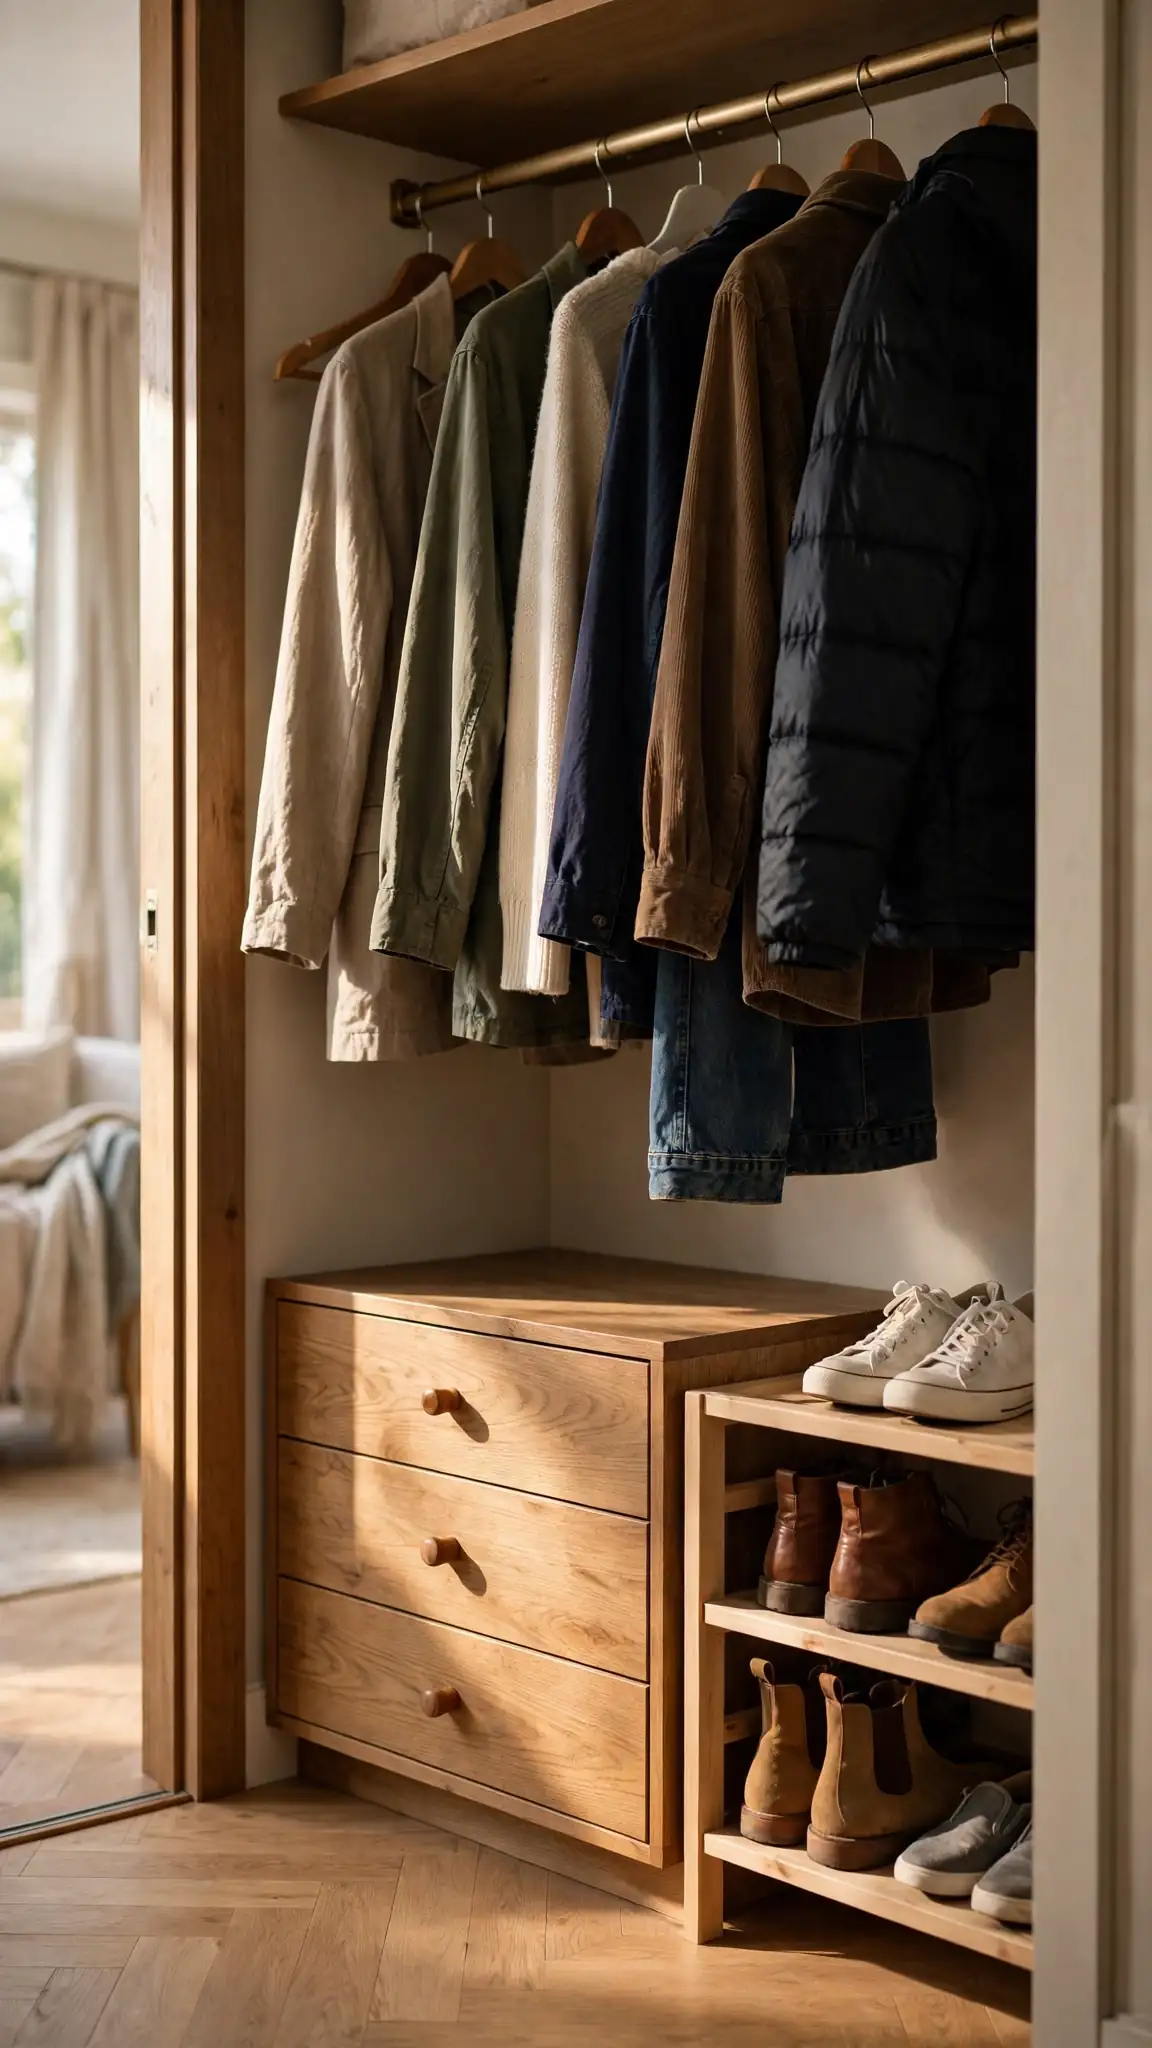
Look below your hanging shirts: there is usually a foot or more of shadowy floor where shoes drift and dust collects. That under-hang zone is found storage, perfect for a low shoe rack, rolling drawers, a hamper, or bins for belts and bags. Shirts only drop about 40 inches, so in a standard closet the space beneath them can fit a two-tier rack or a set of drawers without touching a single hem. Claiming this strip often adds the equivalent of a whole extra shelf, without any installation beyond sliding furniture into place.
A two-tier shoe rack sized to your closet width costs $15 to $30 at IKEA or Target; low rolling drawer carts run $35 to $60 and fit under most rods with room to spare. Measure the drop of your longest shirts first and keep organizers at least two inches below the hems. Wheels matter here, because the whole unit should roll out for cleaning. Avoid tall bins under short hanging, which crush sleeves and trap moisture against fabric. This is also the right home for a slim hamper, roughly 10 inches deep. Pro tip: put dryer sheets or a cedar block in the under-hang zone, since low airflow makes it the closet’s mustiest neighborhood.
21. Use Pull-Out Valet Rods for Tomorrow's Outfit

A valet rod is a small telescoping bar that pulls out from the closet side panel, giving you a temporary stage for tomorrow’s outfit, a packing lineup, or clothes fresh from the dry cleaner. It sounds minor, but it changes mornings: the outfit is chosen the night before, steamed, and waiting, so there is no frantic digging with coffee in hand. When you are done, the rod slides away to nothing. Stylists and boutique hotels use them for a reason; a little staging space makes any wardrobe feel more intentional and easier to manage.
Valet rods cost $12 to $30 (Rev-A-Shelf is the go-to brand) and mount with four screws to any vertical panel or wall stud. Install at about 60 inches high so long garments clear the floor, and choose the 12 or 14-inch extension based on your closet depth. Weight limits run around 25 to 35 pounds, plenty for a week’s outfits but not for storage. Place it near the closet entrance where light is best for final checks. The mistake is leaving clothes parked on it permanently, which turns a staging tool into another cluttered rod. Pro tip: use the valet rod on Sunday evenings to line up five work outfits, and weekday mornings become a grab-and-go routine.
22. Keep It Working With a 15-Minute Monthly Reset
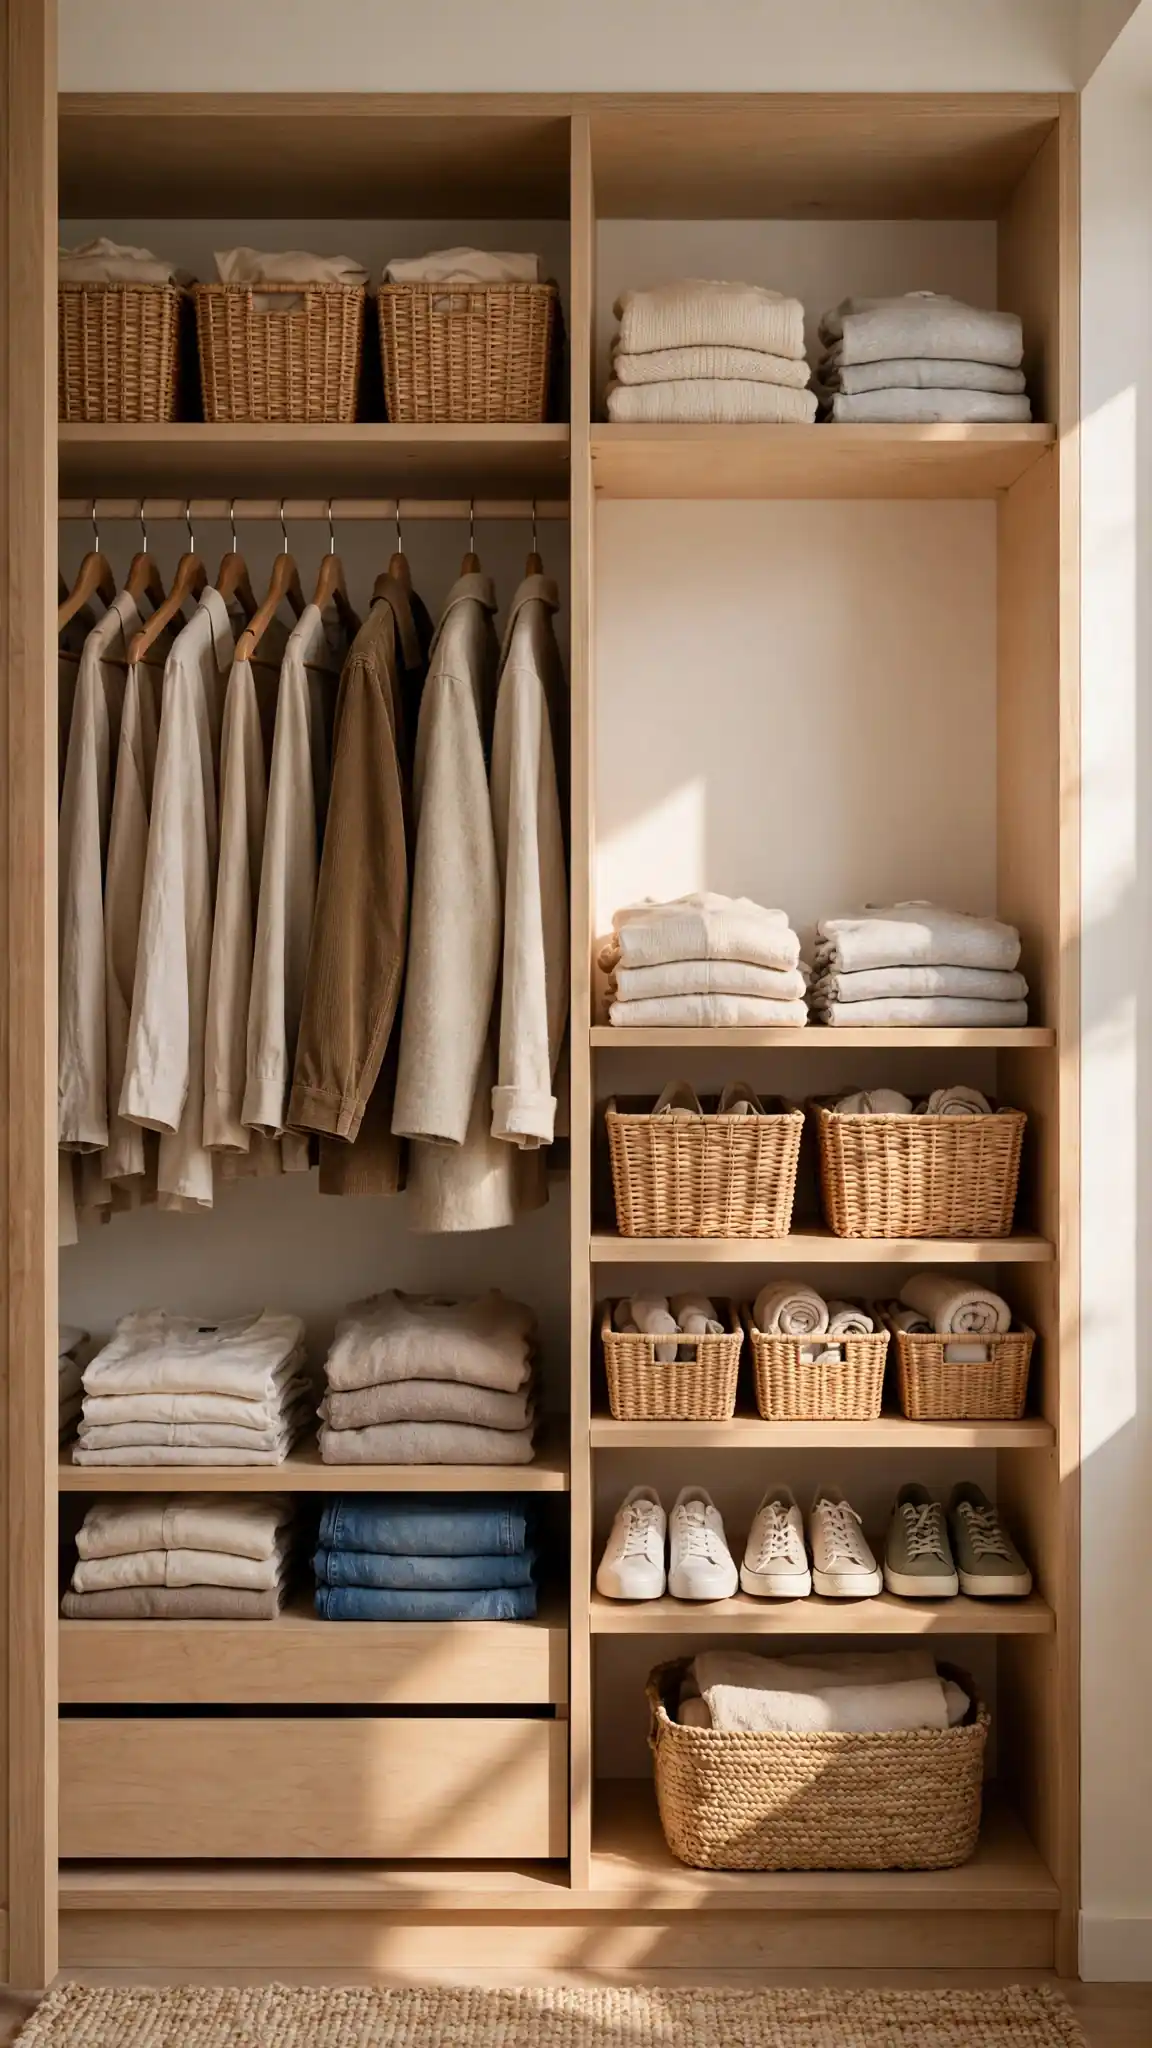
No closet system survives on installation day enthusiasm alone. Clothes migrate, new purchases squeeze in, and one lazy week can restart the pile cycle. A fifteen-minute monthly reset is the maintenance habit that protects your investment: return strays to their zones, re-fold one messy stack, empty the donation basket, and check that labels still match contents. It is deliberately small, because a tiny routine you actually do beats a heroic annual overhaul you dread. Treat it like watering a plant; the system stays alive with almost no effort when the care is regular.
Pair the reset with an existing habit, like the first Sunday laundry load, and set a recurring phone reminder so it never depends on memory. Keep supplies inside the closet: a lint roller, a small trash bag, and spare hangers in one basket. Work zone by zone with a timer; when it dings, stop, even if one shelf remains imperfect. Track donations in a notes app if you itemize taxes. The mistake is letting the reset become a full reorganization, which makes it feel heavy and skippable. Fifteen honest minutes is enough. Pro tip: take a quick photo after each reset, because comparing months shows your progress and keeps motivation embarrassingly easy.
Final Thoughts
The closet ideas that truly double your storage are rarely one big purchase. It comes from stacking small, smart decisions: a second rod here, honest lighting there, labels that keep everyone honest, and the discipline to store only what this season needs. Start with the ideas that solve your loudest daily frustration, measure before you buy, and let each finished zone motivate the next. Within a few weekends, even working alone with basic tools, the space that used to start your mornings with stress can become the calmest, hardest-working corner of your entire home.
Remember that the goal is not a magazine photo; it is a closet that still works on a tired Tuesday in February. Choose closet ideas you can maintain in minutes, spend where capacity grows, and skip anything that demands perfection to function. Review your setup twice a year when you rotate seasons, and adjust heights, zones, and bins as your life changes. Clothes should serve your days, not manage them. With these 22 ideas in your toolkit, you have everything you need to build, and keep, a closet that truly earns its space.
FAQs
Even with a solid plan, a few questions come up again and again when readers put these closet ideas to work, so we collected the ones we hear most from homeowners with small reach-ins, shared walk-ins, and everything in between. Below are the answers we give most often, covering small spaces, tight budgets, honest lighting, kid-friendly setups, and the daily habits that keep a newly organized closet from sliding back into chaos within a month.
If your question is not covered here, start with the golden rule used throughout this guide: measure first, edit second, and buy last. Most closet problems are solved by one of those three steps, and the answers below will point you to the right one for your situation. When in doubt, choose the simpler system, because the best closet is always the one you can maintain on an ordinary busy week.
What are the best closet ideas to double storage in a very small closet?
Start with double hanging rods, which instantly double capacity for shirts and pants, then add slim velvet hangers to fit more on every rod. Use the door for baskets, stack clear shoe boxes vertically, and claim the shelf above the rod for labeled bins. Small closets reward vertical thinking most, because floor space is fixed but height is usually wasted.
What is the cheapest way to organize a closet?
Start with the free closet ideas first: edit, because donating what you do not wear is free and creates instant space. Then spend on capacity: a tension rod for double hanging, a pack of slim hangers, and dollar-store bins total under $50. A hanging shoe organizer and LED strip finish the job. Avoid buying container sets before measuring, since mismatched organizers waste money and space.
How deep should closet shelves be?
For folded clothes, 12 to 14 inches is ideal: deep enough for a standard fold, shallow enough that nothing hides at the back. Shoe shelves can be 11 to 12 inches, while bins do fine on 16-inch shelves. In reach-in closets, avoid shelves deeper than 16 inches, because the back third becomes a dead zone where items disappear for months.
How do I keep my closet organized after the makeover?
Give everything a labeled home, keep a donation basket inside the closet, and do a 15-minute reset once a month to return strays and re-fold messy stacks. The one-in-one-out rule also helps: when a new item arrives, an old one leaves. Systems fail from drift, not disaster, so small regular corrections beat occasional heroic reorganizations every time.
Should I store off-season clothes in the closet?
Only if you have spare capacity. Most closets work better holding the current season only, with off-season clothes in bins on the highest shelf, under the bed, or in a guest closet. Wash everything before storing, add cedar blocks for wool, and label bins by category. Rotating twice a year gives you a moment to donate what no longer fits.
What lighting is best for a closet?
Warm white LED light between 2700K and 3000K shows clothing colors honestly and matches most bedroom lighting. Battery motion-sensor bars are the easiest upgrade: they stick under shelves, turn on when you open the door, and need charging only every few months. Avoid harsh blue-white bulbs, which distort navy, black, and skin tones and lead to outfit regrets.







Leave a comment